Simple Sourdough Bread
This recipe for Sourdough Bread is very simple. It is a two-day process but all that work will be worth it when you take your first bite!
Ingredients
- 4 Cups Hard White, Einkorn or Rye Flour (You can actually do a 50:50 ratio and combine flours.)
- 1 Cup Sourdough Starter
- 1 1/2 Cups Water
- 2 Tsp Pink Himalayan Salt
Instructions
- Make sure your Sourdough Starter is active and all nice and bubbly.
- Stir together the flour and water. Cover with a damp towel and allow to rest for 15-20 minutes.
- Next, add the Sourdough Starter and sprinkle the salt on top.
- Mix together the flour mixture to form the dough. Cover with a damp towel and allow to rest for 30 minutes.
- Now, stretch and fold the dough for roughly 25 minutes. It's just a matter of pulling the dough back and forth in the bowel.
- Cover again with the damp towel and allow for the dough to rise until double.
- Sprinkle flour onto a clean surface. Start shaping the dough into a ball. You'll pull and spin it towards your body. Shape the dough and transfer it to a banneton bowl (floured). You can also use a floured tea towel inside a bowl. The smooth side is going to be on the bottom and the bottom of the bread is going to be on the top. Cover the bowl with plastic wrap and allow to proof in the refrigerator for 12 hours. I've gone 18 hours before and that's ok. The longer you let it ferment, the more beneficial the Sourdough will be for digestion.
- Prior to pulling the bowl out of the fridge, preheat your oven to 500 degrees.
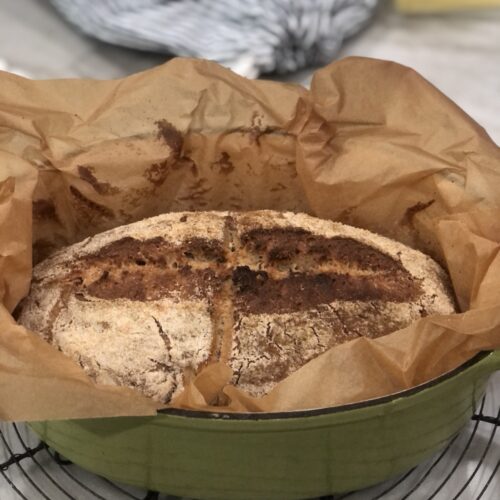
- Take the refrigerated dough, flip it over and place on a piece of parchment paper.
- Shake some excessive flour on top of the dough, smooth it out with your hands and start scoring. You can use a lame or a plain 'ole razor blade will do.
- Bake in the oven with the lid on for 20 minutes and then remove the lid and back the temperature down to 450 for an additional 20 minutes. Your bread should be nice and brown when it’s finished baking.
Notes
- Make sure you cover the dough tightly when in the proofing stages so the top of your dough doesn’t develop a hard crust.
- If you have a gluten sensitivity, allow the dough to do a longer fermentation. I’ve let mine sit for 18 hours before.
- You can certainly use all-purpose flour if you like. The whole grain flours just have more nutrients in them.
- Make sure you have enough flour on the top of the dough when you get ready to score a pretty pattern. It will show through a lot better and go pretty deep with your cut.
- You may need to adjust your baking according to the elevation where you live. Please see High Altitude Baking on how to make those adjustments.