

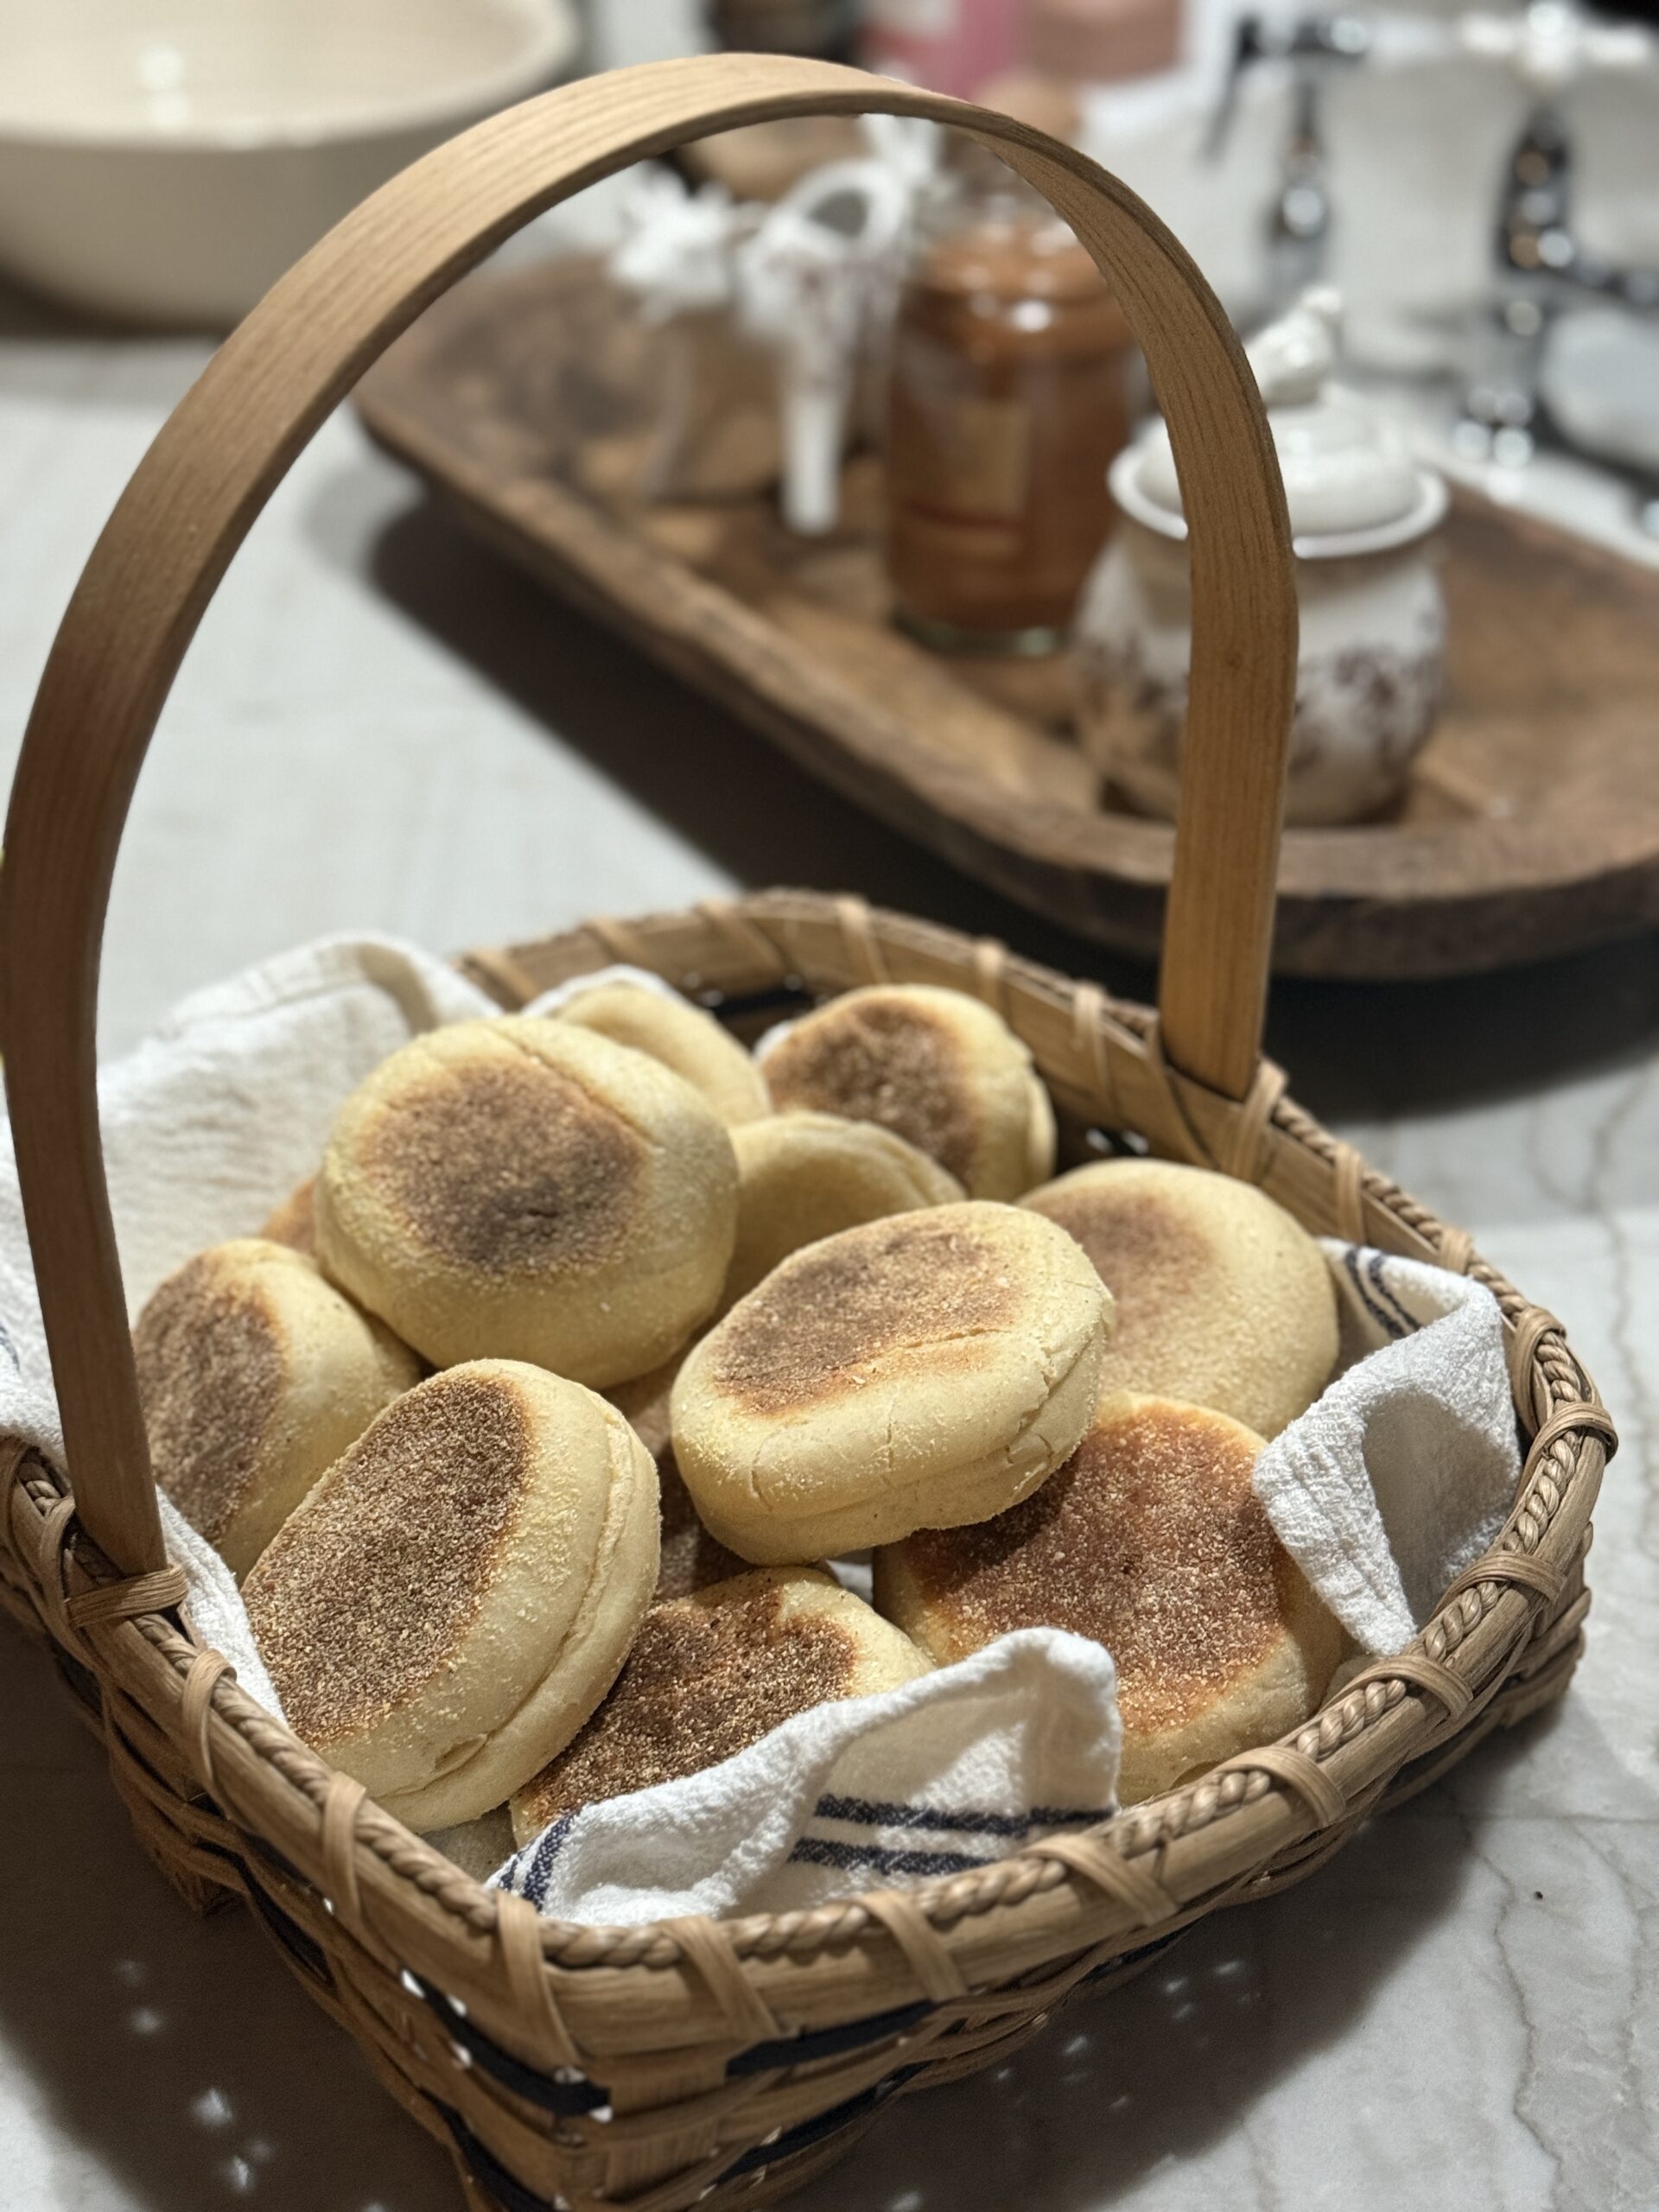
English Muffins are one of the easiest things to make, especially if you are just diving into using fresh-milled flour. If going to the local McDonald’s restaurant getting their “Egg McMuffin” is your thing, you will find making your own at home so much easier and more nutritious.
Ingredients
Fresh-milled flour (use a combination of soft-wheat, hard-white, khorasan or einkorn)
Dry active yeast
Salt
Milk (slightly warmed)
Honey
Egg
Butter
Cornmeal (for dusting)
Instructions
- Combine warmed milk and yeast. Allow to get nice and bubbly.
- Add flour, salt and the egg to a mixing bowl.
- Next, stir in the honey and butter. Add the yeast mixture.
- Knead the dough. If you’ll be kneading by hand, go about 500-600 strokes. Alternatively, you can use a stand-up mixer (to save time). Knead for about 8-10 minutes until the dough pulls away from the sides of the bowl.
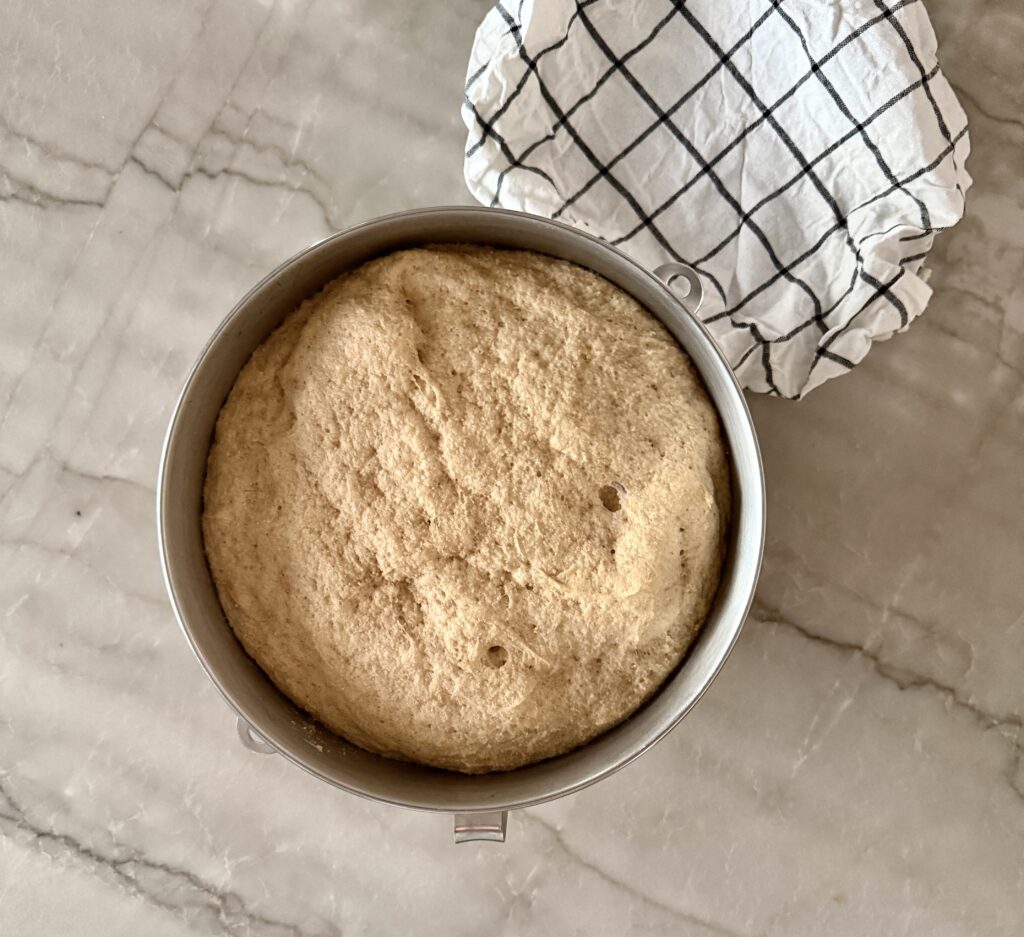
- Cover with a towel and allow to rise until doubled in size.
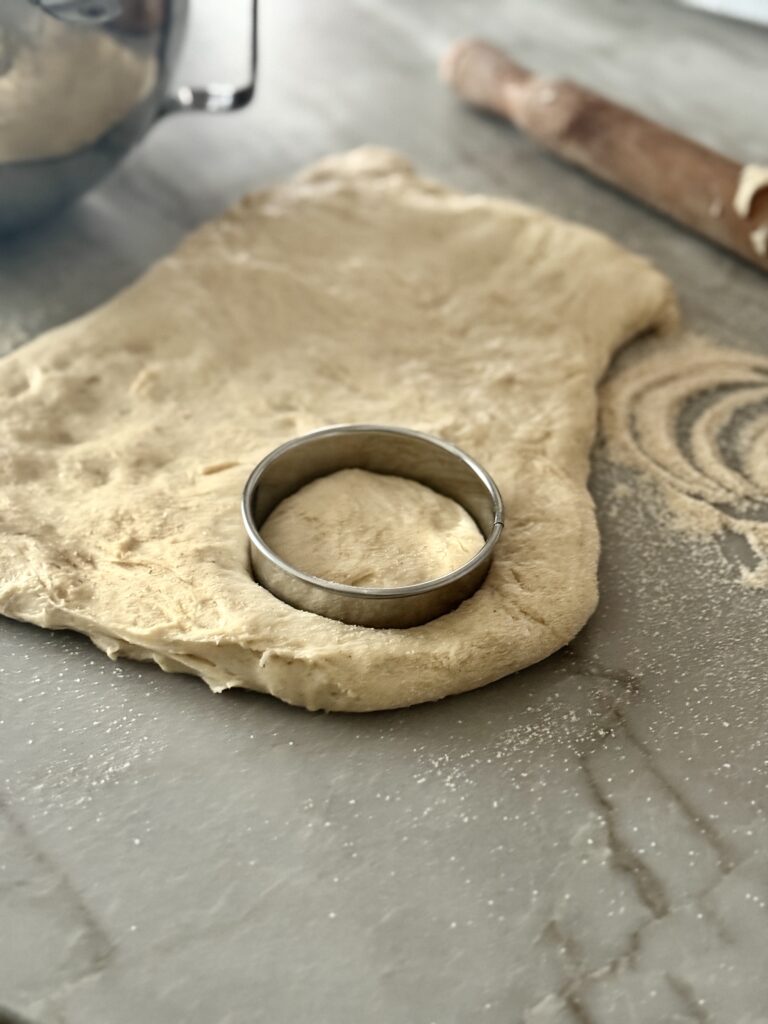
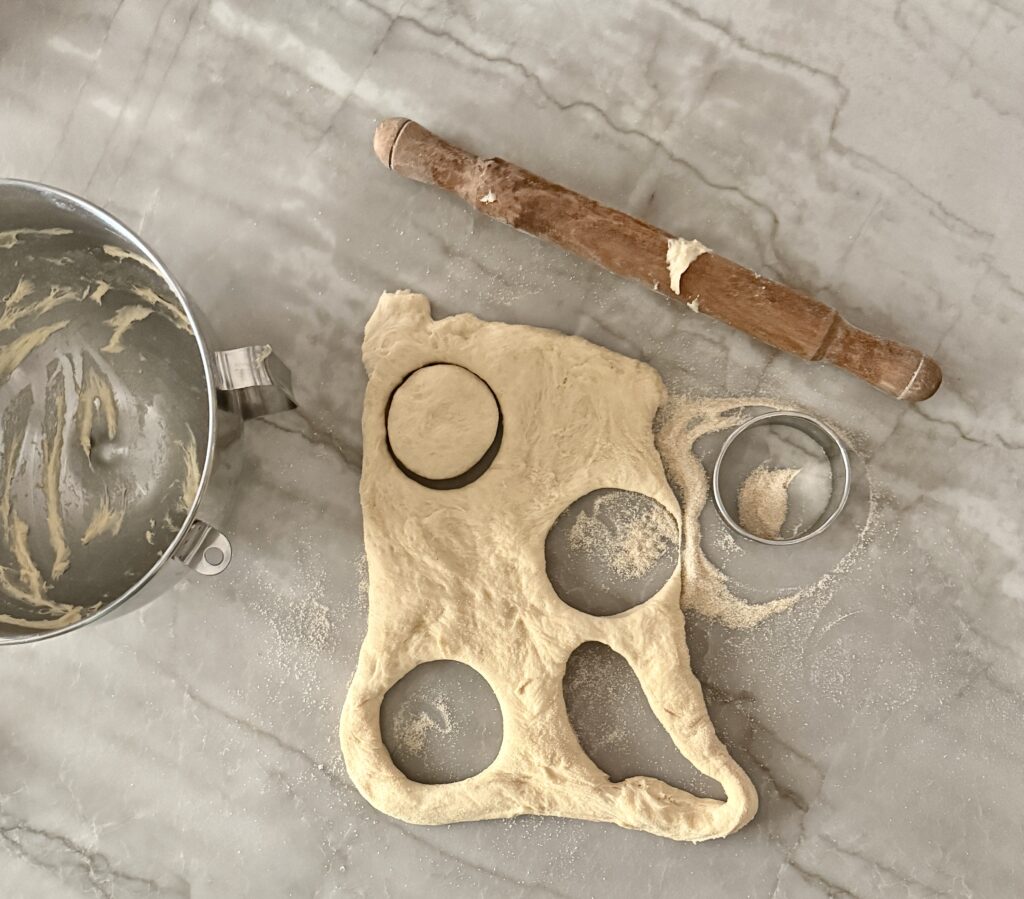
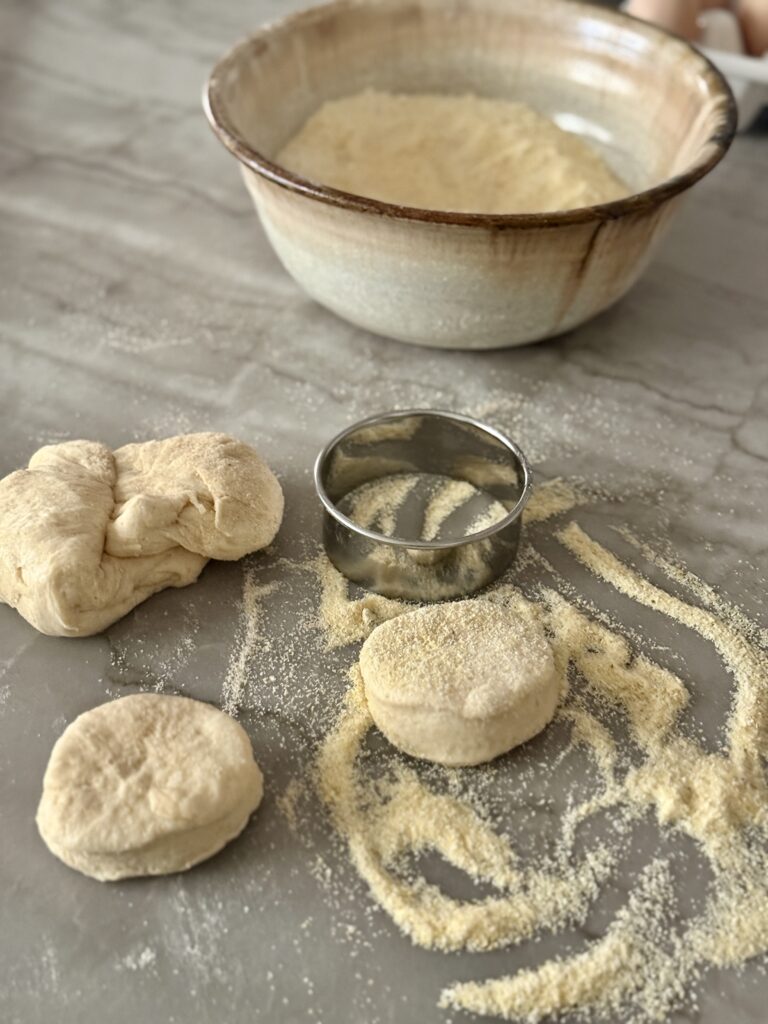
- Roll out the dough onto a lightly floured surface. You’ll want to make sure the dough remains a little thick. I like to go around 3/4”-1” tall.
- Using a 3 inch round cutter, cut 12 circles. Coast them lightly in the cornmeal on each side.
- Place on a parchment lined baking sheet, cover with a towel and allow to rise. This shouldn’t take but 15-10 minutes. They will basically be puffed up.
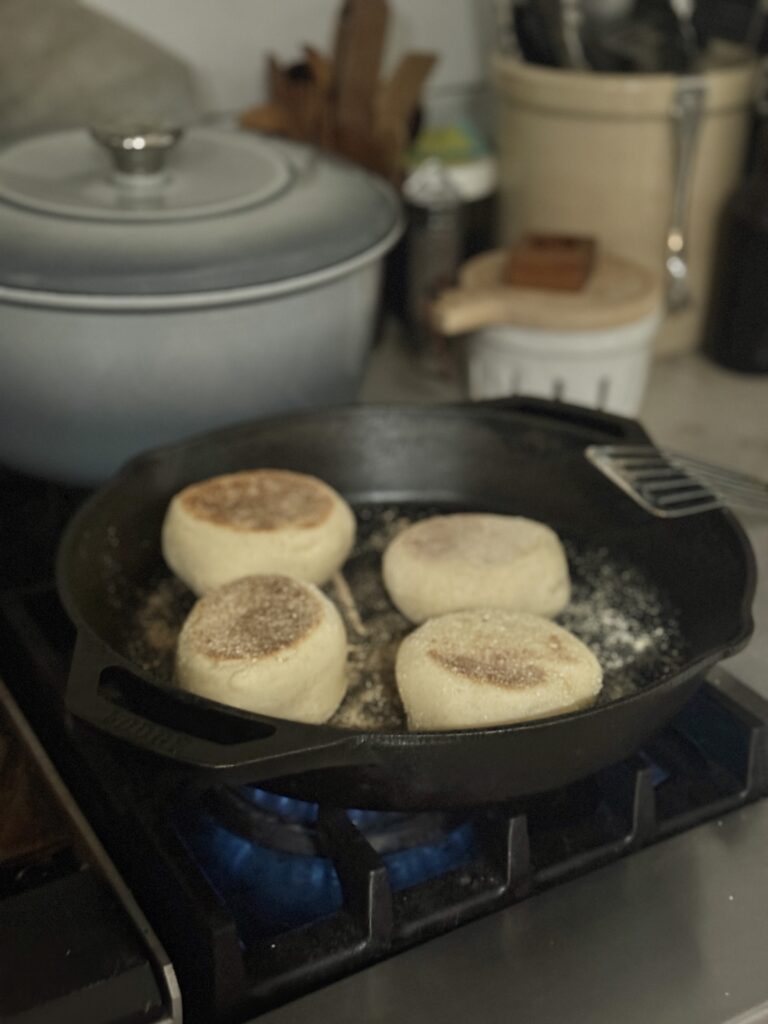
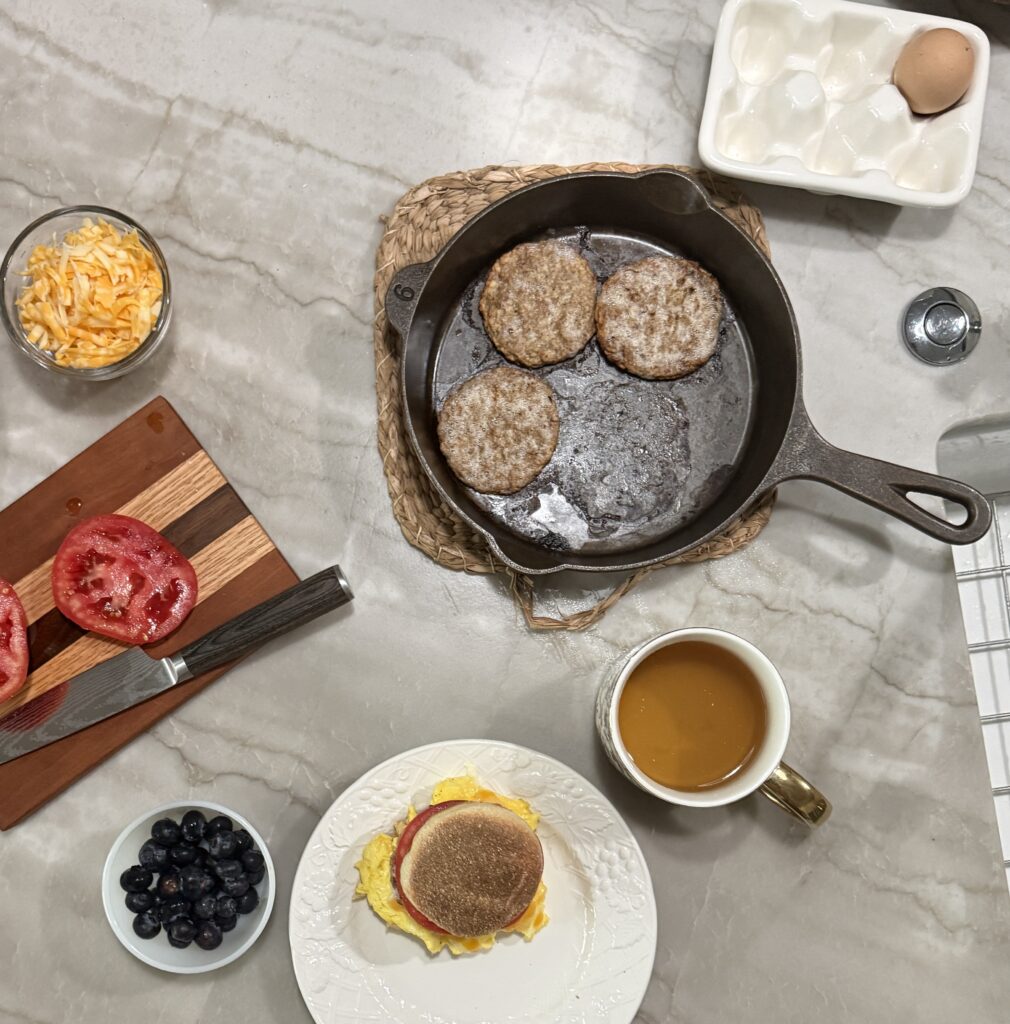
- Heat your cast iron skillet on the low heat setting on your stove. Sprinkle a little cornmeal in the bottom of the skillet.
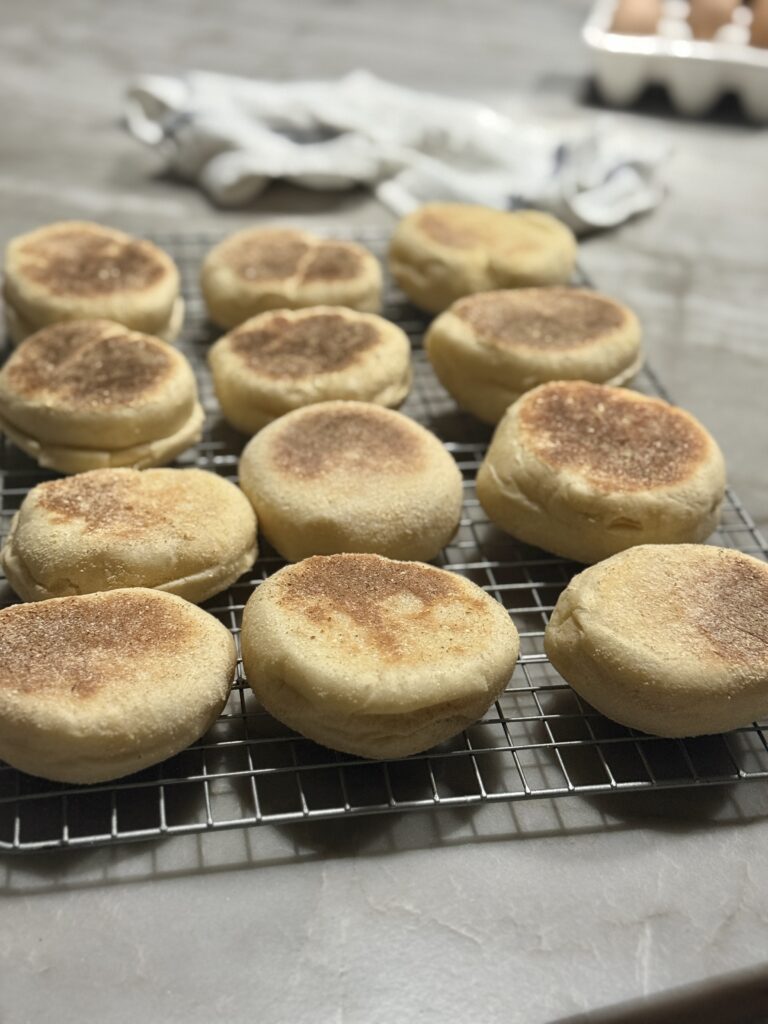
- Place the muffins in the skillet and allow to cook for 5-7 minutes. Flip and cook for another 5-7 minutes. They should be golden brown on each side or reach 200°F when they are done cooking.
- Allow to cool on a wired rack. Use a fork to open them up from the side. Put your favorite topping on them and enjoy!
Join Our Simple Living Community


TIPS
- Start the temperature on the stove at the low setting. Gradually increase the heat, if needed. This will keep the muffins from burning.
- Keep the dough thick when rolling. I like to go between 3/4”-1”high.
- When ready to slice, use a fork (not a knife). This will allow those little pockets inside the muffin to stay in tact.
- Your dough will be slightly sticky. This is going to create those pockets like a traditional English muffin you would buy at the store.
Homemade English Muffins vs Store-Bought
Are homemade English muffins better for you? Let’s compare the ingredients in both homemade and store-bought ones.
Homemade
- The flour has retained all of the nutrients – bran (high fiber), germ and endosperm
- Real simple ingredients
- Fresh, soft texture (may be slightly chewy)
- Takes 2-3 hours to make
- May have a tighter crumb
- This recipe makes 12 so they can be frozen for make ahead

Store-Bought
- Made with enriched flour with synthetic vitamins, preservatives and seed oils
- Quick and convenient
- Machine made giving the English muffins the perfect holes
- Longer shelf life
Overall, I much prefer making these English muffins from scratch. In the little bit of time that it takes to make them, I can either have a dozen ready for a family breakfast or even double the recipe and pop them in the freezer for later use.

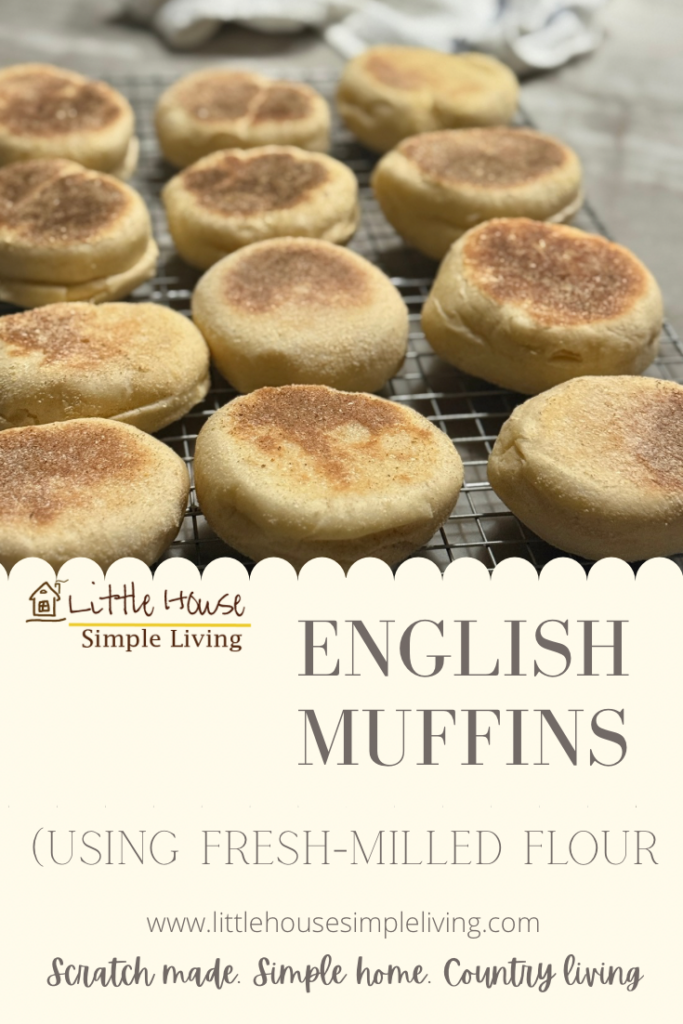
Pin For Later
How to Serve English Muffins
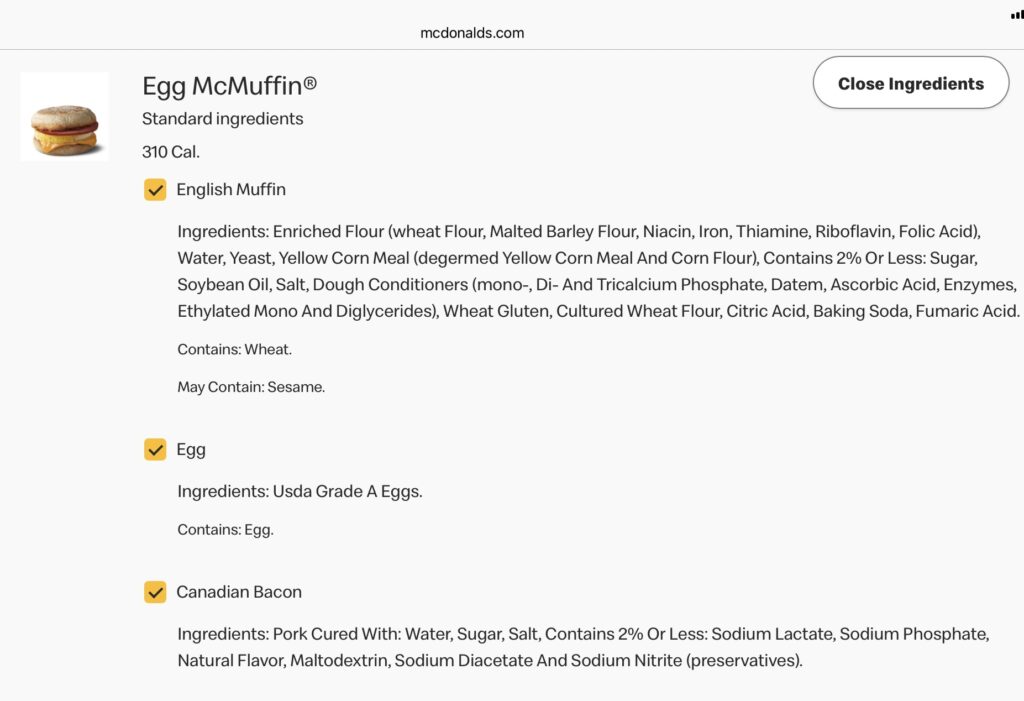
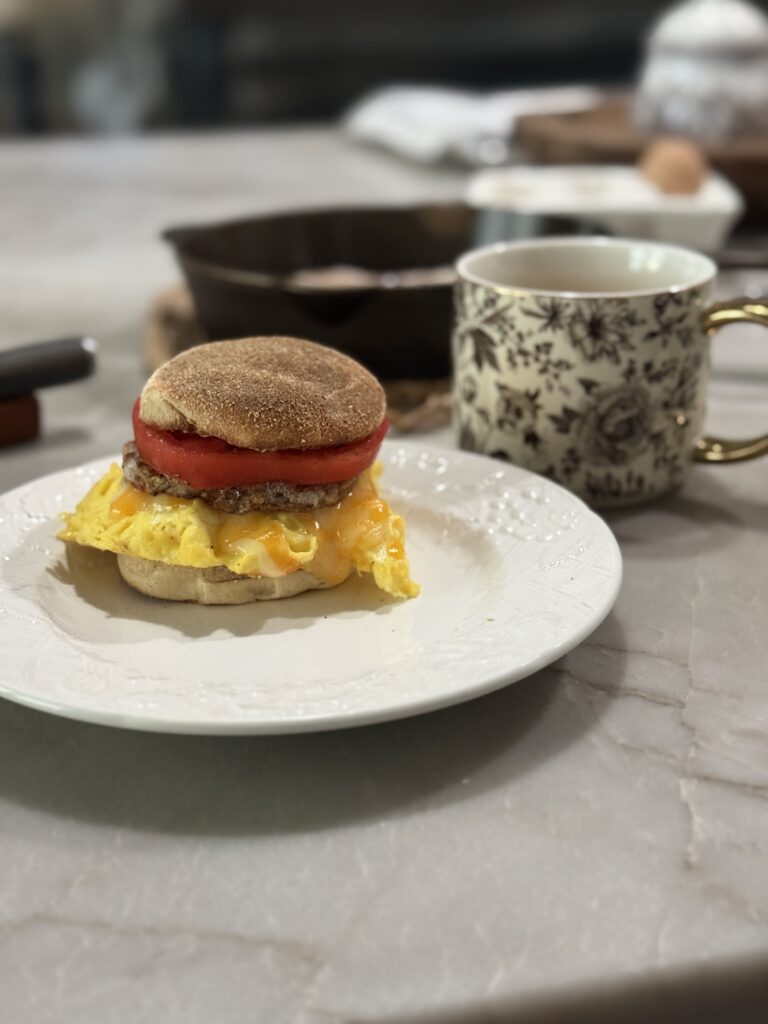
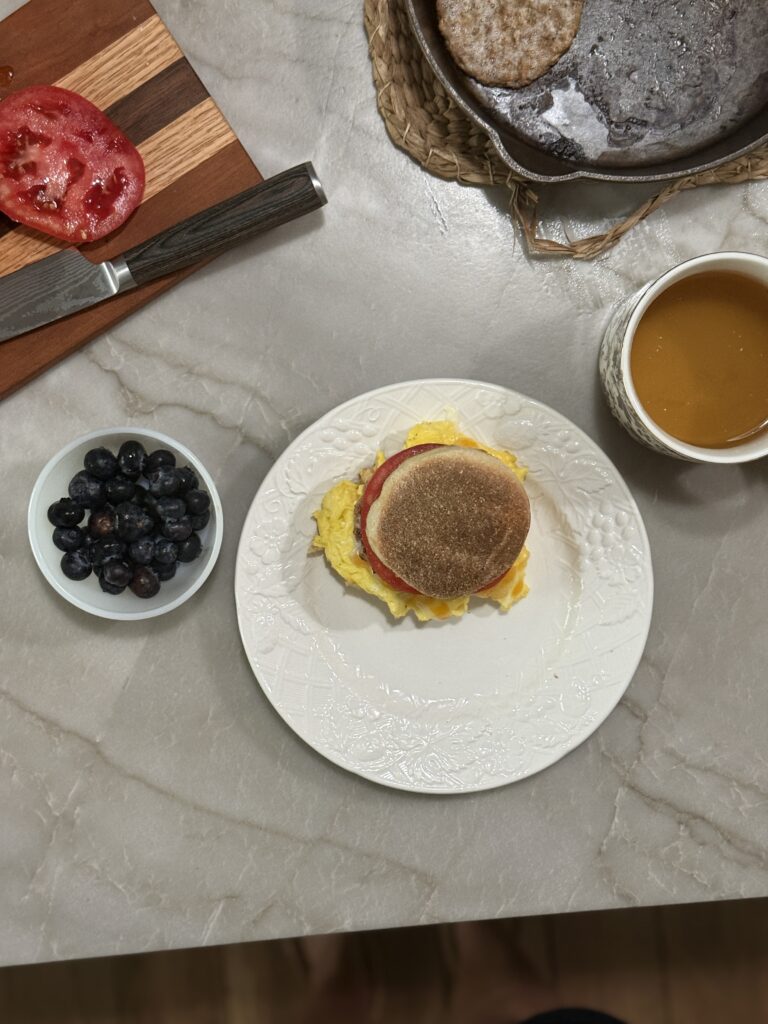
The most common way to serve English muffins is just like the fast food chain does – McDonald’s Egg McMuffin. I like to add cleaner food ingredients on our egg muffins. I’ll either scramble or fry our farm fresh eggs. Add a chicken sausage patty, cheddar cheese, slice of a tomato and/or avocado and some avocado mayo. So yummy and nutritious!
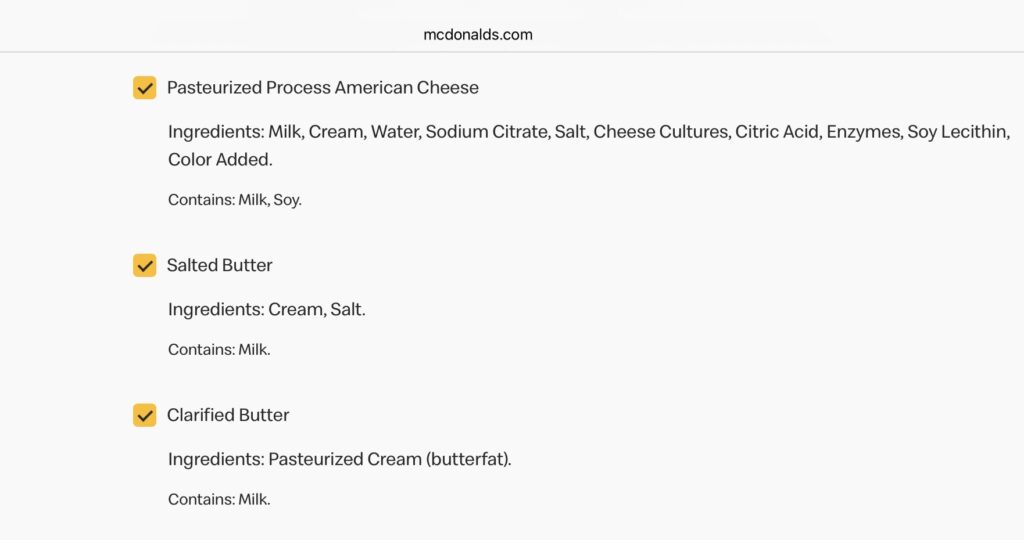
I love doing comparisons with from scratch cooking and fast food restaurants. McDonald’s website has the ingredients for their famous Egg McMuffin (see below). I hope you’ll still make these at home haha.
You can also top English muffins with your favorite nut butter and a homemade jam/jelly, just grass-fed butter and jelly, make a sandwich or even little pizzas for the kiddos.
Learn to Mill Your Own Flour
Here is my beginner’s guide to help you get started!
Items Used in This Recipe
Iron Skillets – My favorite one is here and here.
Cornmeal – receive 20% off (or grind your own)
English Muffins (using fresh-milled flour)
Ingredients
Method
- Combine warmed milk and yeast. Allow to get nice and bubbly.
- Add flour, salt and the egg to a mixing bowl.
- Next, stir in the honey and butter. Add the yeast mixture.
- Knead the dough. If you'll be kneading by hand, go about 500-600 strokes. Alternatively, you can use a stand-up mixer (to save time). Knead for about 8-10 minutes until the dough pulls away from the sides of the bowl.
- Cover with a towel and allow to rise until doubled in size.
- Roll out the dough onto a lightly floured surface. You'll want to make sure the dough remains a little thick.I like to go around 3/4"-1" tall.
- Using a 3 inch round cutter, cut 12 circles. Coast them lightly in the cornmeal on each side.
- Place on a parchment lined baking sheet, cover with a towel and allow to rise. This shouldn't take but 15-10 minutes. They will basically be puffed up.
- Heat your cast iron skillet on the low heat setting on your stove. Sprinkle a little cornmeal in the bottom of the skillet.
- Place the muffins in the skillet and allow to cook for 5-7 minutes. Flip and cook for another 5-7 minutes.They should be golden brown on each side or reach 200° F when they are done cooking.
- Allow to cool on a wired rack. Use a fork to open them up from the side. Put your favorite topping on them and enjoy!
Notes
- Start the temperature on the stove at the low setting. Gradually increase the heat, if needed. This will keep the muffins from burning.
- Keep the dough thick when rolling. I like to go between 3/4″ – 1″high.
- When ready to slice, use a fork (not a knife). This will allow those little pockets inside the muffin to stay in tact.
- Your dough will be slightly sticky. This is going to create those pockets like a traditional English muffin you would buy at the store.
I hope you enjoy making this recipe for you and your family all year long. Please share this post over on Pinterest and tag me on Instagram.

Wendy Lea Walker, NTP
Nutritional Therapy Practitioner
I’m Wendy. A wife, empty-nester mama, homemaker, homebaker, gardener and small-time farmer. I love sharing wisdom and mistakes I’ve learned along the way. Anyone can garden or homestead, no matter where you live. It’s a mindset. You just have to start somewhere. I believe food is medicine. Feed the body real whole foods and healing will begin. I’m an advocate for eating real food and enjoy sharing all my fresh-milled flour recipes. I’ve learned to slow down over the years from all the noise that came with life and enjoy creating a simple cottage home.

Leave a Reply