

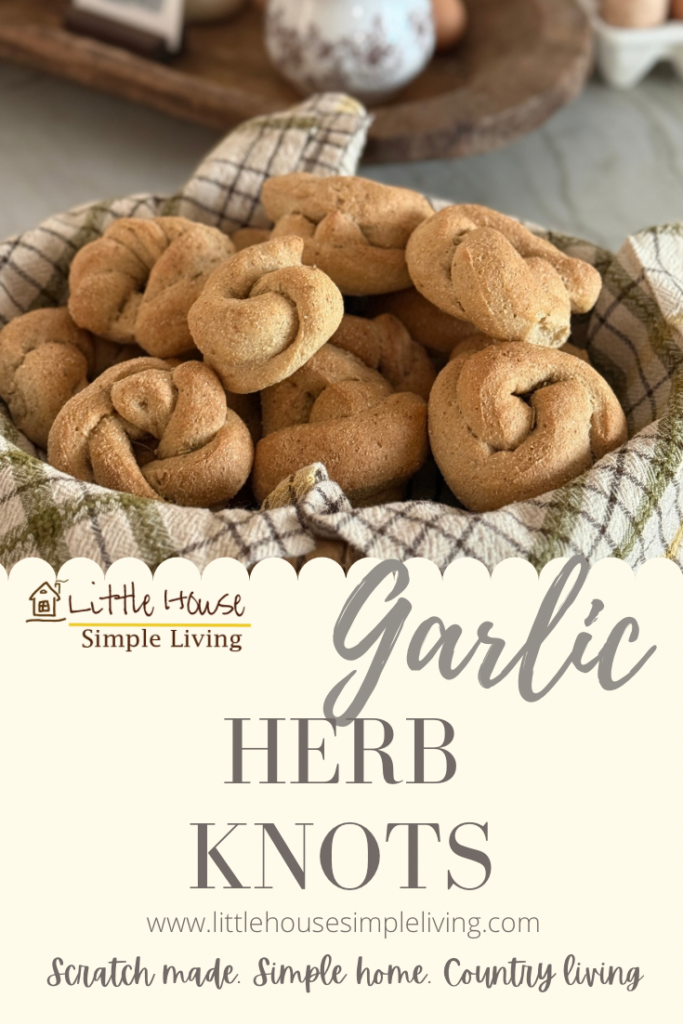
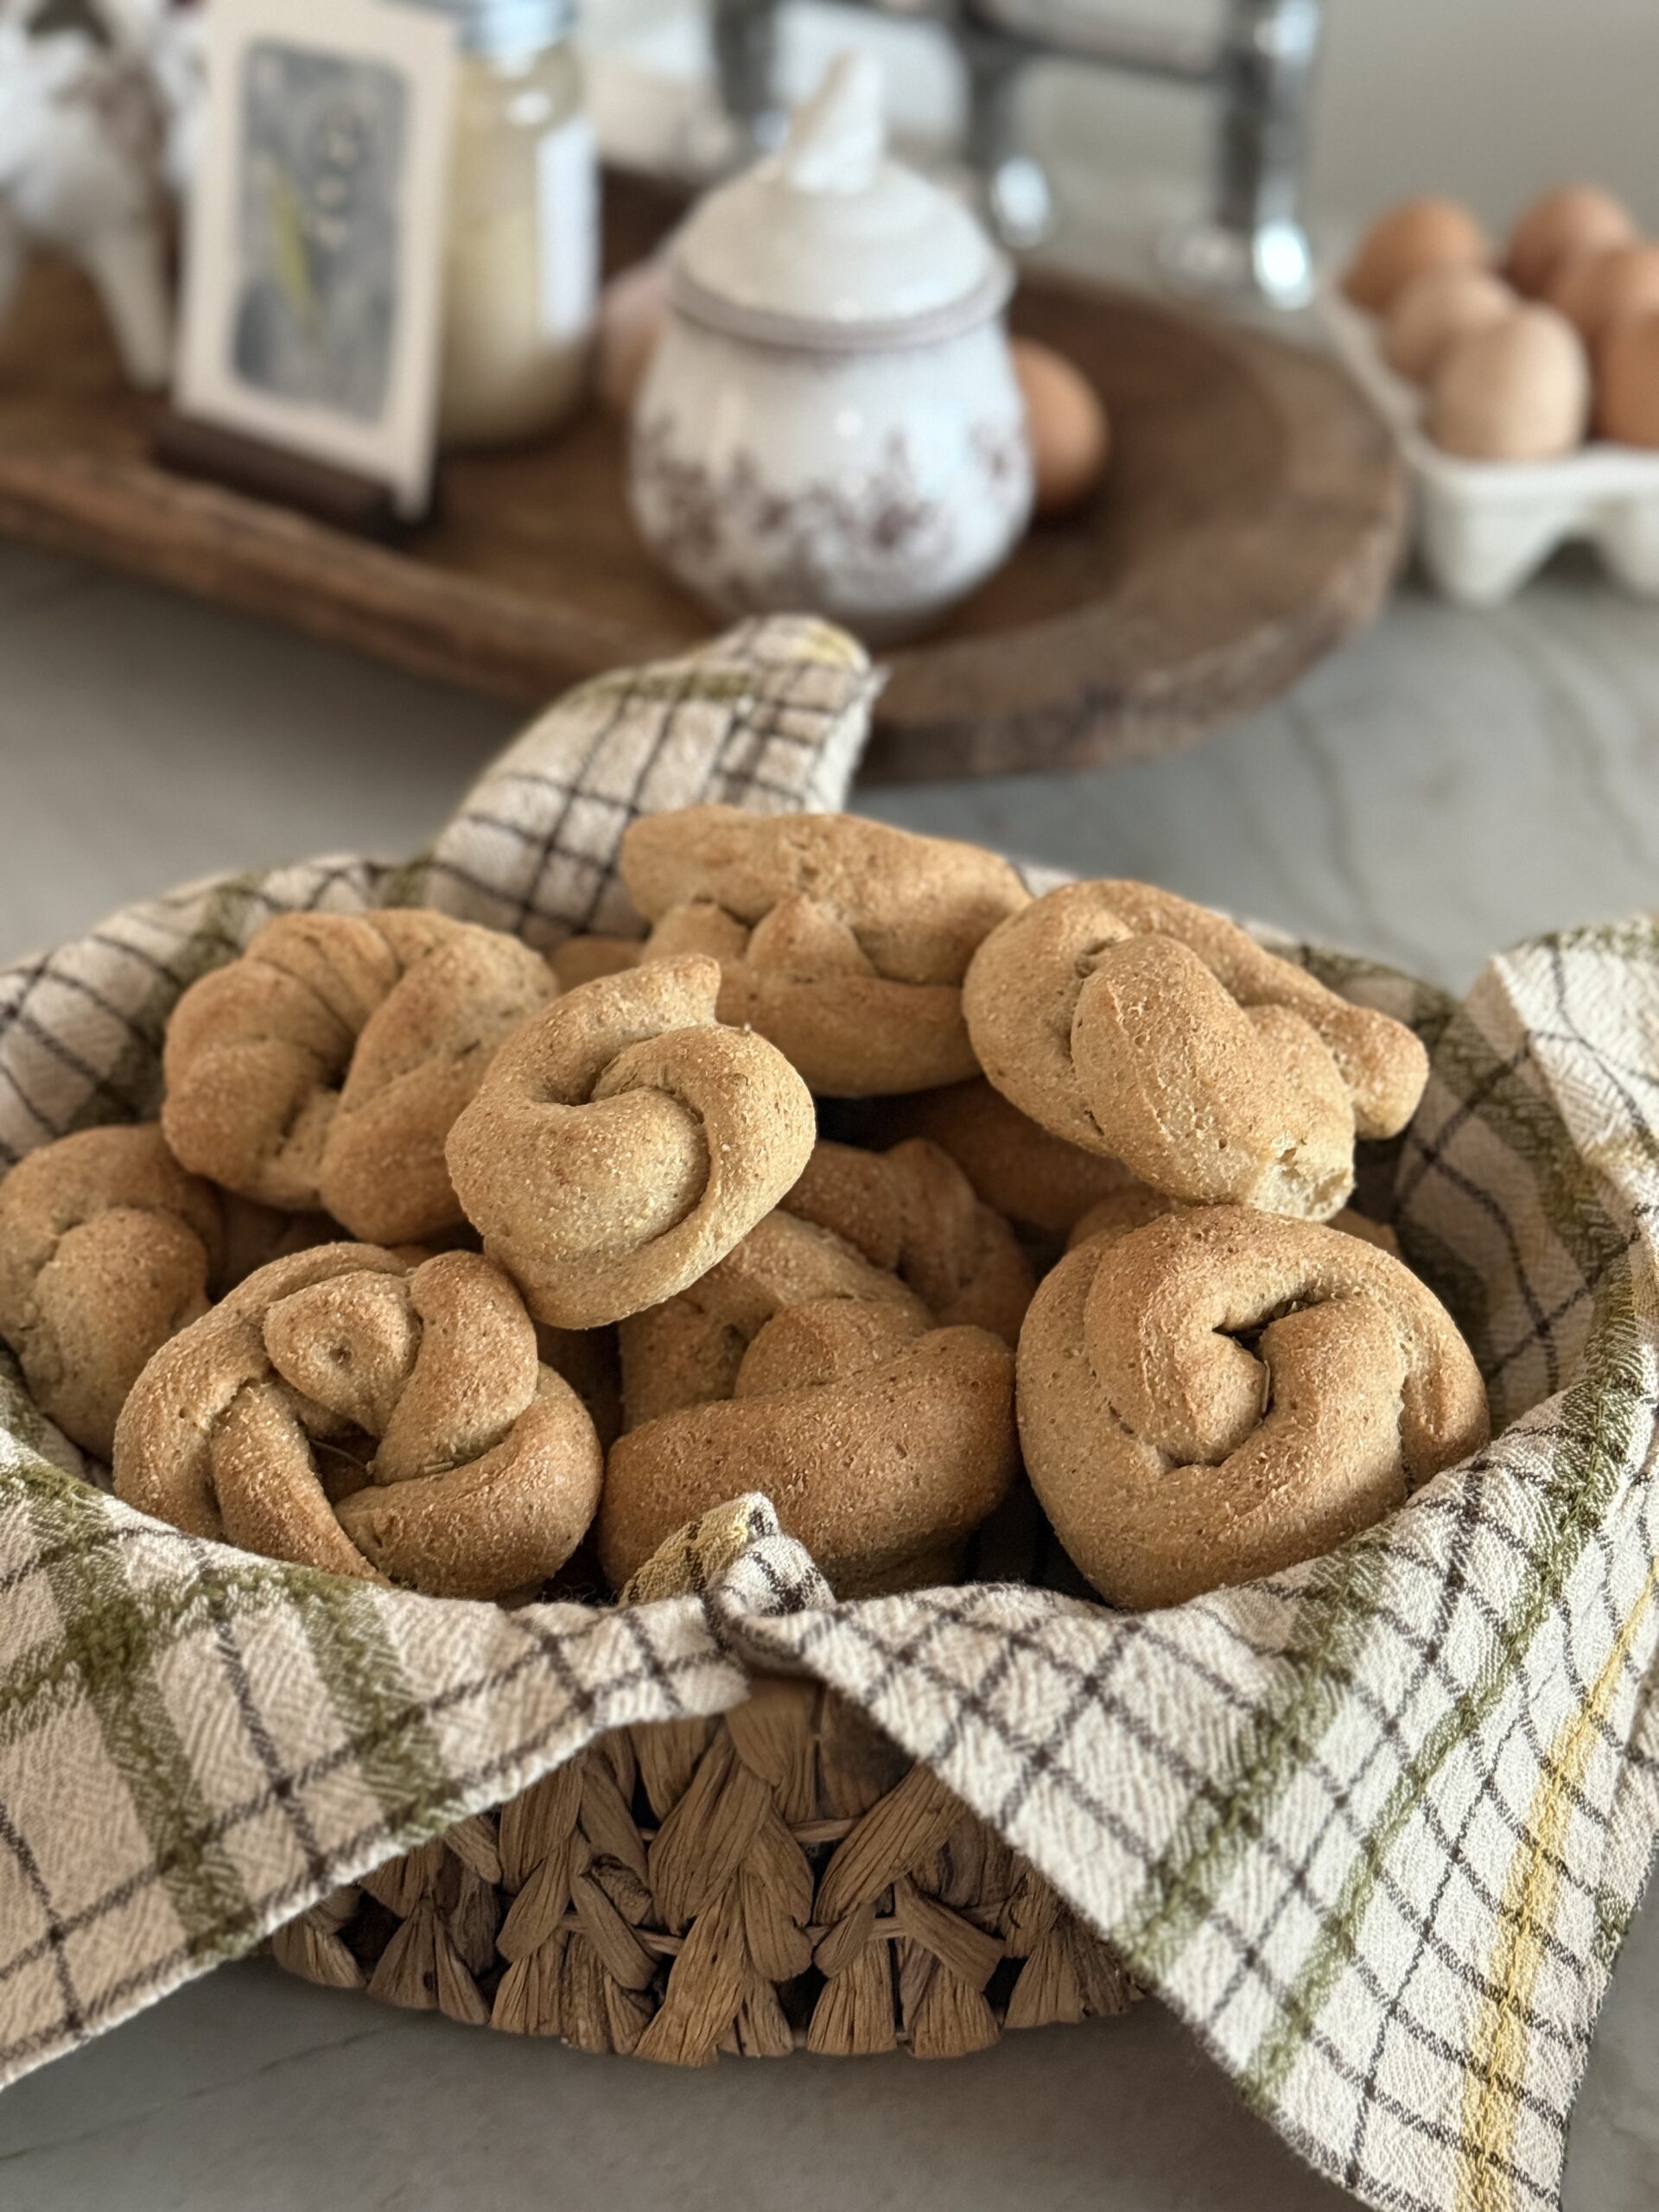
If you love bread and garlic like I do, you will love these garlic herb knots. I’ve added herbs to elevate the flavor. These will make a great addition to most meals.
{Jump to Recipe}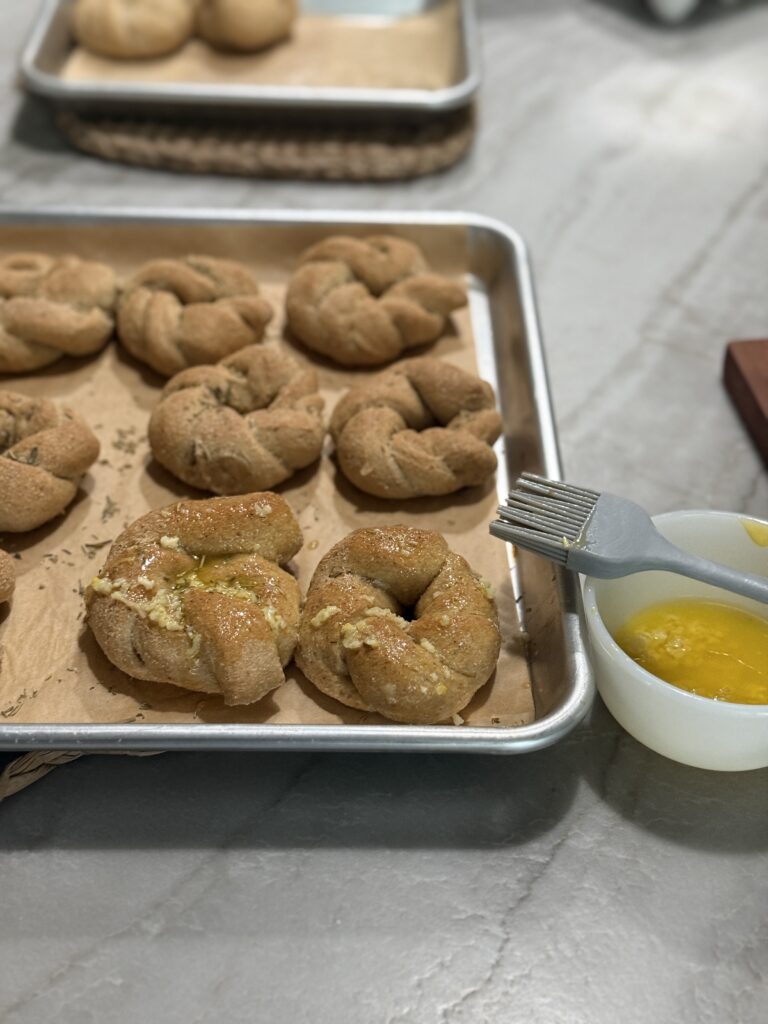
Ingredients
Fresh Milled Flour (or you can use all-purpose)
Active dry yeast
Warm water
Real salt
Sunflower lecithin
Lukewarm water
Extra virgin olive oil
Raw honey
Instructions
Dough Prep
- Dissolve the yeast in the warm water. Stir until nice and bubbly. Set aside.
- Add your flour, lecithin and salt into your mixing bowl. Make a well (basically a hole) in the center.
- Add the honey and olive oil to the lukewarm water. Stir together.
- Pour the yeast in the well of the flour and then add the honey/oil mixture. Stir together until everything is combined.
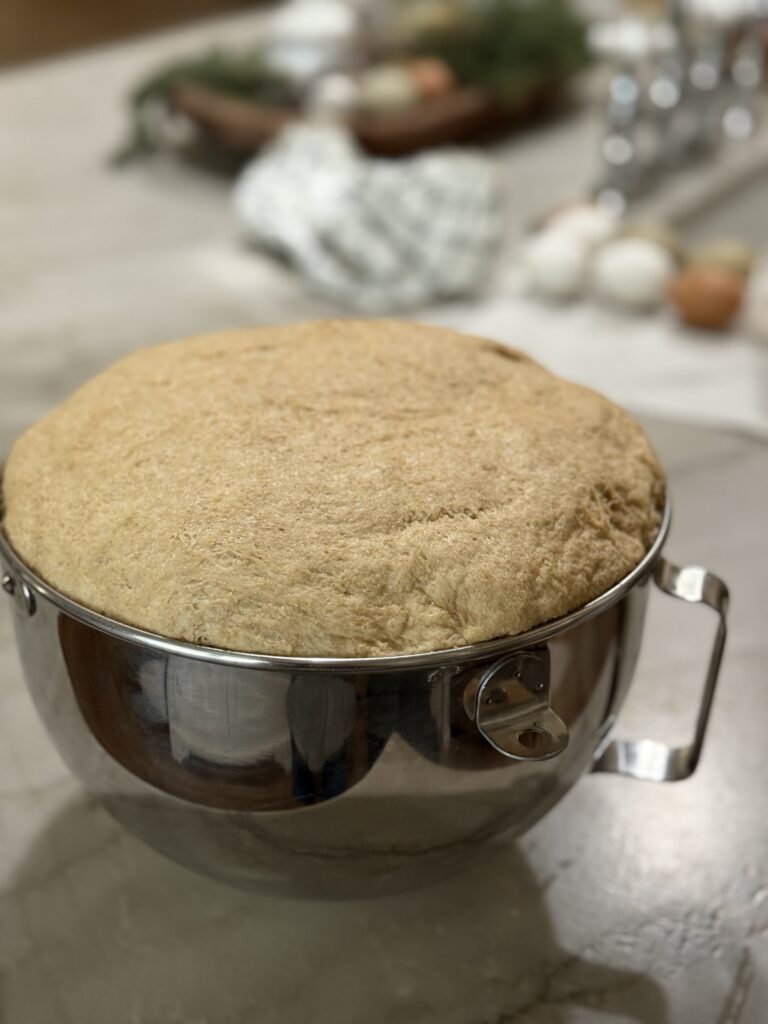
- Now, it’s time to knead the dough. If doing this by hand, it’s about 600 strokes (just use your hands going back and forth with the dough). In a standup mixer, it will take about 10 minutes. Cover with a damp towel and allow to rise for 1-2 hours. It should double in size.
- With a wet finger, poke a hole into the dough. If the hole doesn’t fill in, you are ready for the next step. Lastly, if the hole doesn’t fill close up, just let your dough rise a little longer.
- Gently punch down the dough and pull it away from the sides, forming a ball. Cover with the same towel and let rise again, usually 30 minutes.
Shape & Bake
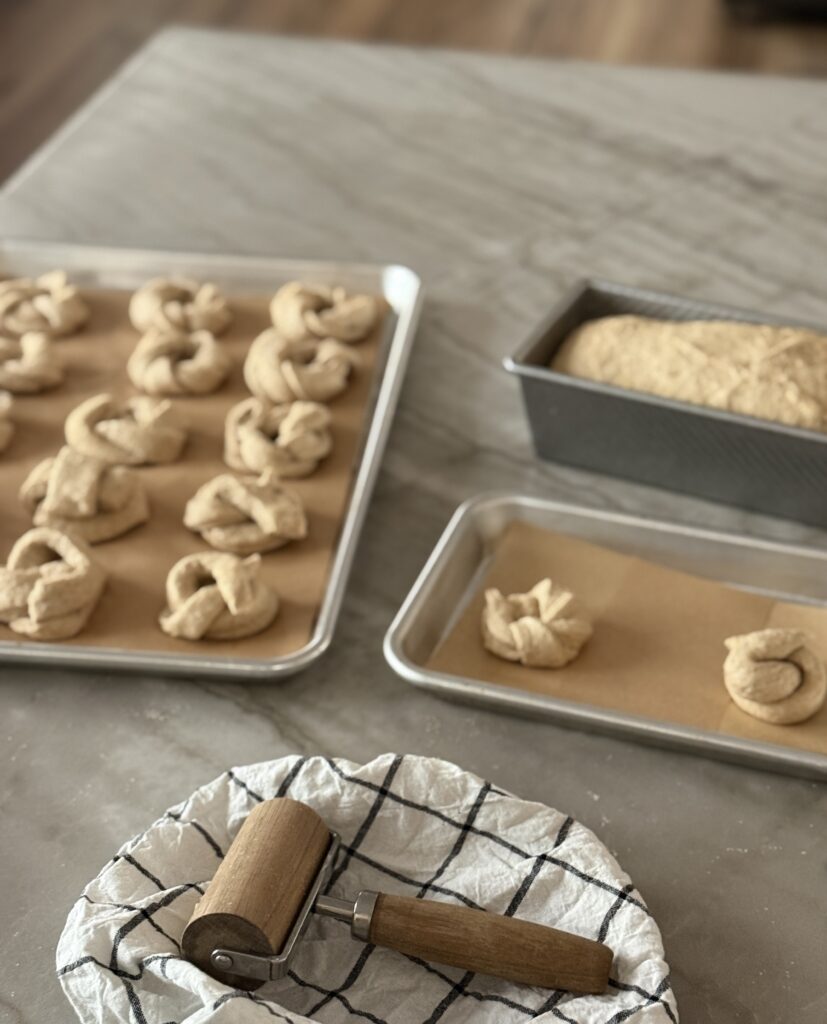
- Now, it’s time to form your garlic herb knots. Split your dough in half. Basically, you can make (1) loaf of whole wheat bread and garlic knots or just use this recipe for a large batch of knots.
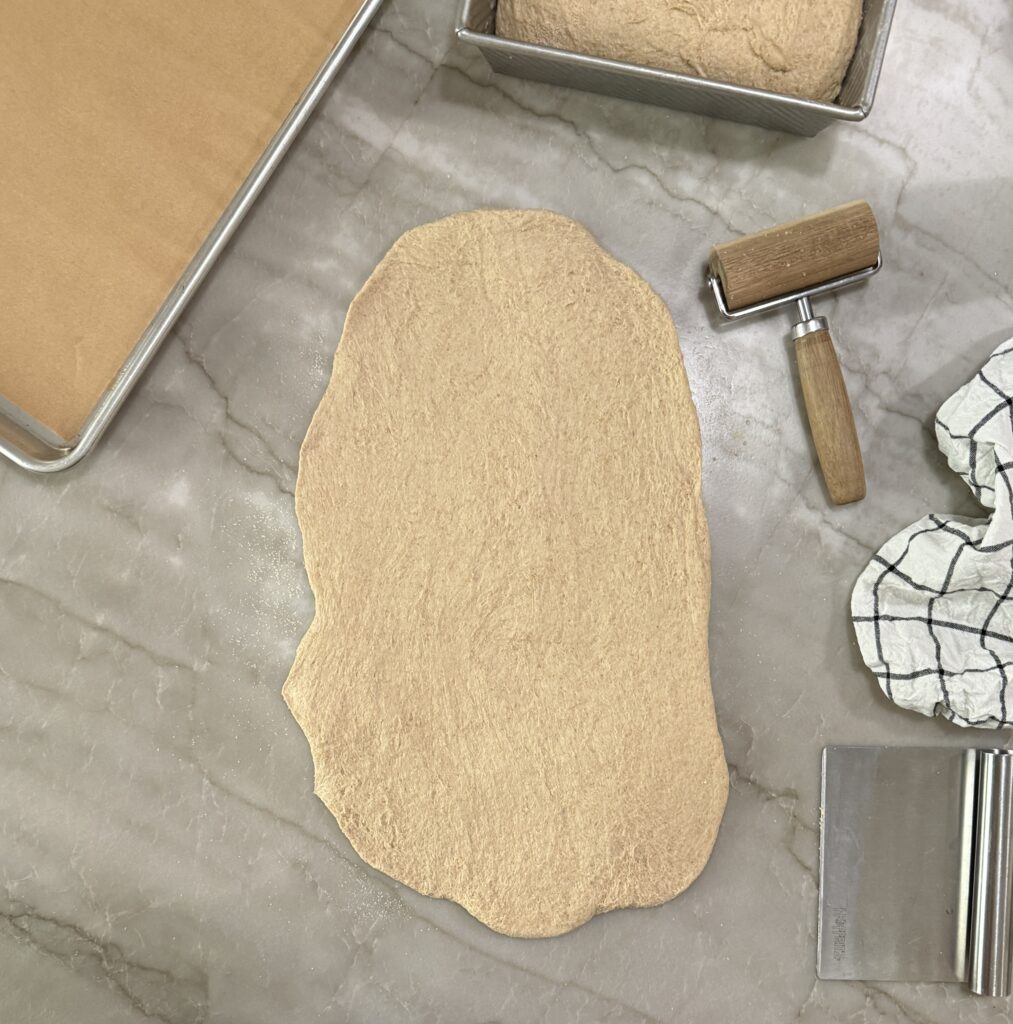
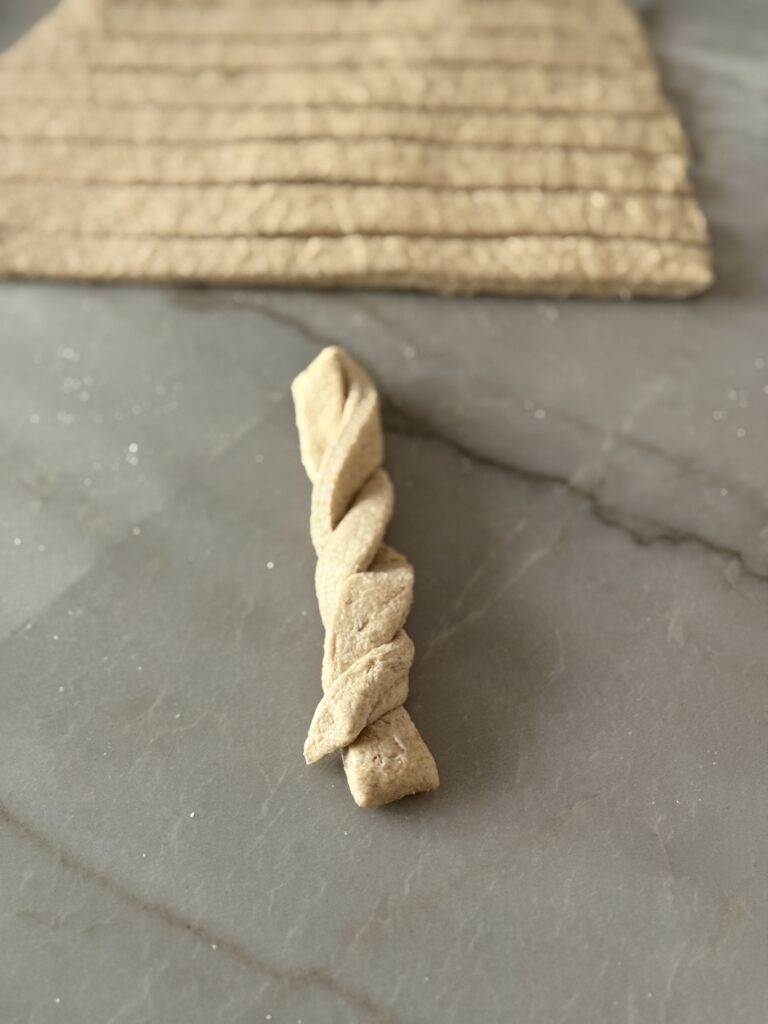
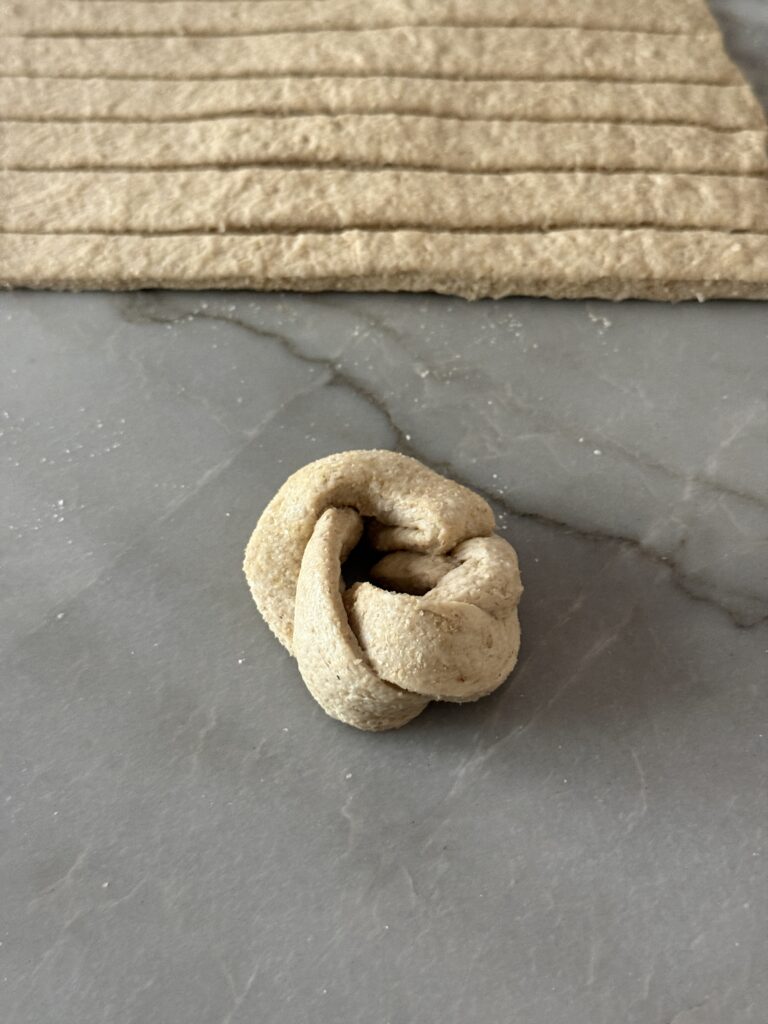
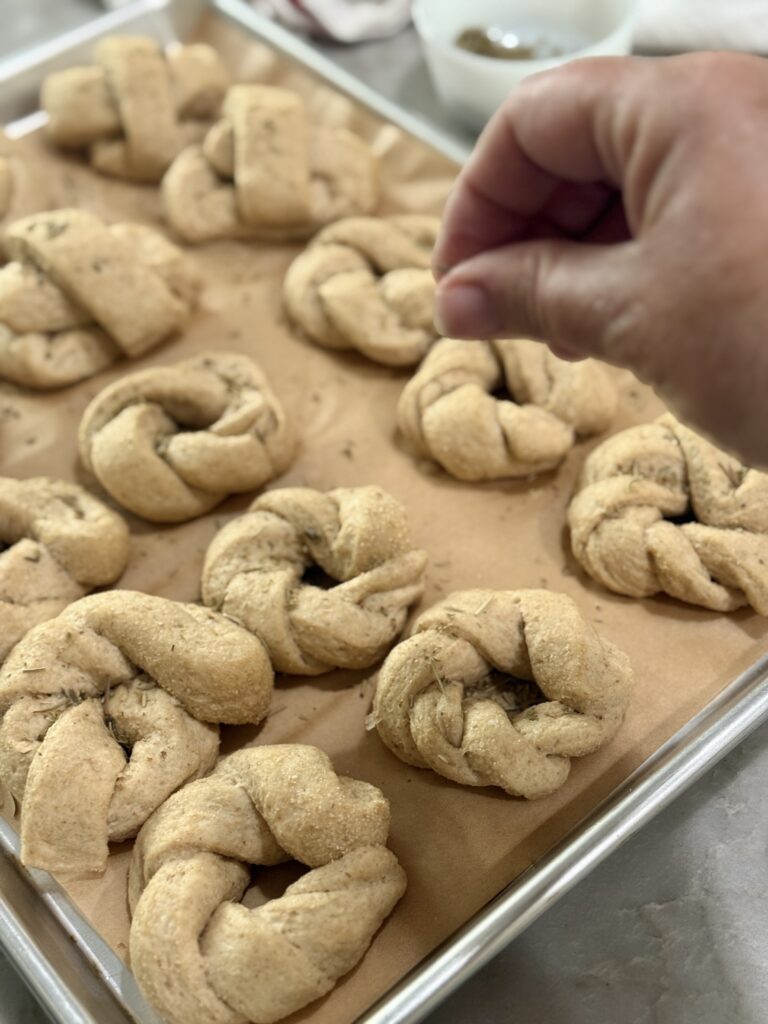
- Roll your dough out into a rectangle shape (about 1/4 inch thick). Cut into 1 inch strips. Take each strip and make a braid or twist (see photo below). Next, take each end of the braid and form a circle. Place each one on a parchment lined baking sheet.
- Sprinkle dried herbs on top of each garlic knot.
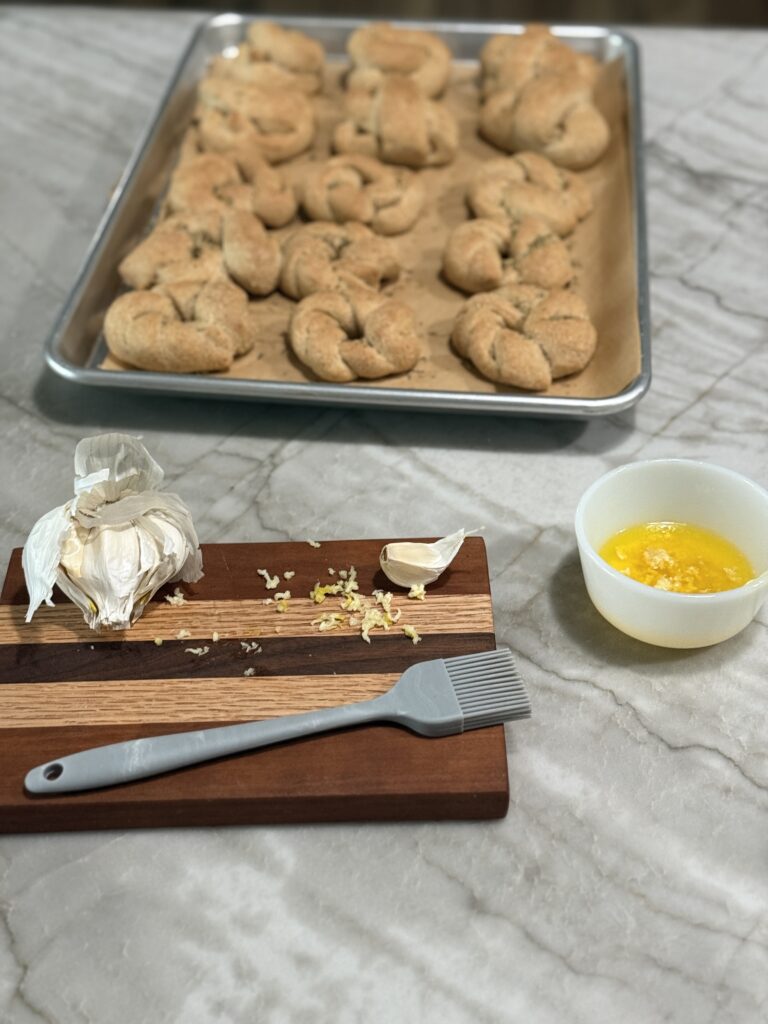
- Bake in a 350°oven for 20 minutes.
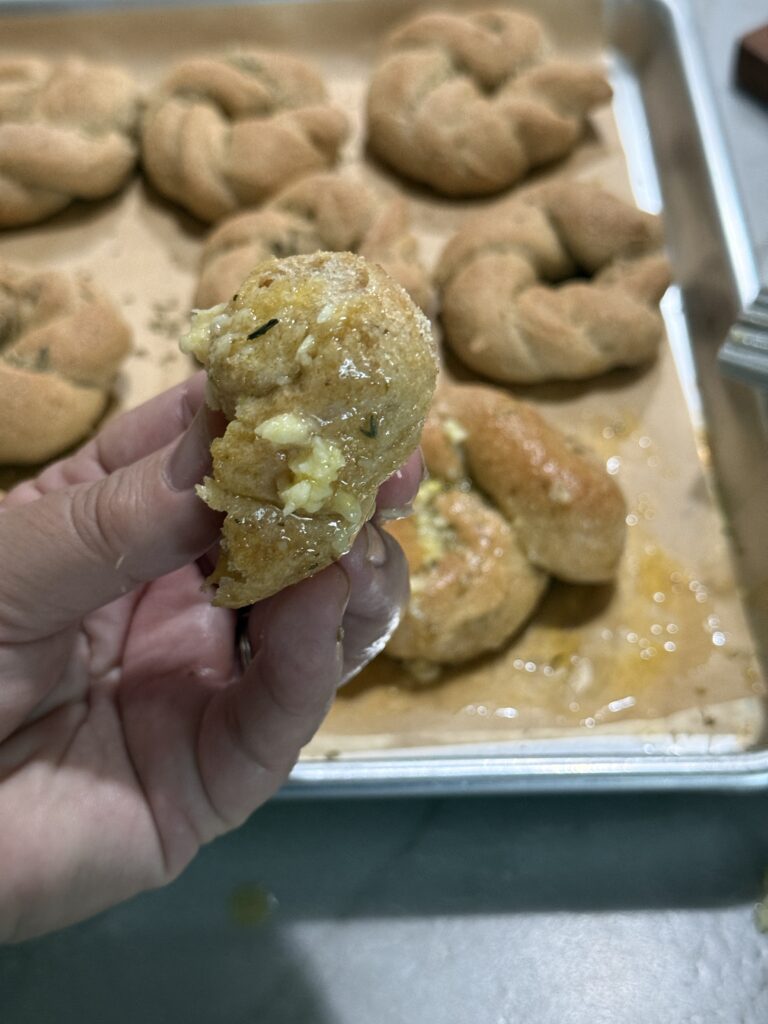
- Using a pastry brush, coat each garlic herb knot with a butter and garlic wash.
Join Our Simple Living Community


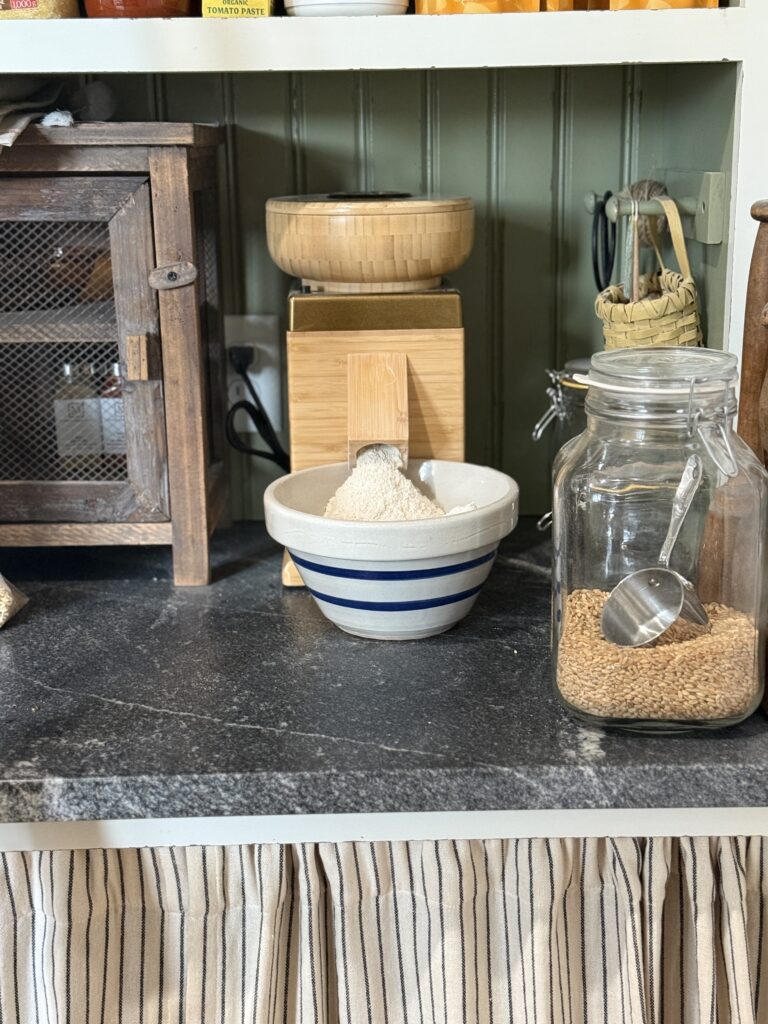
Learn to Grind Your Own Flour
I’m sharing my beginner’s guide with everything you need to get you started milling your own flour. This will give your family nutritious and delicious bread products.
Fresh-Milled Flour vs. Store Bought Flour
There’s some major differences in between what you buy at the store and what you grind from wheat berries.
Let’s Compare the Health Benefits
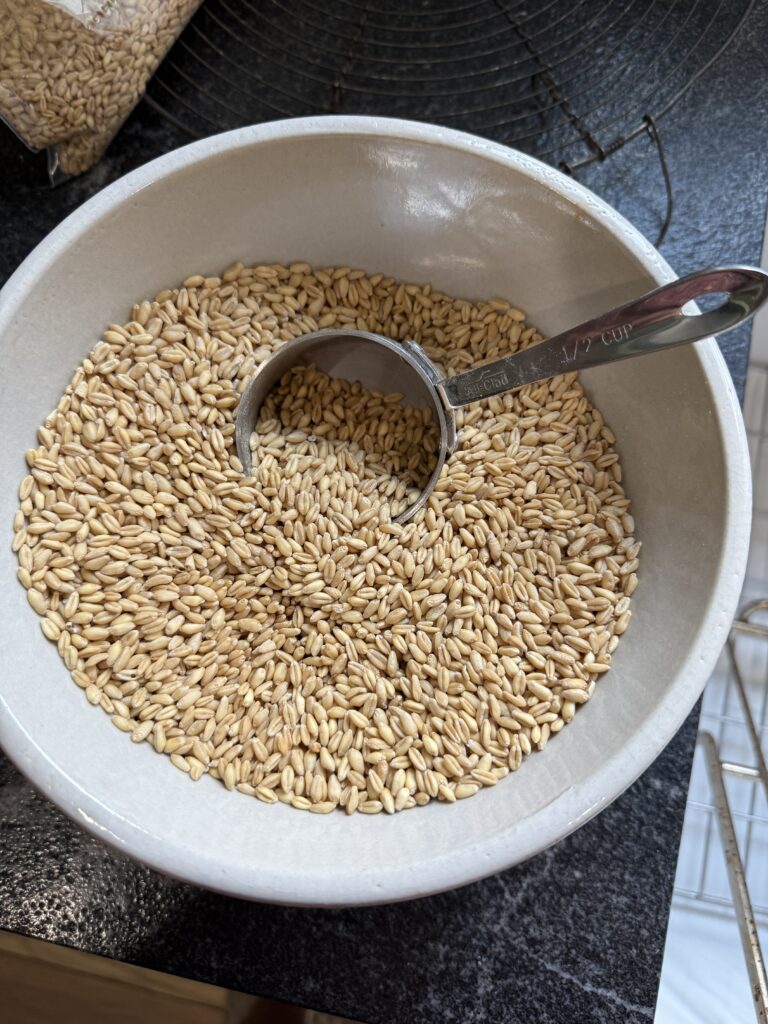
Store Bought Flour has had the germ and the bran removed. This allows the bags of flour on the shelves to stay fresher. The vital nutrients have been removed. Alternatively, there are organic flours that retain a little more of the vitamins and minerals but they can get costly. I have found a few wonderful organic bread flours that I use with my fresh-milled flour or alone. They are stone ground fresh milled flour. It has been ground in a special way that retains all of the nutrients. I’ll be sharing about them below.
Fresh-Milled Flour has a lot of the daily required essential nutrients in each kernel, also referred to as wheat berries. Each kernel is constructed of three parts. The Bran, Germ and the Endosperm. The bran is the outer layer and consists of a small amount of protein, B vitamins, trace minerals and fiber. The germ is tucked away like an embryo and contains some protein, B vitamins and essential fatty acids. Accordingly, it is also a great source of fiber. Once the bran and the germ are broken, they are exposed to oxygen and now the nutrients are now oxidized. This means that the flour will not stay fresh on the shelf for very long.
Endosperm is surrounded by the bran and the germ. Think of it as the yolk to an egg. It contains the majority of the protein and it’s the starch. Order a FREE CD on “The Truth About Wheat” HERE.
Substitute All—Purpose Flour Recipes with Fresh-Milled Flour
Pin For Later
Storage of Garlic Herb Knots
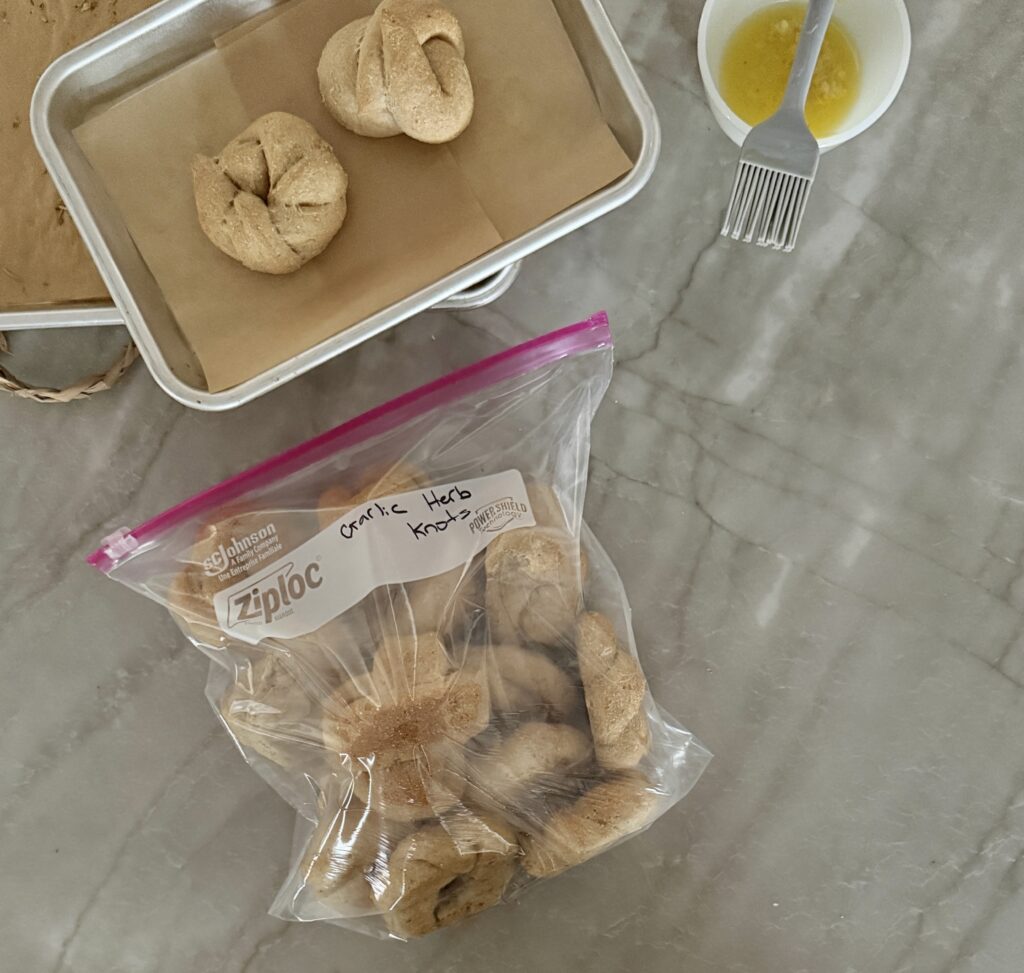
These garlic herb knots are best eaten the day your make them. When you brush the melted garlic butter on top of them, if not consumed immediately, they will become soggy. What I like to do is make a big batch. If it’s just a few of us for dinner, then I’ll brush the garlic butter on just a few. I will freeze the rest once they are cooled. They will last in there for 2 months.
When you are ready to consume them, pull whatever you want out. Place them on a parchment lined baking sheet and toast them up in the oven. I would bake them on a 250°setting for about 20 minutes (if frozen). If thawed, it may only take 10 minutes. Once they come out of the oven, brush them with the garlic butter. Freezing the baked knots makes it really convenient to pull them out in a pinch for those impromptu dinner guests or those “what are we having tonight” meals.
Other Fresh Milled Flour Recipes
Items Used in this Recipe
Grain Mill (receive $20 off)
Grain Mills, Mixers, Grains, etc.
Resources
https://www.nber.org/system/files/working_papers/w23730/w23730.pdf
https://nutritionsource.hsps.harvard.edu/whatshouldieat/wholegrains
Wang J, Chatzidimitriou E, Wood L, Hasanalieva G, Markelou E, Iversen PO, Seal C, Baranski M, Vigar V, Ernst L, Willson A, Thapa M, Barkla BJ, Leifert C, Rempelos L. Effect of wheat species (Triticum aestivum vs T. spelta), farming system (organic vs conventional) and flour type (wholegrain vs white) on composition of wheat flour – Results of a retail survey in the UK and Germany – 2. Antioxidant activity, and phenolic and mineral content. Food Chem X. 2020 May 4;6:100091. doi: 10.1016/j.fochx.2020.100091. PMID: 32420543; PMCID: PMC7215096.
www.wholegrainscouncil.org
The Essential Home-Ground Flour book by Sue Becker
Medical Disclaimer:
The content on our website is for informational and educational purposes only. It is not intended to provide medical advice. It is also not intended to take the place of such advice or treatment from a personal physician. All readers/viewers of this content are advised to consult their doctors or qualified health professionals regarding specific health questions. Wendy Walker, NTP (Little House Simple Living) and the publisher of this content do not take responsibility. This applies to any health consequences that might occur. It applies to any person reading or following the information in this educational content. All viewers of this content should consult their physicians. This is especially true for those taking prescription or over-the-counter medications. They should do this before beginning any nutrition, supplement or lifestyle program.
Garlic Herb Knots
Ingredients
Method
- Dissolve the yeast in the warm water. Stir until nice and bubbly.
- Mix the flour, lecithin and salt in your bowl. Make a well in the center.
- Add the honey and olive oil to the lukewarm water. Stir together.
- Pour the yeast in the well of the flour and then add the honey/oil mixture. Using your Danish whisk, stir together until everything is combined.
- Now, it's time to knead the dough. If doing it by hand, it's about 600 strokes. In a standup mixer, it will take about 10 minutes. Cover with a damp towel and let rise for 1-2 hours.It should double in size.
- With a wet finger, poke a hole into the dough. If the hole doesn't fill in, you are ready for the next step. If the hole does close up, just let your dough rise a little longer.
- Gently punch down the dough and pull it from the sides, forming a ball. Cover with the same towel and let rise again, usually 30 minutes.
- Now, it's time to form your garlic herb knots. Split your dough in half. Basically, you can make (1) loaf of whole wheat bread and garlic knots or just use this recipe for a large batch of knots.
- Roll your dough out into a rectangle shape (about 1/4 inch thick). Cut into 1 inch strips. Take each strip and make a braid/twist. Next, take each end of the braid and form a circle. Place each one on a parchment lined baking sheet.
- Sprinkle dried herbs on top of each garlic knot.
- Bake for 20 minutes in a 350℉ oven.
- Using a pastry brush, coat each garlic herb knot with a butter and garlic wash.
Notes
- If you add the olive oil first, the honey will not stick to the measuring spoon. The oil makes it slide right off.
- You can definitely use all-purpose flour. I just prefer the nutritious ingredients in freshly-milled flour.
- If you choose to use other flours as in Einkorn or Khorasan, you’ll need to adjust the water to flour ratios. I’ve learned to play around with flours until I get the right consistency.
- This recipe makes (1) nice size loaf of bread and 15-17 garlic knots. You can also make 35-37 garlic knots if you have a big crowd.
- Storage: These garlic herb knots are best eaten the day your make them. When you brush the melted garlic butter on top of them, if not consumed immediately, they will become soggy. What I like to do is make a big batch. If it’s just a few of us for dinner, then I’ll brush the garlic butter on maybe 4 or 6 of them. I will freeze the rest once they are cooled. You wont’ add the garlic butter. They will last in there for 2 months. When you are ready to consume them, pull whatever you want out. Place them on a parchment lined baking sheet and toast them up in the oven. I would bake them on a 250°setting for about 20 minutes (if frozen). If thawed, it may only take 10 minutes. Once they come out of the oven, brush them with the garlic butter. Freezing the baked knots makes it really convenient to pull them out in a pinch for those impromptu dinner guests or those “what are we having tonight” meals.
I hope you enjoy making this recipe for you and your family all year long. Please share this post over on Pinterest and tag me on Instagram. I’d love to see how yours turn out.

Wendy Lea Walker, NTP
Nutritional Therapy Practitioner
I’m Wendy. A wife, empty-nester mama, homemaker, homebaker, gardener and small-time farmer. I love sharing wisdom and mistakes I’ve learned along the way. Anyone can garden or homestead, no matter where you live. It’s a mindset. You just have to start somewhere. I believe food is medicine. Feed the body real whole foods and healing will begin. I’m an advocate for eating real food and enjoy sharing all my fresh-milled flour recipes. I’ve learned to slow down over the years from all the noise that came with life and enjoy creating a simple cottage home.

Leave a Reply