

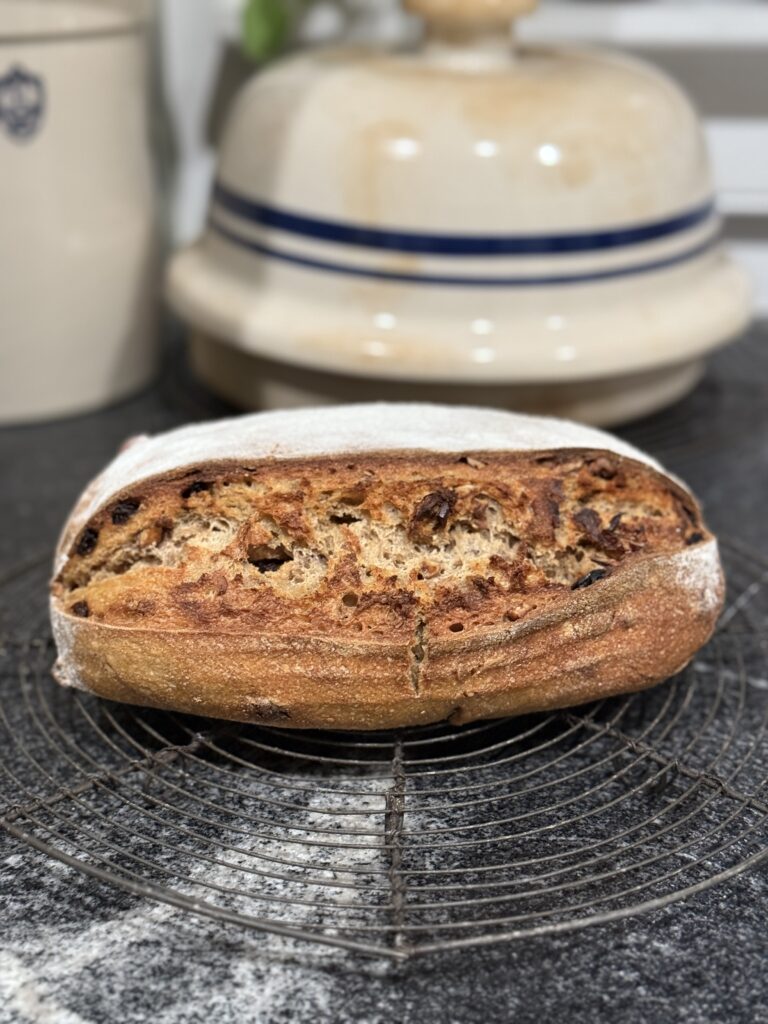
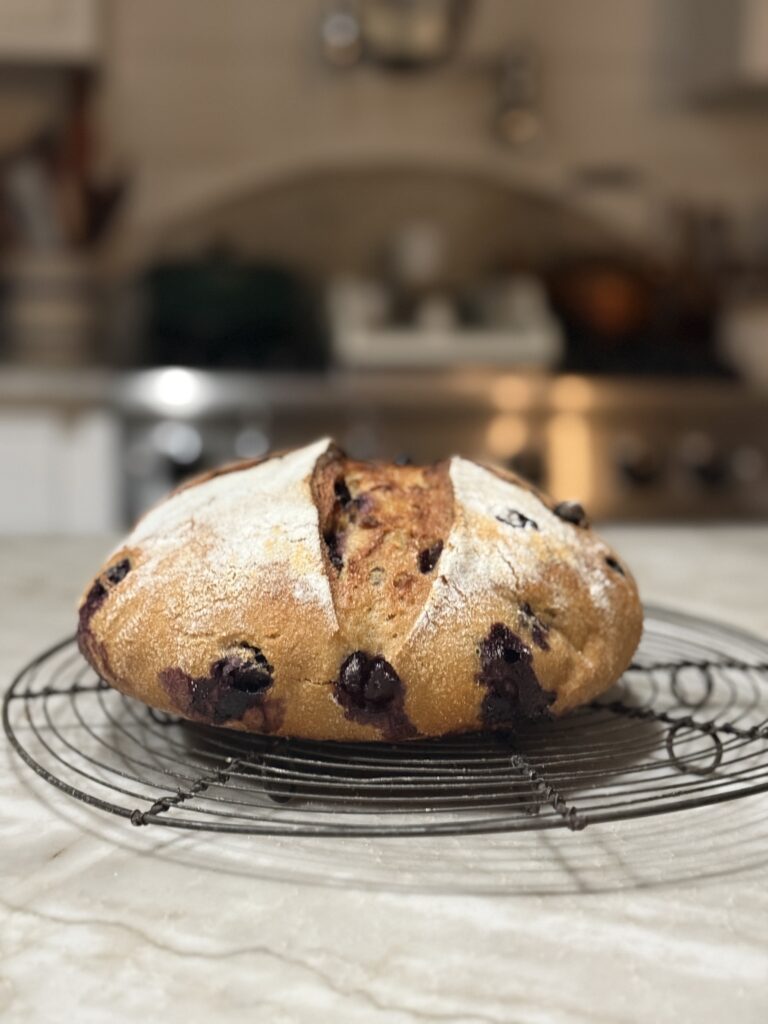
It’s blueberry season here in the south. It’s the perfect time to make a Blueberry Lemon Maple Sourdough Loaf of bread. The flavors all come together while it’s in the oven. The taste is delicious. I can’t wait to share this recipe with you.
{Jump to Recipe}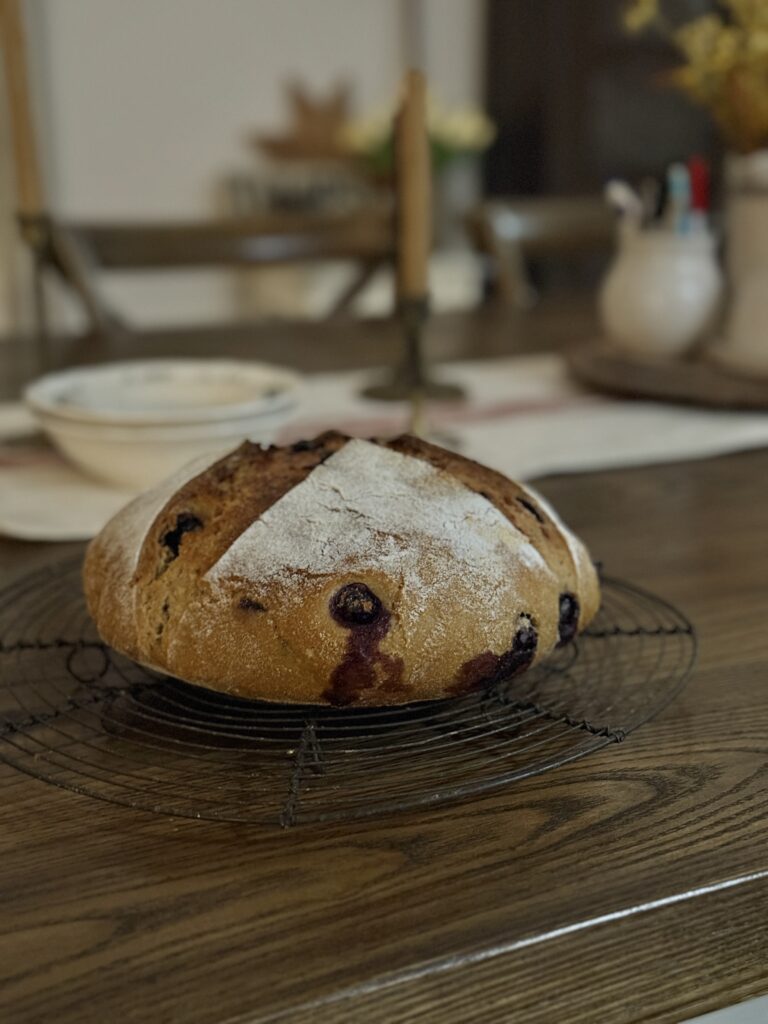
Why Blueberry, Lemon and Maple Syrup?
The tartness of the blueberry and lemon alone are amazing. But, when you add real maple syrup, it gives that perfect amount of rich sweetness. No Aunt Jemima or Log Cabin fake syrup here. I love finding Vermont maple syrup online. If I’m traveling, I always try to find some from a local farm (if they produce it in that state).
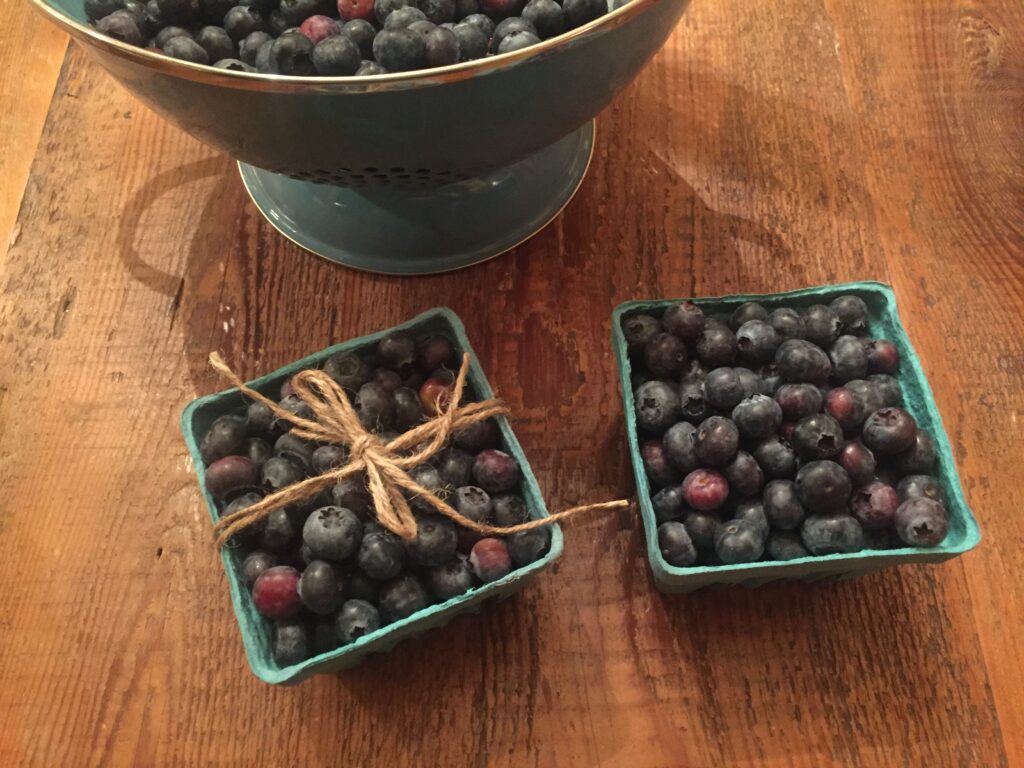
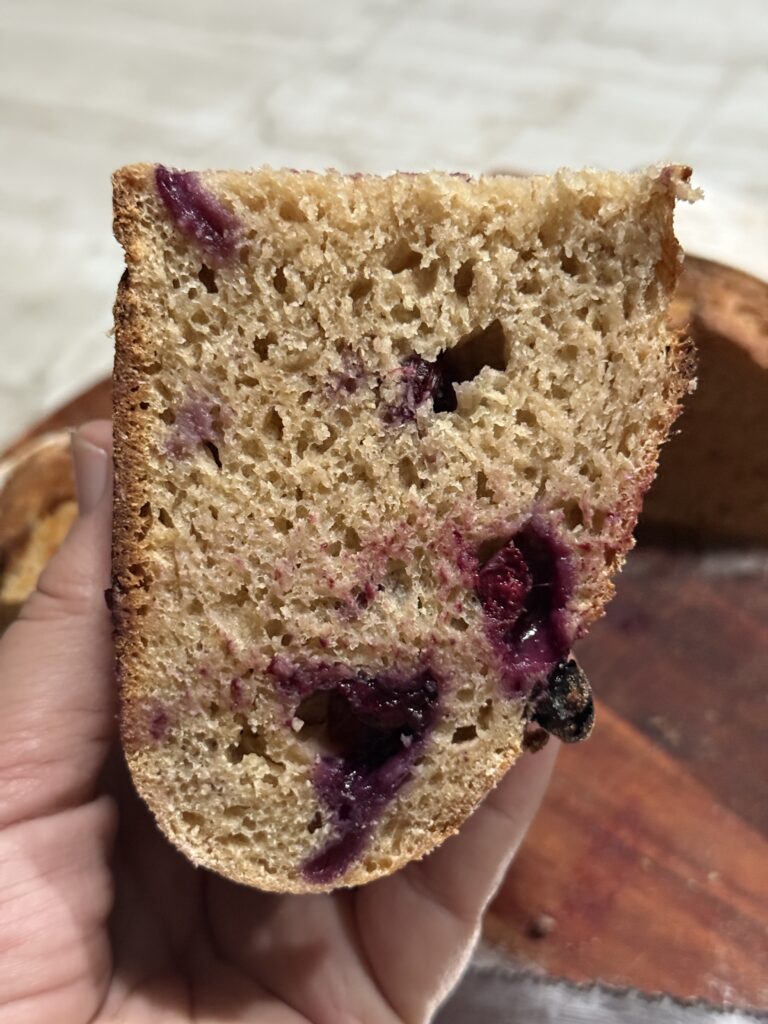
We have blueberry farms that have u-pick from April-May. I like loading up on a bunch to use fresh and freeze for later. It’s best to use fresh blueberries in this Blueberry Lemon Maple Sourdough Loaf. They tend to release more water when baking and they spread out more throughout the loaf, making the inside of your loaf look globby. I can usually find lemons at a local market. So, if you love all three of these, you will love this recipe.
Ingredients
Blueberries – If you can go to a local u-pick farm and get them, they would make an amazing loaf. You can use frozen but you’ll need to adjust the water in the recipe. Once the frozen blueberries thaw out, they will release water.
Lemon – We will be using the zest from an entire lemon as well as the juice.
Maple Syrup – Real maple syrup is best. The bottles at the store are usually filled with high-fructose corn syrup. Real syrup will give a robust richness in this loaf.

How To Make Blueberry Lemon Maple Sourdough Loaf
Day 1
- Mix the Dough (Autolyse):In a large bowl, combine the starter and water. Add the flour and stir until no dry spots remain. It’ll be shaggy and sticky—don’t worry! Cover and let it rest for 15 minutes. This helps the flour hydrate and kickstarts gluten development.
- Add Salt:After the rest, add the salt. Mix by hand (pinching and folding) or with a spoon until fully incorporated. The dough will feel wet and stretchy.
- Bulk Fermentation with Stretch and Folds:Over the next 4 hours, let the dough rest. It will rise and be puffy, usually increasing in size by 50%. Timing depends on your starter’s strength and room temp. Next, over the next 2 hours, perform 4 sets of stretch and folds every 30 minutes. To do this, wet your hands, grab one side of the dough, stretch it up, and fold it over the center. Rotate the bowl 90 degrees and repeat for all four sides. This builds strength in the dough. After the second fold, gently mix in the blueberries, lemon zest/juice and maple syrup. Spread them evenly as you fold to avoid clumping. Continue spreading the mix-ins with the third and forth stretch n’ fold (being gentle not to mess with the dough).
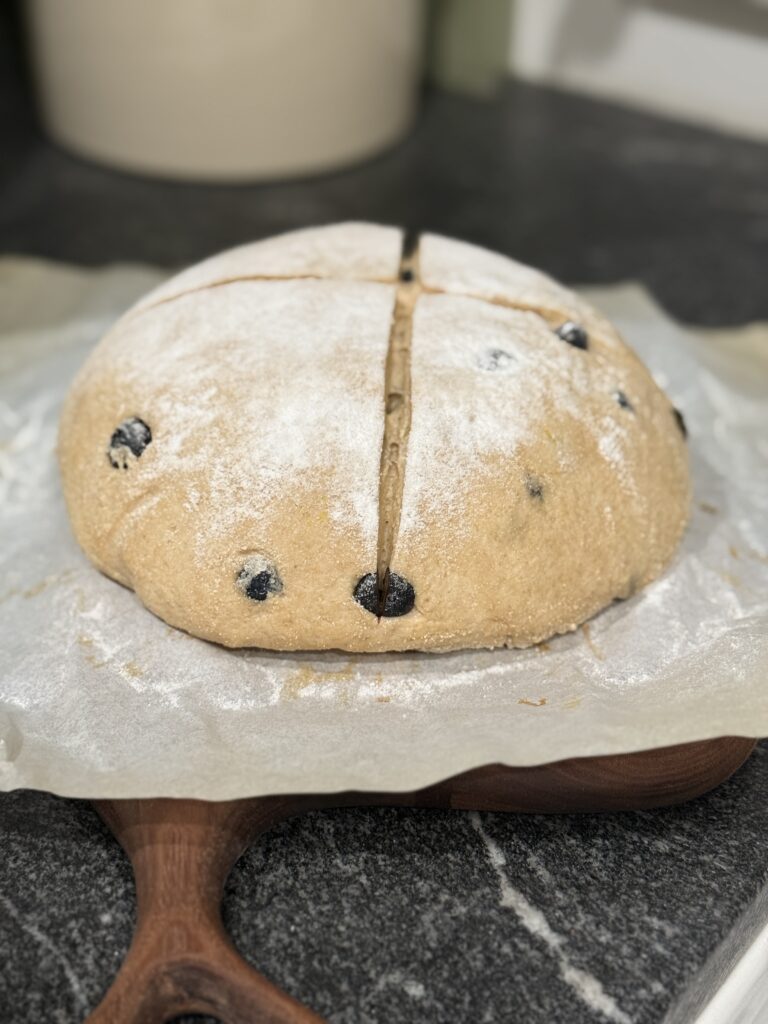
- Shape the Loaf:Turn the dough onto a lightly floured surface. Gently shape it into a round or oval loaf by folding the edges toward the center, like the shape of an envelope. Move the dough back and forth on the counter, in the shape of a ball creating tension. For the final shape, flip it seam-side up, tighten it into a ball (or batard), and place it seam-side up in a floured proofing basket or a bowl lined with a floured tea towel.
- Second Rise (Proofing):Cover and let it proof in the refrigerator overnight (12-15 hours) for a slower ferment and deeper flavor. It’s ready when it’s puffed up and holds a slight indent when poked.
Day 2
- Preheat and Prep:Preheat your oven to 450°F (230°C) with a Dutch oven or baking stone inside for at least 45 -60 minutes.
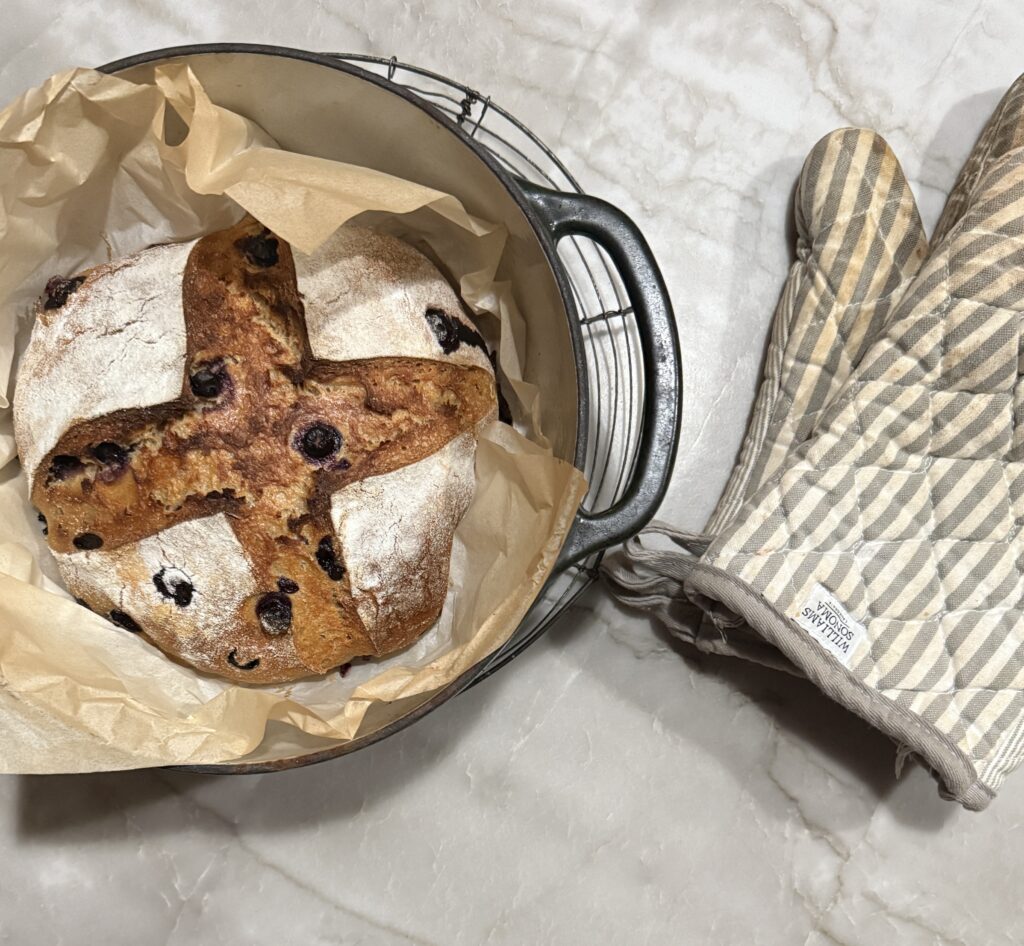
- Score and Bake:Turn the dough onto parchment paper. Score the top with a sharp blade or lame—a simple slash or “x” score works great. Add a few ice cubes and some water to a tray at the bottom of the oven. Place the dough (with parchment paper) into the hot baking vessel, cover, and bake for 25 minutes. Remove the lid and bake another 20 minutes until deep golden brown.
- Let the loaf cool on a wire rack for at least 1-2 hours before slicing. This helps the crumb set and keeps it from getting gummy.
Join Our Simple Living Community


Tools I Used
Pin For Later

Which Baking Vessel to Use
My go-to for years has been a dutch oven. I’ve used both a cast iron and an enameled one. They both make a lovely loaf. Nice, crispy crust and soft on the inside. They are an investment and you’ll keep them for a very very long time.
I found this bread baker made from pottery and I’m loving it as well. It’s so pretty and looks good sitting on the counter. If you have a love for vintage blue stripe pottery, then you’ll love this one too!
Another Option
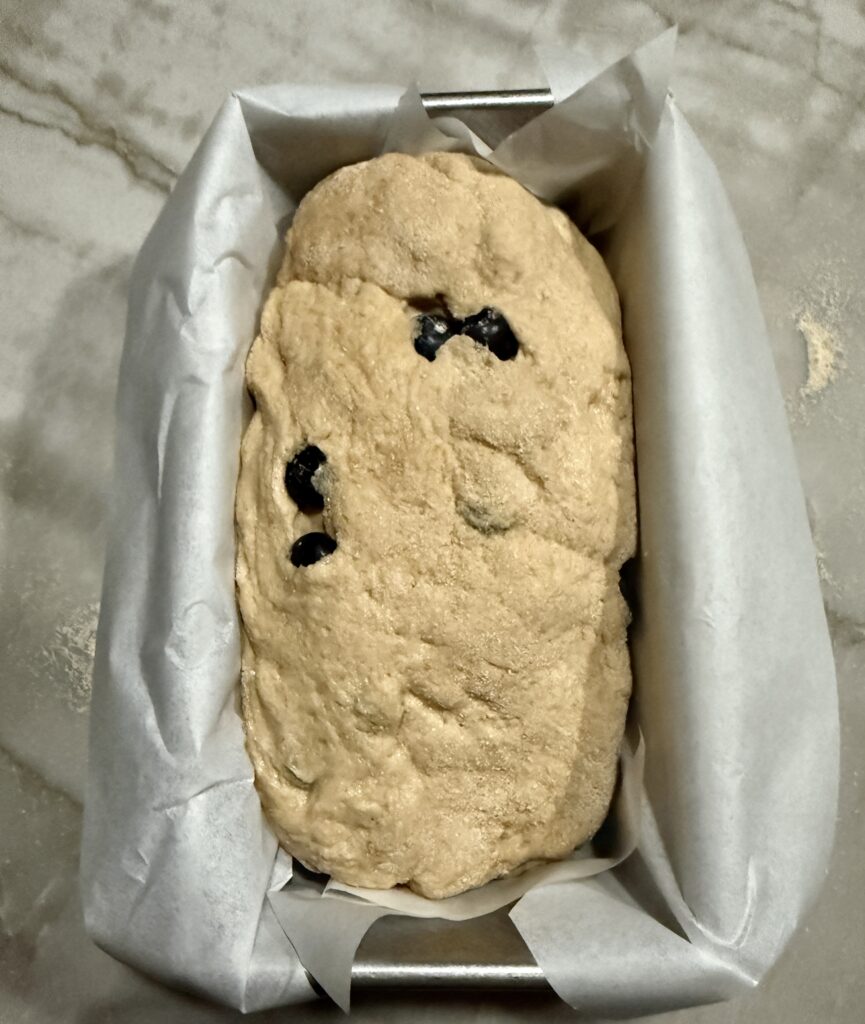
If you don’t have a dutch oven, that is ok. Most of us have a set of tin loaf pans so just use those. This is a great method if you don’t have a dutch oven or just starting out on your Sourdough journey. They actually give you a taller rise, such as if you were making a regular yeast loaf of bread. Here are the steps on what to do:
- At the shaping step, line a tin loaf pan with parchment paper. Instead of shaping your loaf into a round or an oval shape, start turning it and getting it to the shape of the loaf pan. I like to use 8×4 loaf pan sizes.
- Cover it with a towel, place in a plastic bag and refrigerate for 12-15 hours.
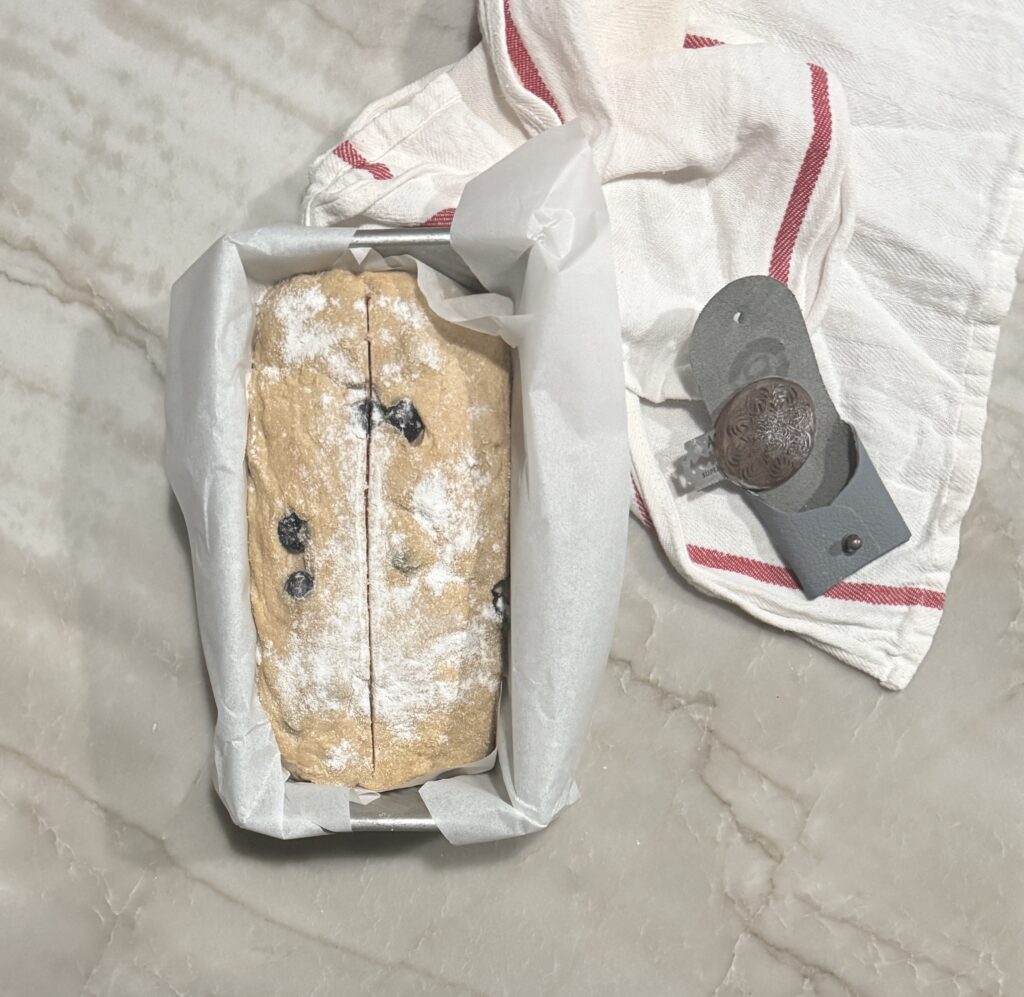
- Bake Day: Pull the loaf pan out of the fridge. Do a simple straight score down the middle or you could make slash marks at an angle on the top. You’ll need to score it somehow so the dough has room to expand.
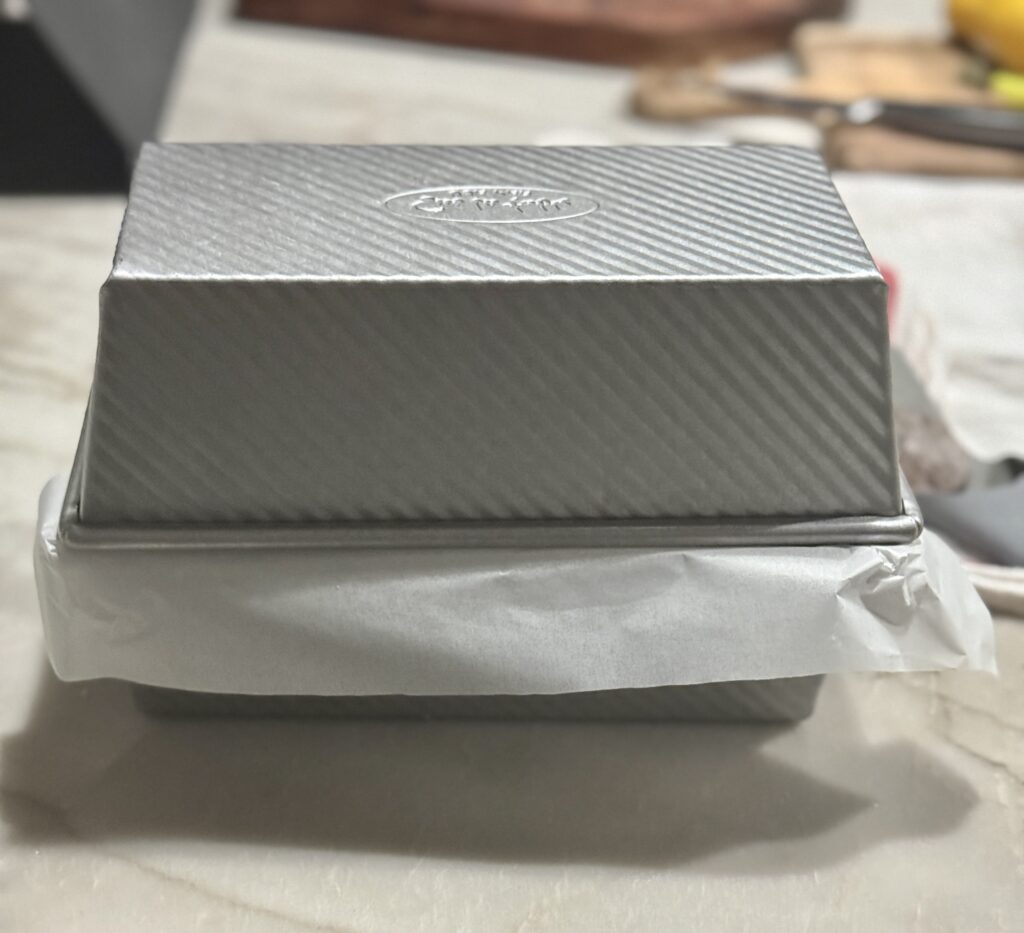
- Place in the hot oven. Put the other loaf pan on top (see photo below). This is going to replace the dutch oven lid. You’ll need the lid on to create steam. I also have a pan in the bottom of my oven that I fill with water and a few ice cubes. Bake for 25 minutes. Remove the top pan and bake for 20 minutes more. Allow to cool for 1-2 hours.
Learn To Use Mix-Ins In Other Sourdough Loaves
- Cranberry Pecan
- Tuscan
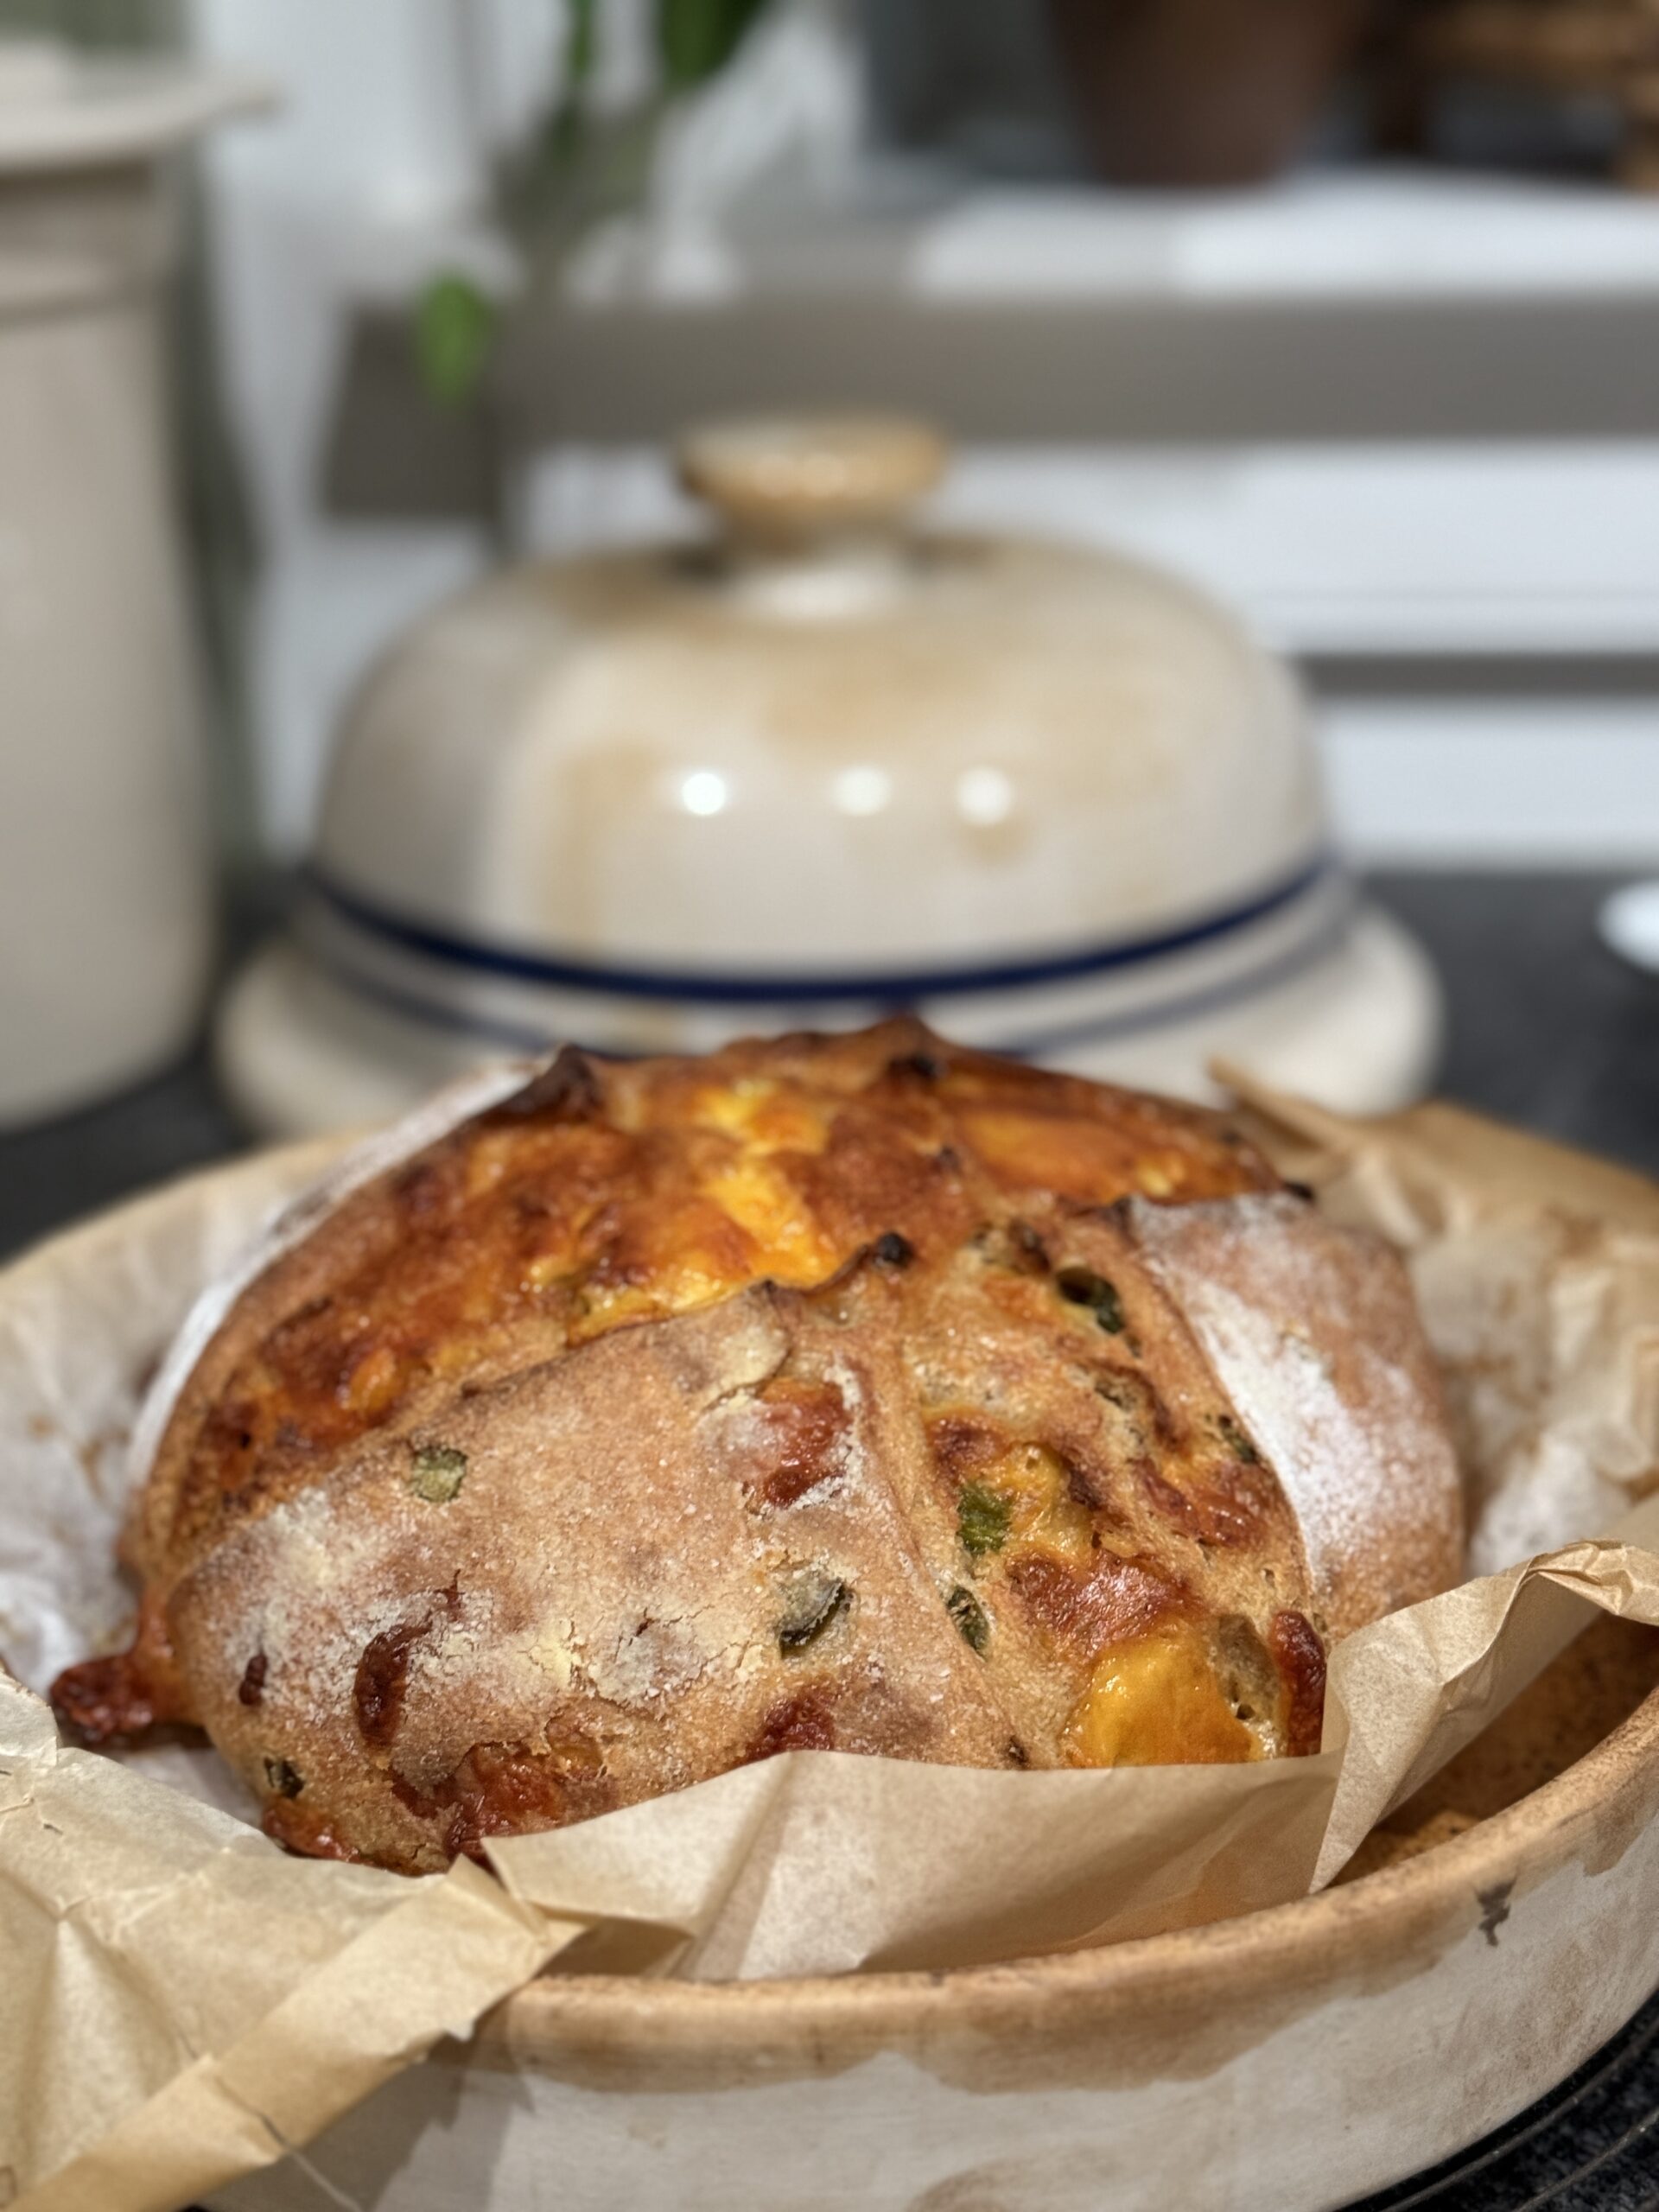
- Jalapeño Cheddar
- Cinnamon Raisin Pecan
What Goes Good With Blueberry Lemon Maple Sourdough Loaf
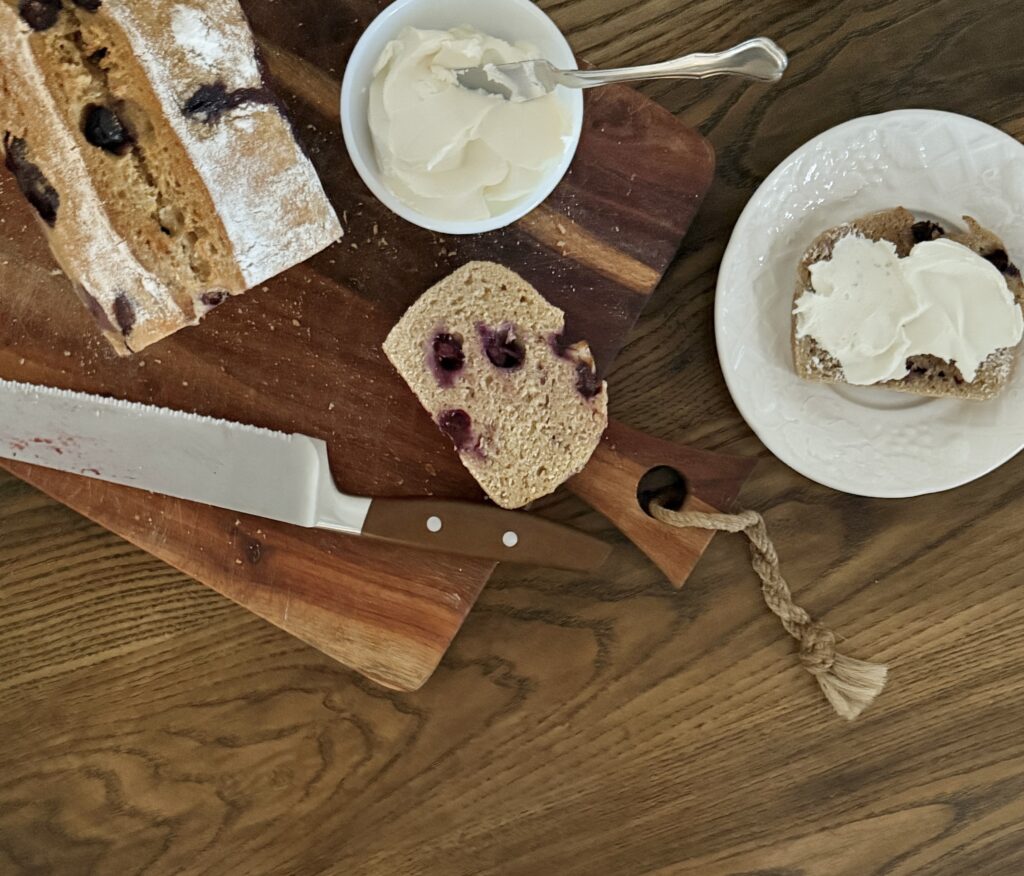
Once the loaf has cooled for a bit, top it with real butter, cream cheese or a lemon curd. This blueberry lemon maple Sourdough loaf also makes a great French toast. It would be perfect for breakfast or a nice brunch. There’s nothing like eating a slice of warm bread but I will toast it after the second day. It makes a really yummy nutritious treat.
Where To Buy Grains
I’ve been a co-op leader for BreadBecker’s since 2017. If you have a co-op near you, you can buy grains in 6 gallon buckets. Everyone pulls together to save on shipping. They deliver 3x a year. It can be a great way to stock up or if you have a large family. To fill in the gaps, I order from a few other high quality companies. I love both of their vision and mission.
Guardian Grains – (enter code lhsimpleliving for 15% off)
Sunrise Flour Mill – (receive 20% off, no code needed)
- No Tillage: tillage breaks down the fungal network in the soil which is essential for raising fully self sustaining plants.
- No Fertilizers either organic or synthetic.
- No Seed Treatments
- No GMO
- No Insecticide
- No Fungicide
- No pre-harvest desicant
Blueberry Lemon Maple Sourdough Loaf
Ingredients
Method
- Mix the Dough (Autolyse):In a large bowl, combine the starter and water. Add the flour and stir until no dry spots remain. It’ll be shaggy and sticky—don’t worry! Cover and let it rest for 15 minutes. This helps the flour hydrate and kickstarts gluten development.
- Add Salt:After the rest, add the salt. Mix by hand (pinching and folding) or with a spoon until fully incorporated. The dough will feel wet and stretchy.
- Bulk Fermentation with Stretch and Folds:Over the next 4 hours, let the dough rest. It will rise and be puffy, usually increasing in size by 50%. Timing depends on your starter’s strength and room temp.Next, over the next 2 hours, perform 4 sets of stretch and folds every 30 minutes. To do this, wet your hands, grab one side of the dough, stretch it up, and fold it over the center. Rotate the bowl 90 degrees and repeat for all four sides. This builds strength in the dough.After the second fold, gently mix in 1/4 of the blueberries, lemon and maple syrup. Spread them evenly as you fold to avoid clumping. Continue spreading the mix-ins evenly with the third and forth stretch n’ fold, distributing it throughout each step. Be gentle so it doesn’t mess with the dough. Basically, you’ll add 1/4 of the mix-ins into each stretch and fold (starting the 2nd one).
- Shape the Loaf:Turn the dough onto a lightly floured surface. Gently shape it into a round or oval loaf by folding the edges toward the center, like the shape of an envelope. Move the dough back and forth on the counter, rolling a ball and creating tension. For the final shape, flip it seam-side up, tighten it into a ball (or batard), and place it seam-side up in a floured proofing basket or a bowl lined with a floured tea towel.
- Second Rise (Proofing):Cover with a grocery bag and let it proof in the refrigerator overnight (12-15 hours) for a slower ferment and deeper flavor. It’s ready when it’s puffed up and holds a slight indent when poked.
- Preheat and Prep:Preheat your oven to 450°F (230°C) with a Dutch oven or baking vessel of choice, inside for at least 45 -60 minutes.
- Score and Bake:Turn the dough onto parchment paper. Score the top with a sharp blade or lame. A simple slash or “x” score works great. Add a few ice cubes and some water to a tray at the bottom of the oven. Place the dough (with parchment paper) into the hot baking vessel, cover, and bake for 25 minutes. Remove the lid and bake another 20 minutes until deep golden brown.
- Let the loaf cool on a wire rack for at least 1-2 hours before slicing. This helps the crumb set and keeps it from getting gummy.
Notes
- Starter Check: Make sure your starter is at its peak—doubling in size within 4-6 hours of feeding.
- Hydration: If your dough feels too stiff, add a splash more water (5-10g) when mixing. Sourdough can vary based on flour and humidity.
- Baking: After the lid comes off, bump the heat down to 400 allowing your loaf not to burn.
- You can use all-purpose flour but you’ll need to adjust the water amount. Freshly-milled flour absorbs more water. I always start with 350 grams and add more if needed, depending on what wheat I’m using.
I hope you enjoy this delicious Blueberry Lemon Maple Sourdough Loaf. It’s perfect for a Spring/Summer breakfast or afternoon treat. Tag me over on Instagram if you make this loaf. I’d love to see yours!

Wendy Lea Walker, NTP
Nutritional Therapy Practitioner

Leave a Reply