

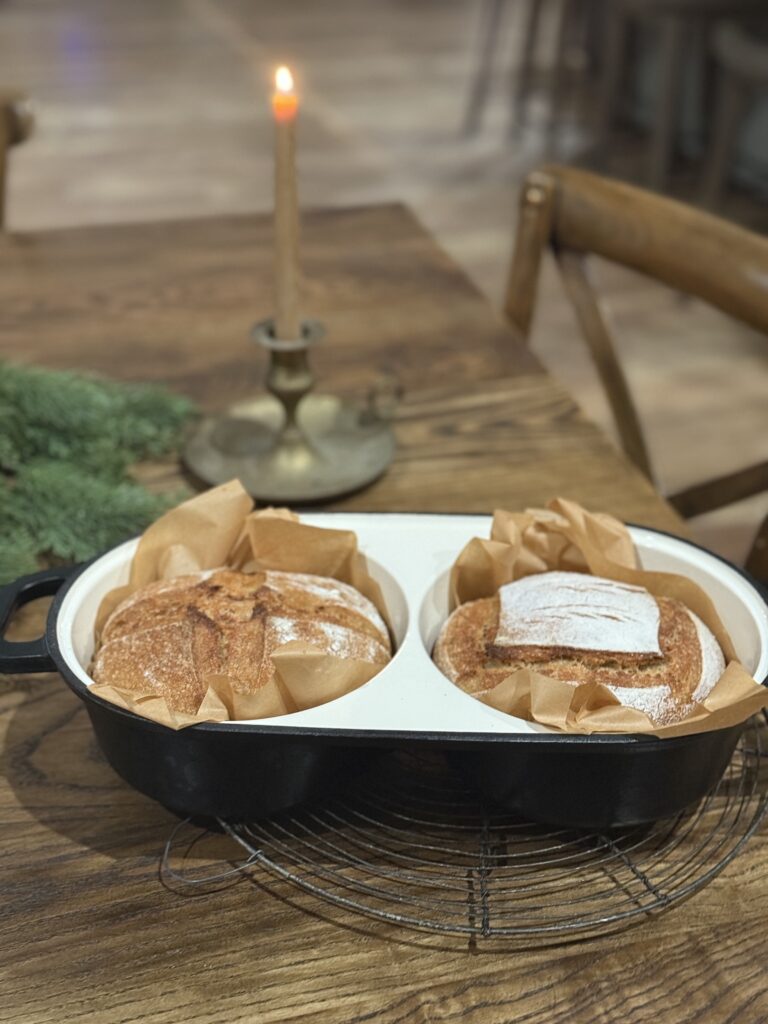
There’s nothing like a warm bowl of soup or your favorite stew during fall or winter. What’s even better is serving it in these adorable Sourdough Bread Bowls. Even better is that they are made with fresh-milled flour.
{Jump to Recipe}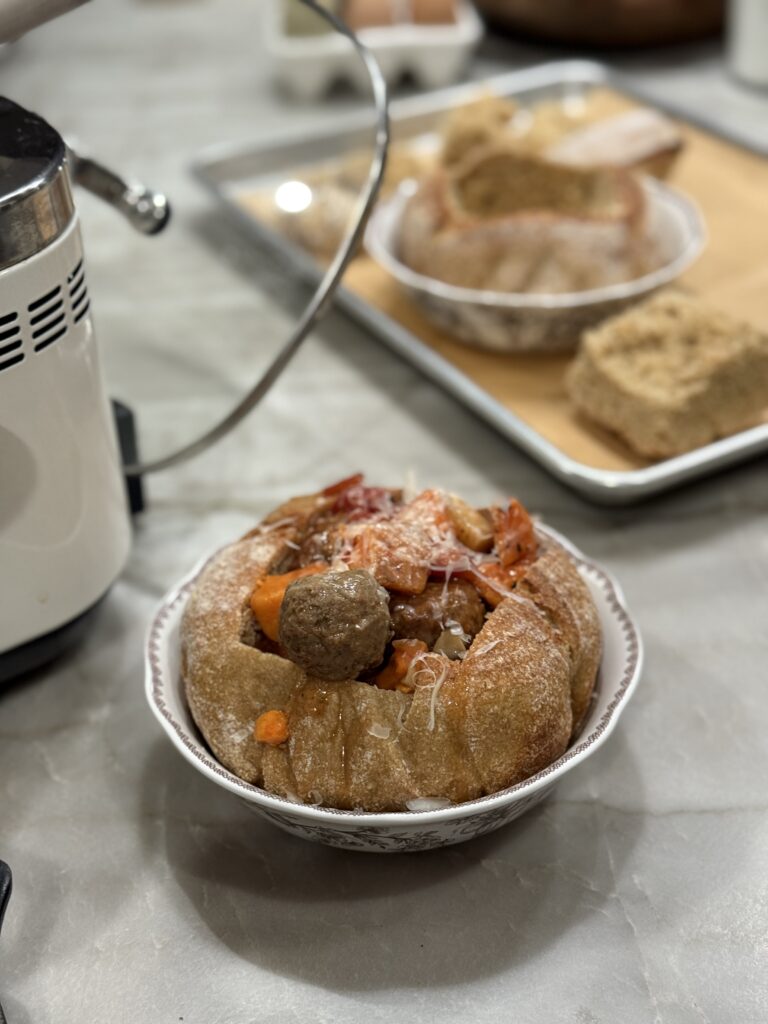
Ingredients
115 grams of active sourdough starter
450 grams of water
13 grams of salt
300 grams of fresh-milled hard-white wheat flour
300 grams of fresh-milled khorasan flour
Directions
Day 1
- You will need your food scale.
- Combine your active starter and water in a bowl. Using a danish whisk, stir together until thoroughly combined.
- Add your flour and stir. Your dough will look shaggy. Cover the bowl and let it rest (autolyse) for 30 minutes.
- Add the salt to your dough. Stir or use your hands to mix it all together.
- Now, cover the bowl with a towel and place your dough in a warm spot for bulk fermentation. With fresh-milled flour, my dough is always ready at 4 hours. It may take longer if using another type of flour and/or if your house is cool. The key isn’t the timing but when your dough is done proofing, it should have tiny holes on the bottom of the dough.
Join Our Simple Living Community


Stretch n’ Folds
- Start by pulling the dough up towards you on one side. Pull it back down. Turn the bowl towards your right and repeat four of these stretch n’ folds. You’ll do this every 20-30 minutes for two hours. So, four sets of stretch and folds.
Shaping/Cold Proof
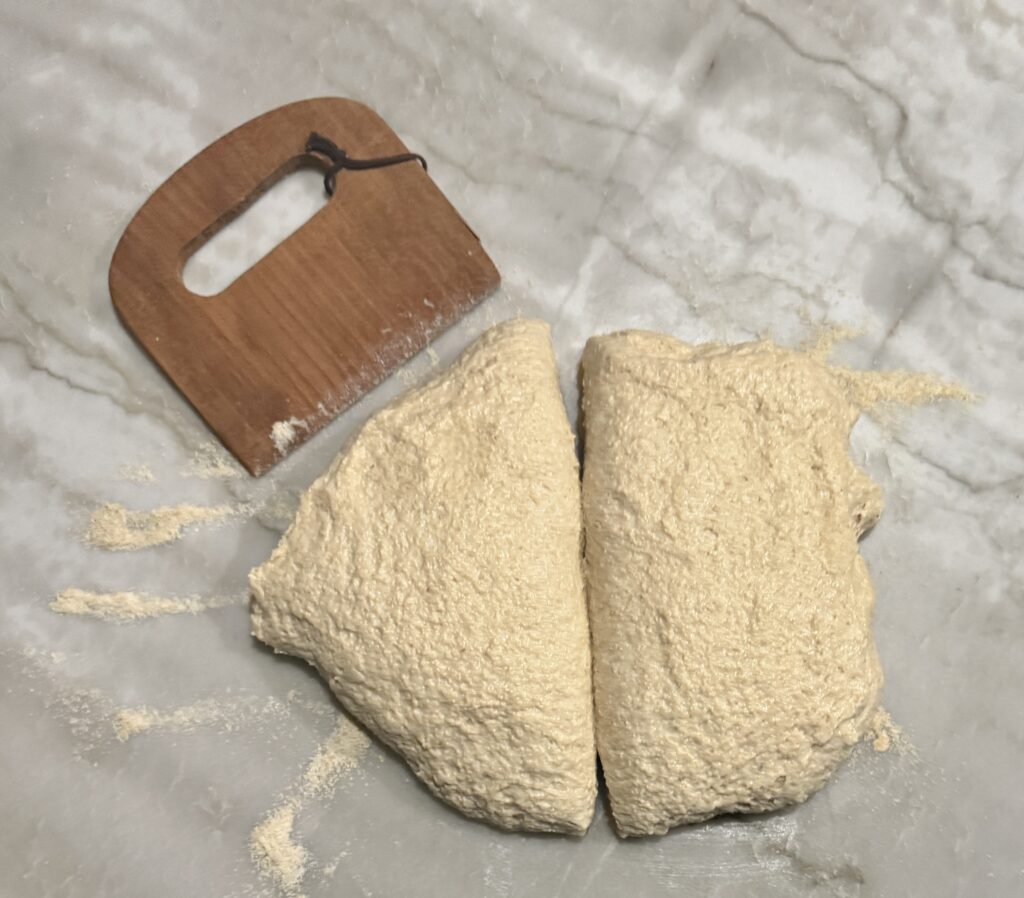
- On a clean surface, sprinkle a dusting of flour and place your dough on top. Cut your dough in half with a knife or bench scraper.
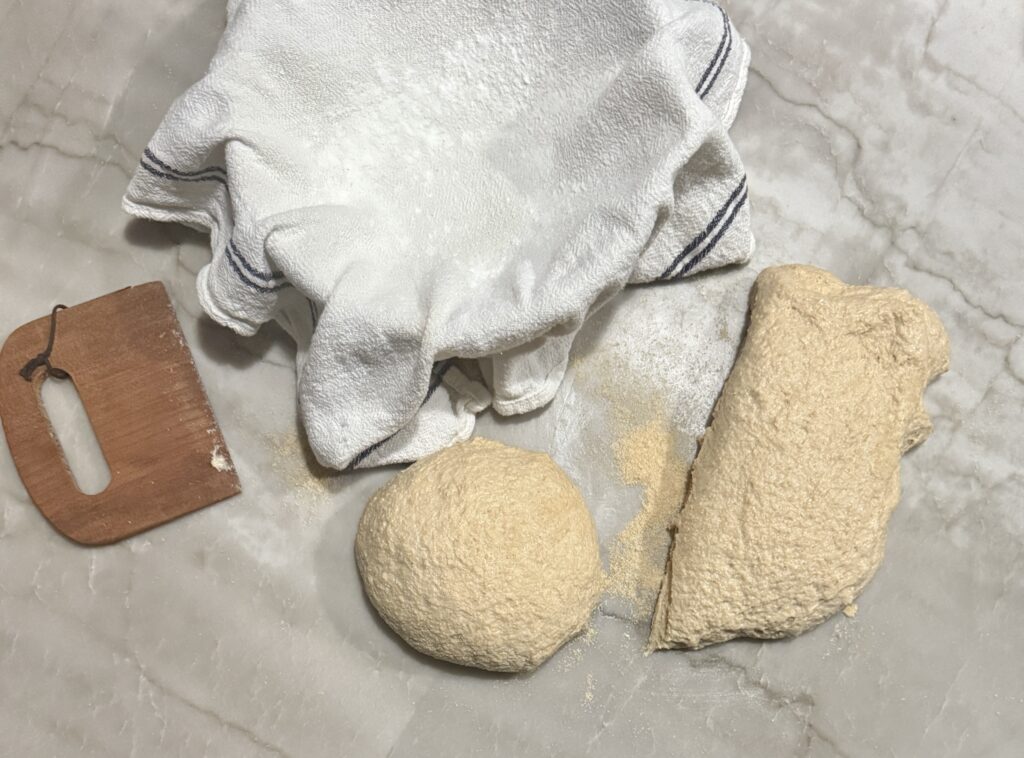
- Take each piece of dough (separately) and stretch it out into the shape of a small rectangle. Pull the right side out and then fold it in. Do the same thing with the left side. Next, pull the section in front of you up and then down.It should resemble the shape of an envelope.
- Now, start moving the dough back and forth towards you, creating tension. You’ll start shaping it into a round ball.
- Place a towel in your banneton baskets or small bowls. Dust a little bit of flour so the dough doesn’t stick.
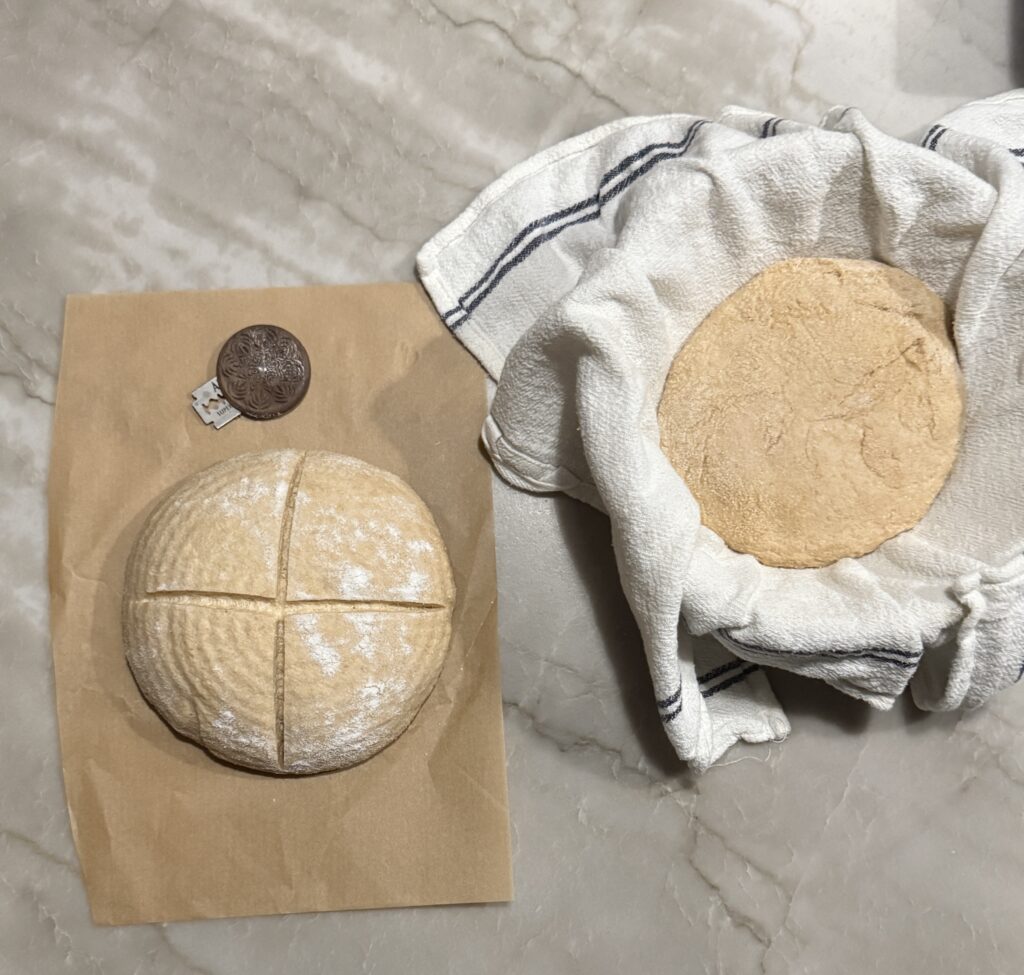
- Turn your ball upside down and place in the basket. The bottom of the loaves should be on the top. Fold the towel in and place in a plastic grocery bag.
- Final step for the night: place your dough bowls in the fridge to cold proof overnight. You can usually go 8-24 hours. Mine are perfect right at the 12 hour mark.
Sourdough Made Simple
Grab the Sourdough Made Simple Guide on how to keep your sourdough bread baking at a minimum. It doesn’t have to be so fussy or use all these rules that you see everyone else doing. It’s packed with over 50 pages of tutorials, videos, baking schedule, knowledge of fresh-milled flour and my tried and tested Rustic Sourdough Loaf recipe that I use in my own kitchen every single week.
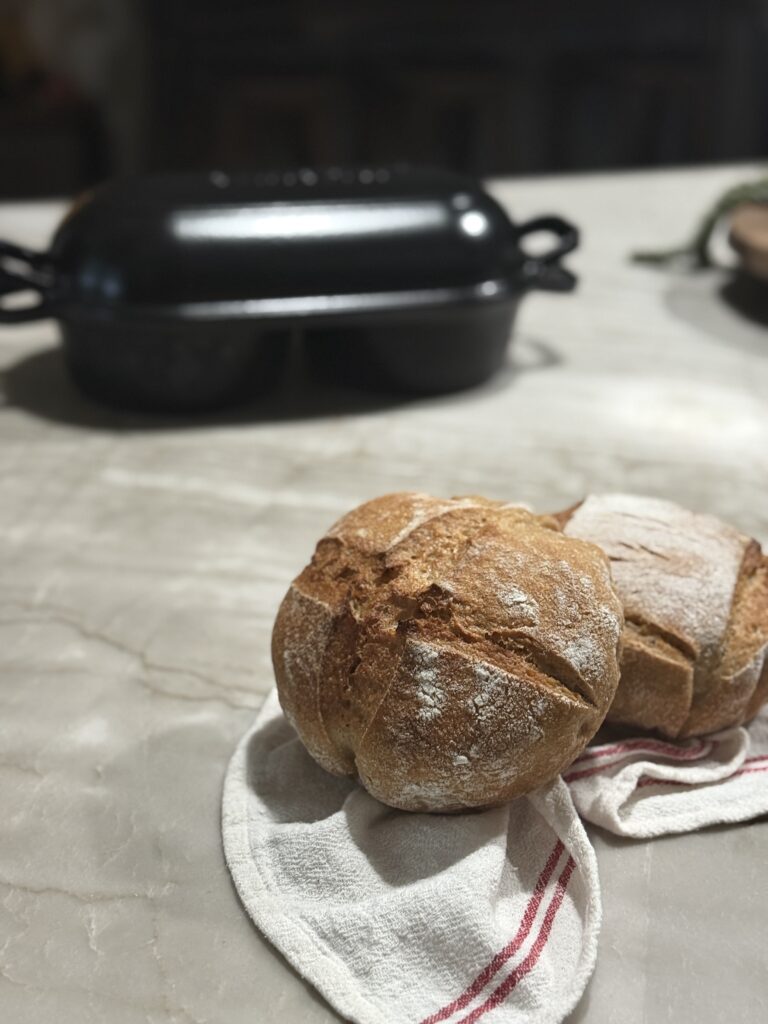
Day 2 – Bake Day
- Preheat your oven to 450°and place your baking vessel (Dutch oven or any pan with a lid) inside the oven to warm up for 30 minutes.
- About 10 minutes before the oven is finished warming up, pull your dough out of the fridge. Place a piece of parchment paper on top of the dough. You will now flip it over so the dough is sitting on the parchment paper. Score your loaf.
- Place the little bread loaves in the baking vessels. Put the lids on and bake for 20 minutes. Remove the lid and bake for 15 minutes. The tops of the loaves should be golden and crispy. I also fill a tray in the bottom of my oven with water and a few ice cubes to create steam while they are baking.
- Remove from the oven and allow to cool.
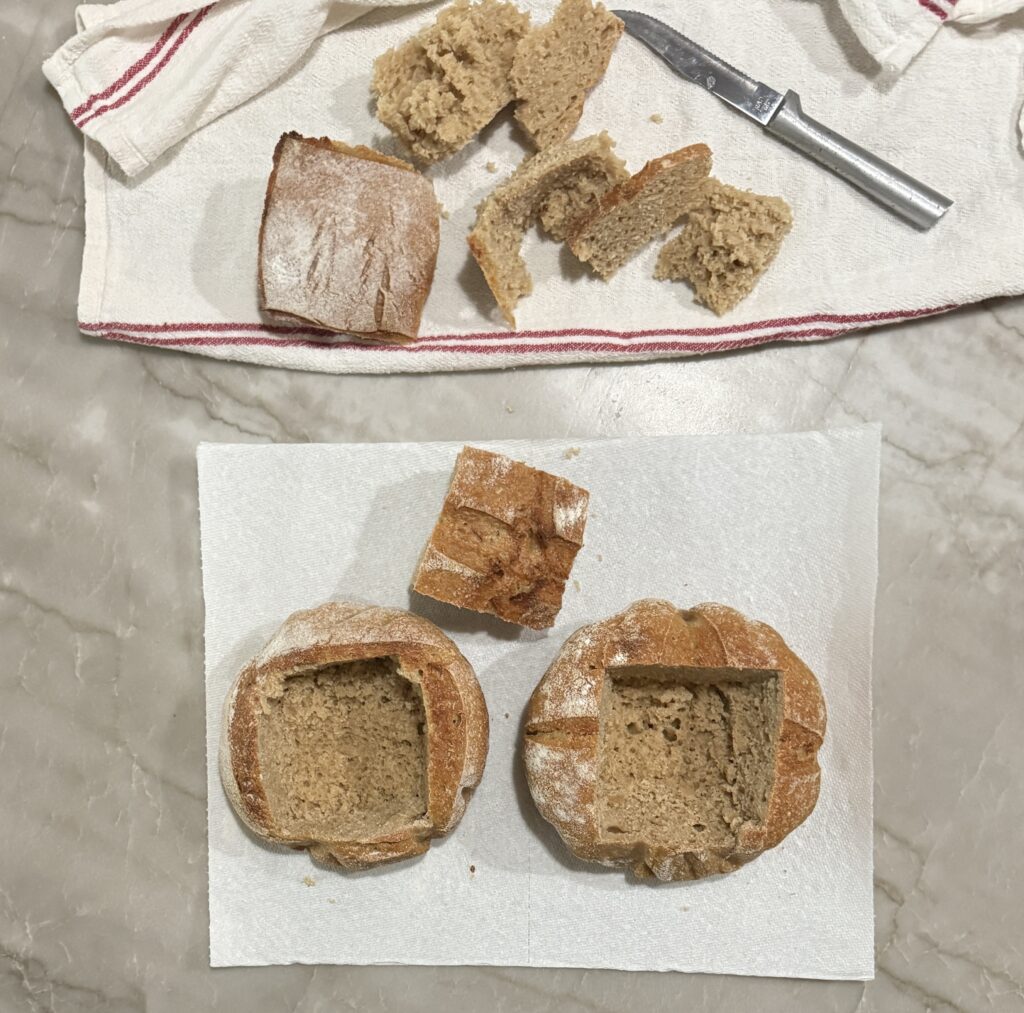
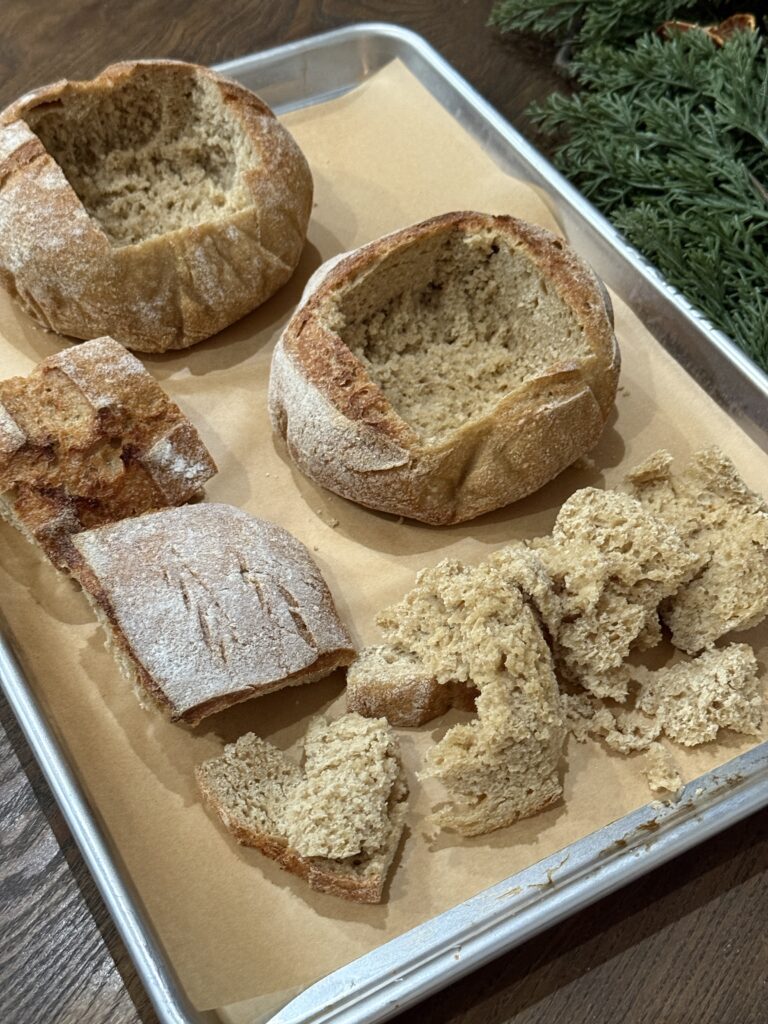
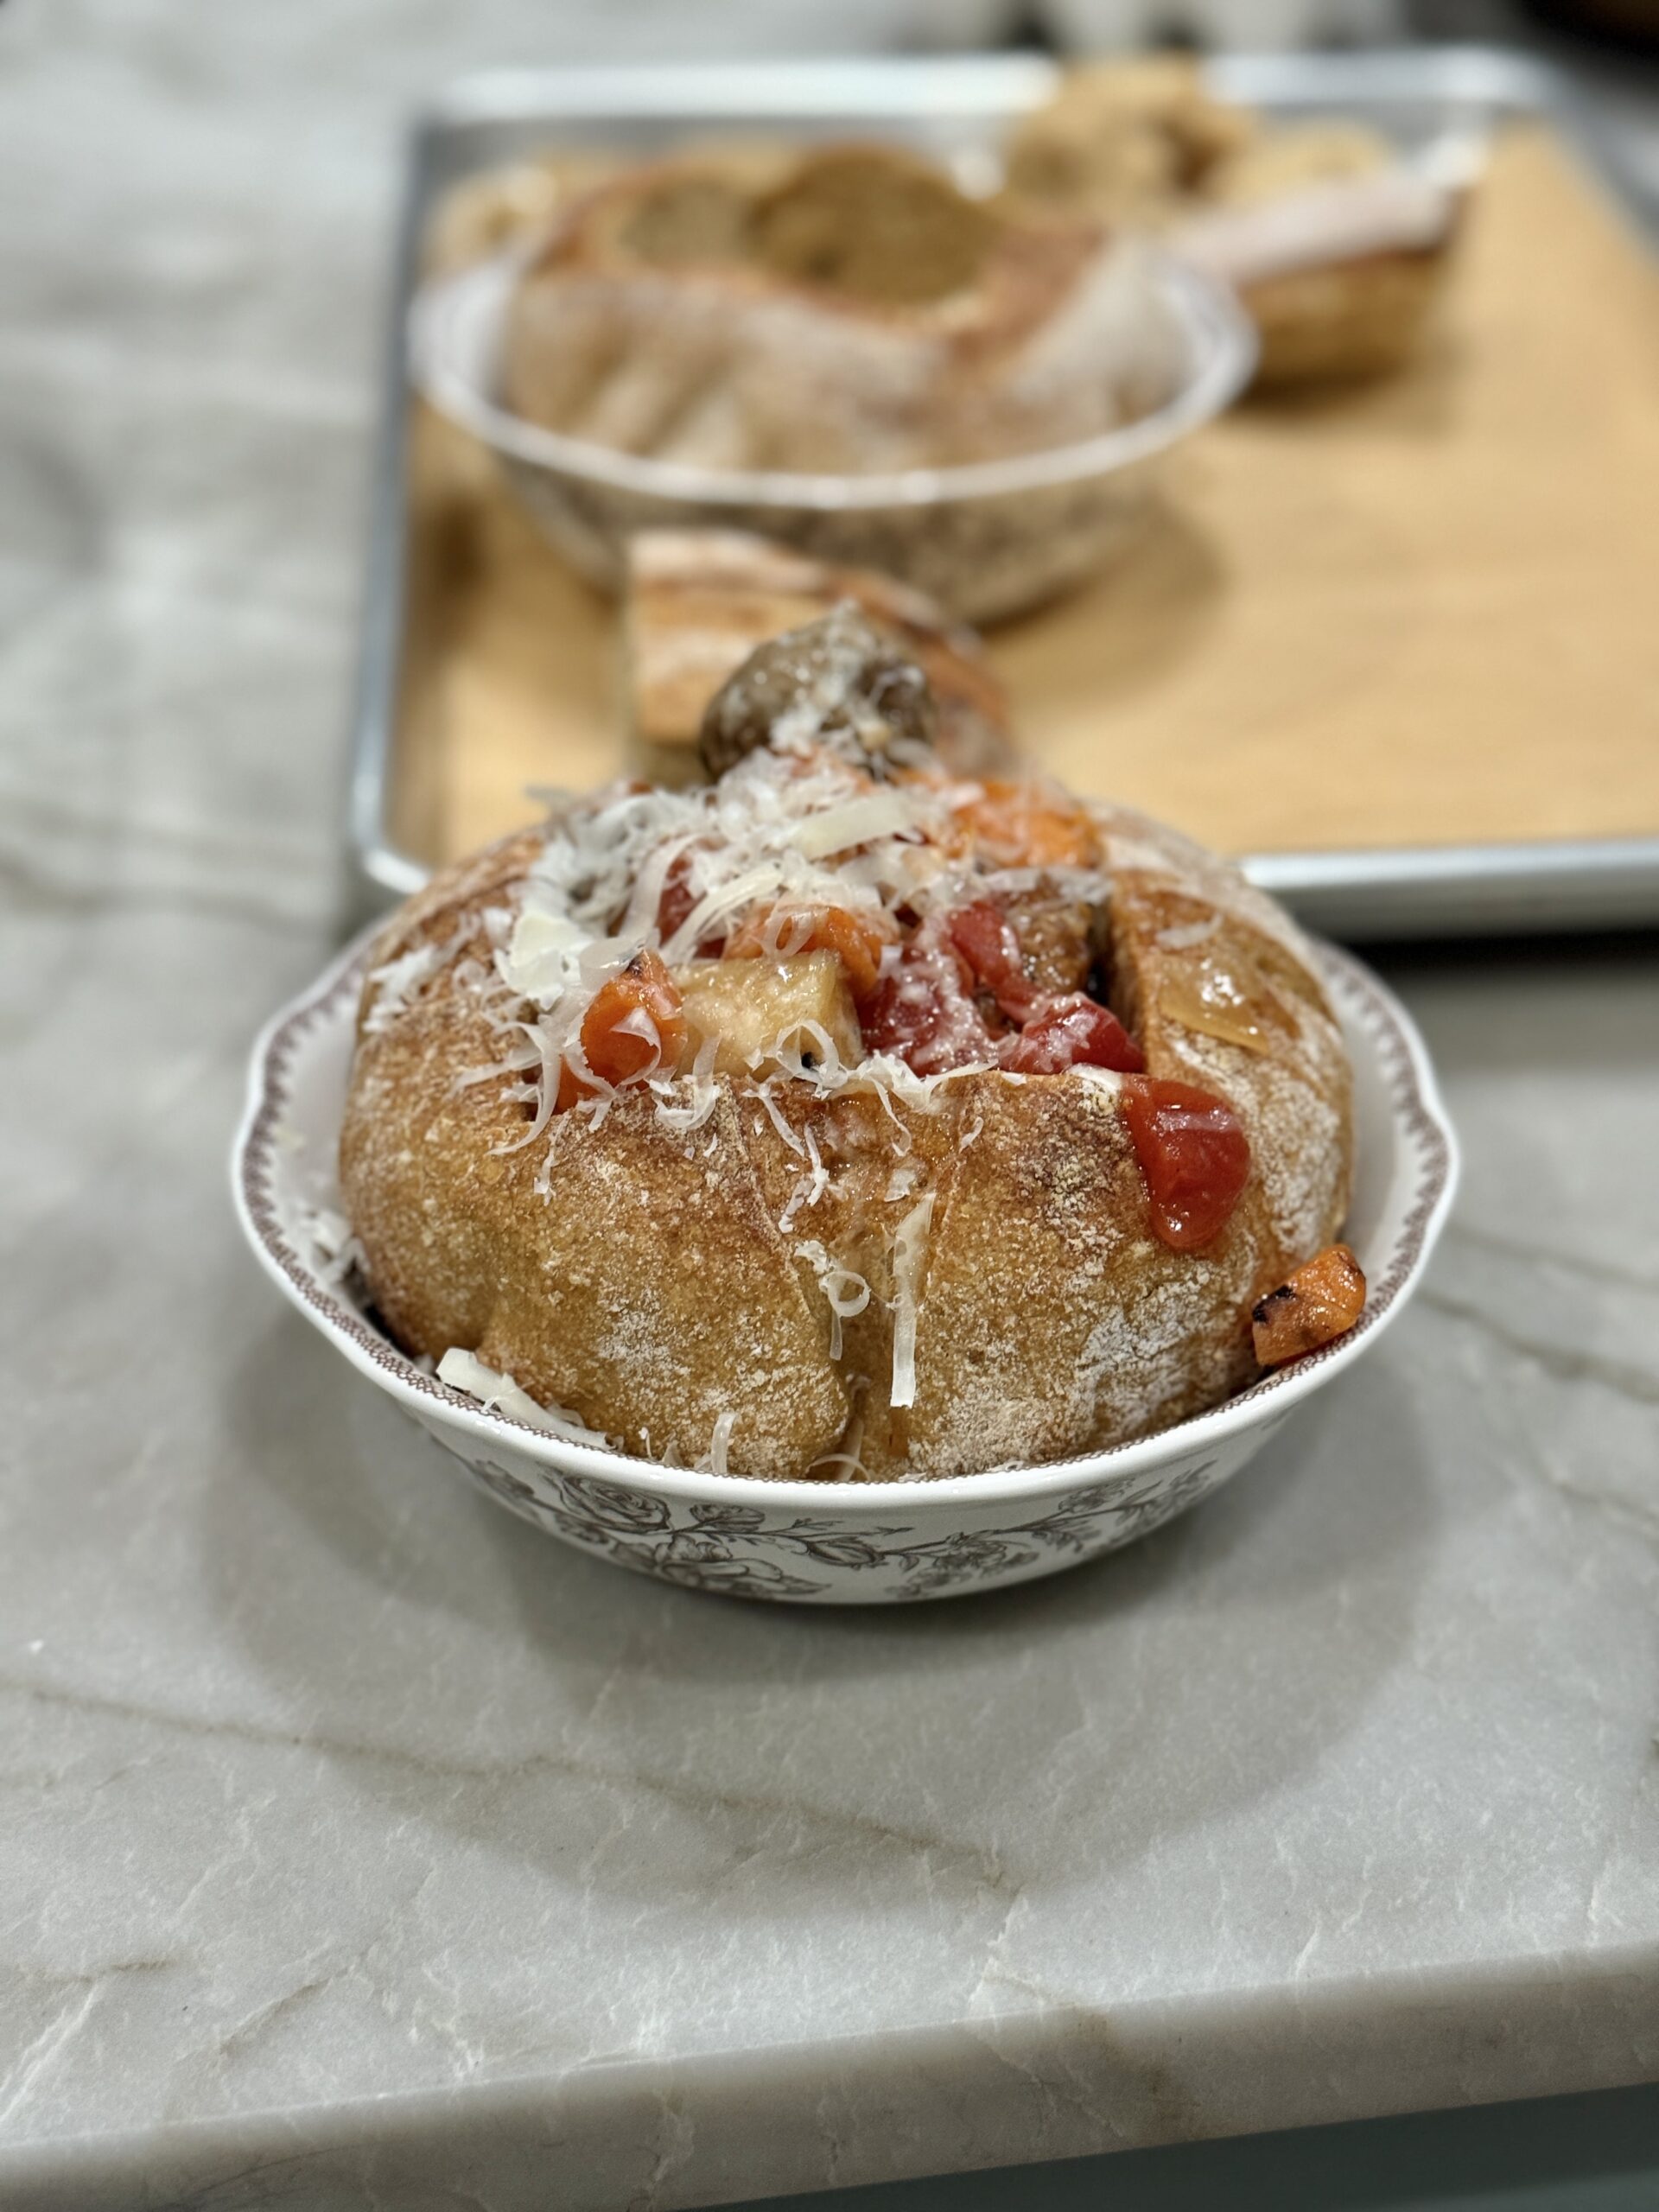
How to Cut the Bread Bowls
- Using a knife, cut a “square” on the top of the loaf. Pull the section out. I like to just use my hands.
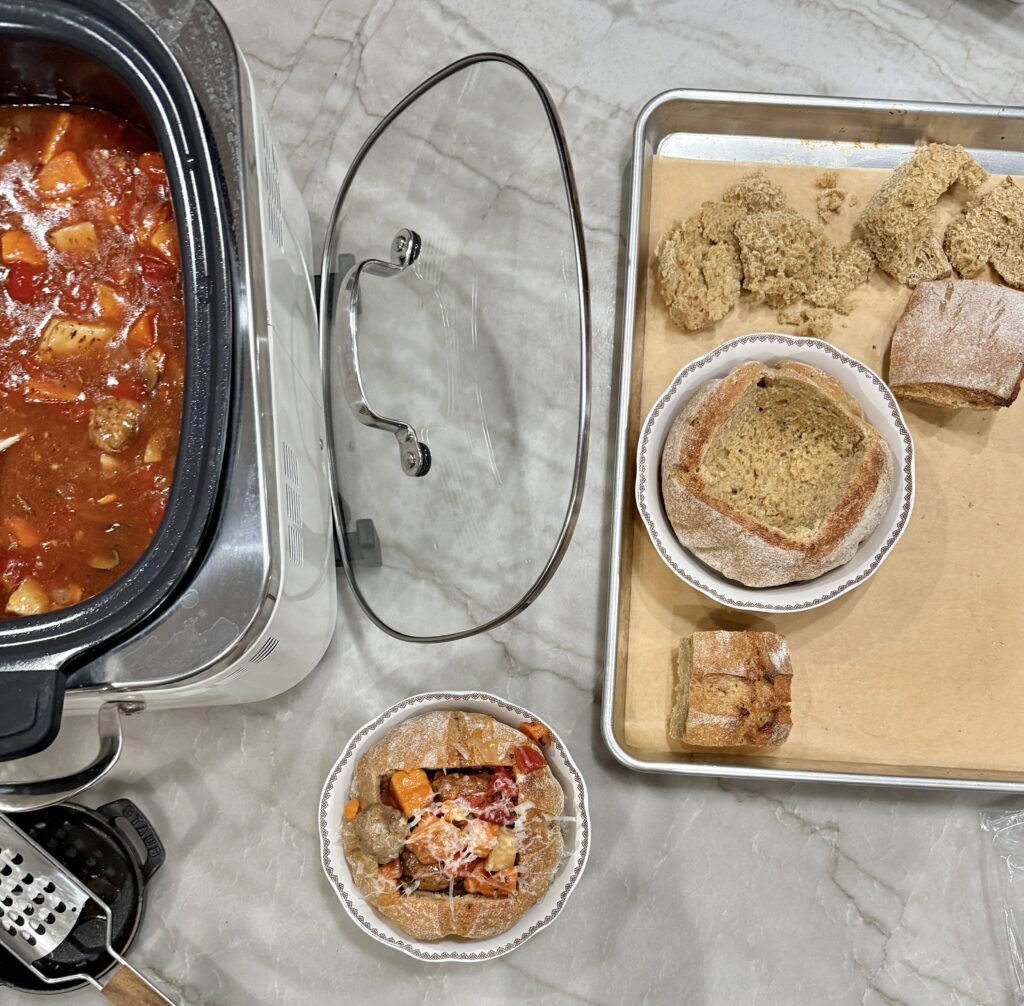
- Keep scooping out enough of the bread to create space to fill the bowl with your favorite soup or stew.
- You can either save the bread to eat with your meal or create bread crumbs.
- If you’ve baked your bread bowls in the morning, just place them on a parchment lined baking sheet and warm them up for about 10-15 minutes in a 300°oven.
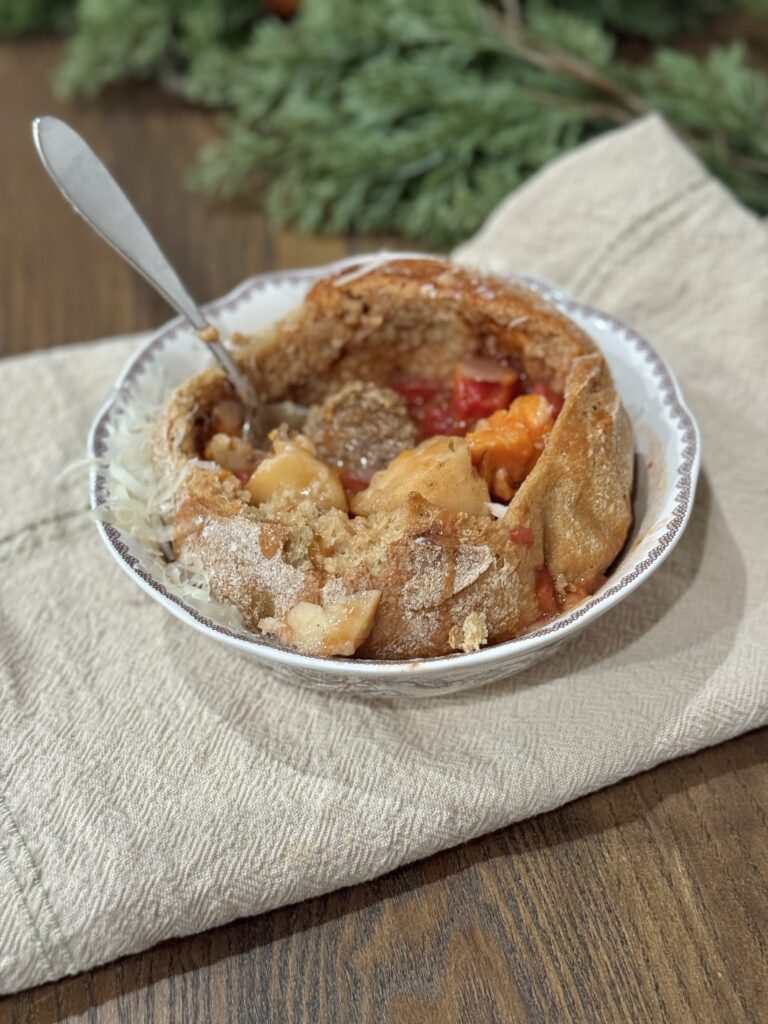
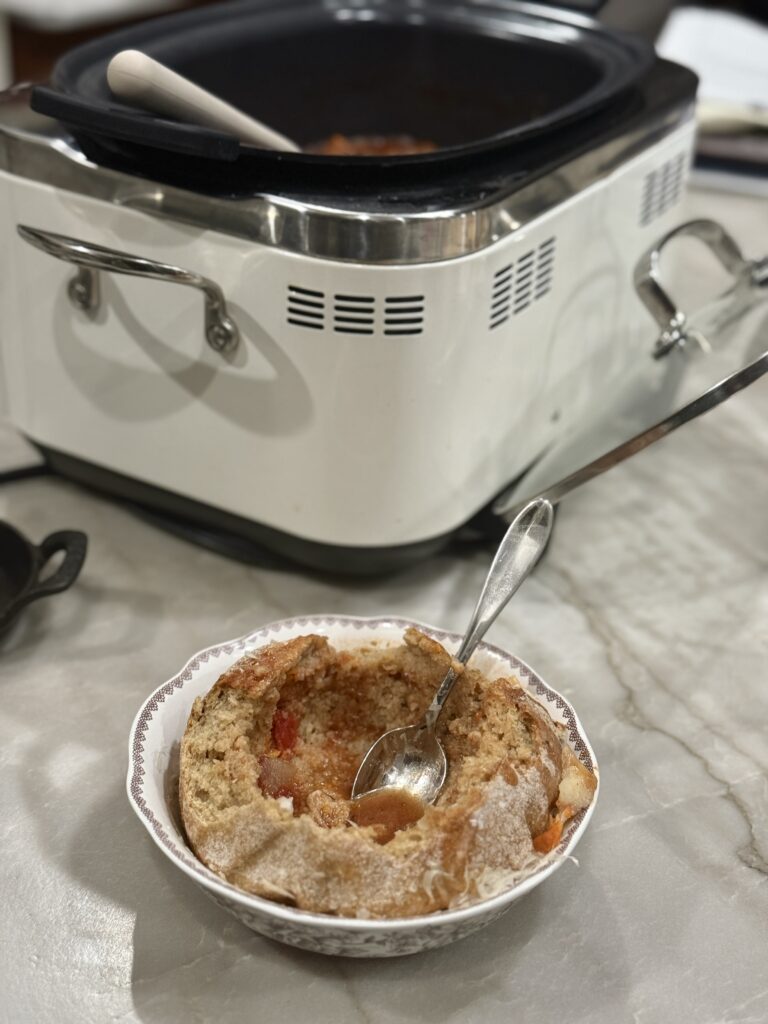
- I like to place my bread bowls in a real bowl, just in case for leaking. Ladle your favorite soup/stew and enjoy!
Pin For Later

See my full disclosure here.
Tips
- I am using fresh-milled flour. If you choose to use another flour, make the adjustments for water. Fresh-milled wheat absorbs more liquid and other flours do not.
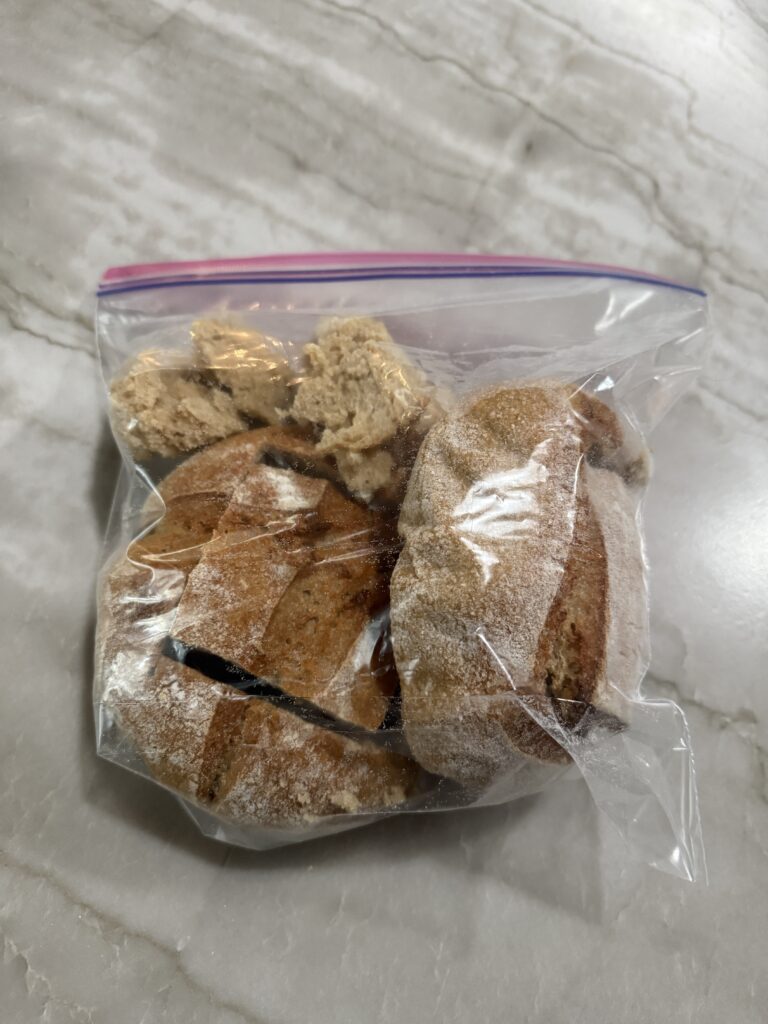
- If freezing these bread bowls, pre-cut the tops off and pop them in the bag along with the bowls. You can also make bread crumbs out of the scrap pieces.
- I like to place the bread bowl inside a real bowl just in case the soup would leak out as you’re eating it.
Do These Sourdough Bread Bowls Freeze Well?
Yes, yes they do! I froze thee two loaves back in December as I knew I’d be making a lot of soup in January and February. I went ahead and pulled the bread from inside the bowl and just stuck everything in a ziplock bag. When you get ready to use them, take them out of the freezer that morning. When you are reading to serve your meal, place on a parchment lined baking sheet for about 10-15 minutes in a 300°oven to warm them up. Will last in the freezer for 2-3 months.
Why Use Fresh-Milled Flour?
Whole Grain Benefits
- Whole grains offer a “complete package” of health benefits, unlike refined grains, which are stripped of valuable nutrients in the refining process.
- As stated above, all whole grain kernels contain three parts: the bran, germ, and endosperm. Each section houses health-promoting nutrients. The bran is the fiber-rich outer layer that supplies B vitamins, iron, copper, zinc, magnesium, antioxidants, and phytochemicals. Phytochemicals are natural chemical compounds in plants that have been researched for their role in disease prevention.
The germ is the core of the seed where growth occurs; it is rich in healthy fats, vitamin E, B vitamins, phytochemicals, and antioxidants. The endosperm is the interior layer that holds carbohydrates, protein, and small amounts of some B vitamins and minerals.
These components have various effects on our bodies:
- Bran and fiber slow the breakdown of starch into glucose—thus maintaining a steady blood sugar rather than causing sharp spikes.
- Fiber helps lower cholesterol as well as move waste through the digestive tract.
- Fiber may also help prevent the formation of small blood clots that can trigger heart attacks or strokes.
- Phytochemicals and essential minerals such as magnesium, selenium and copper found in whole grains may protect against some cancers.
Items Used in this Recipe
Slow-Cooker (for the Harvest Meatball Stew)
Recipes That Would Be Good in Bread Bowls
Old-Fashioned Chicken and Dumplings
Resources
www.wholegrainscouncil.org
The history and processes of milling
Sourdough Bread Bowls (using fresh-milled flour)
Ingredients
Method
- You will need your food scale.
- Combine your active starter and water in a bowl. Using a danish whisk, stir together until thoroughly combined.
- Add your flour and stir. Your dough will look shaggy. Cover the bowl and let it rest (autolyse) for 30 minutes.
- Add the salt to your dough. Stir or use your hands to mix it all together.
- Now, cover the bowl with a towel and place your dough in a warm spot for bulk fermentation. With fresh-milled flour, my dough is always ready at 4 hours. It may take longer if using another type of flour and/or if your house is cool. The key isn't the timing but when your dough is done proofing, it should have tiny holes on the bottom of the dough.
- Start by pulling the dough up towards you on one side. Pull it back down. Turn the bowl towards your right and repeat four of these stretch n' folds. You'll do this every 20-30 minutes for two hours. So, four sets of stretch and folds.
- On a clean surface, sprinkle a dusting of flour and place your dough on top. Cut your dough in half with a knife or bench scraper.
- Take each piece of dough (separately) and stretch it out into the shape of a small rectangle. Pull the right side out and then fold it in. Do the same thing with the left side. Next, pull the section in front of you up and then down.It should resemble the shape of an envelope.
- Now, start moving the dough back and forth towards you, creating tension. You'll start shaping it into a round ball.
- Place a towel in your banneton baskets or small bowls. Dust a little bit of flour so the dough doesn't stick.
- Turn your ball upside down and place in the basket. The bottom of the loaves should be on the top. Fold the towel in and place in a plastic grocery bag.
- Final step for the night: place your dough bowls in the fridge to cold proof overnight. You can usually go8-24 hours. Mine are perfect right at the 12 hour mark.
- Preheat your oven to 450° and place your baking vessel (Dutch oven or any pan with a lid) inside the oven to warm up for 30 minutes.
- About 10 minutes before the oven is finished warming up, pull your dough out of the fridge. Place a piece of parchment paper on top of the dough. You will now flip it over so the dough is sitting on the parchment paper. Score your loaf.
- Place the little bread loaves in the baking vessel(s). Put the lid on and bake for 20 minutes. Remove the lid and bake for 15 minutes. The tops of the loaves should be golden and crispy. I also fill a tray in the bottom of my oven with water and a few ice cubes to create steam while they are baking.
- Remove from the oven and allow to cool.
- Using a knife, cut a "square" on the top of the loaf. Pull the section out. I like to just use my hands.
- Keep scooping out enough of the bread to create space to fill the bowl with your favorite soup or stew.
- You can either save the bread to eat with your meal or create bread crumbs.
- If you've baked your bread bowls in the morning, just place them on a parchment lined baking sheet and warm them up for about 10-15 minutes in a 300° oven.
- I like to place my bread bowls in a real bowl, just in case for leaking. Ladle your favorite soup/stew and enjoy!
Notes
- I am using fresh-milled flour. If you choose to use another flour, make the adjustments for water. Fresh-milled wheat absorbs more liquid and other flours do not. You’ll need to adjust to whatever flour you use.
- If freezing these bread bowls, pre-cut the tops off and pop them in the bag along with the bowls. You can also make bread crumbs out of the scrap pieces.
- I like to place the bread bowl inside a real bowl just in case the soup would leak out as you’re eating it.
I hope you enjoy making this recipe and that it will benefit you and your family all year long. Please share this post over on Pinterest and tag me on Instagram. I’d love to see how you make yours.

Wendy Lea Walker, NTP
Nutritional Therapy Practitioner
I’m Wendy. A wife, empty-nester mama, homemaker, homebaker, gardener and small-time farmer. I love sharing wisdom and mistakes I’ve learned along the way. Anyone can garden or homestead, no matter where you live. It’s a mindset. You just have to start somewhere. I believe food is medicine. Feed the body real whole foods and healing will begin. I’m an advocate for eating real food and enjoy sharing all my fresh-milled flour recipes. I’ve learned to slow down over the years from all the noise that came with life and enjoy creating a simple home.

Wow! This sound so good! I don’t know why I’ve never thought to make fresh sourdough bread bowls.
Thank you and yes, they are perfect for a warm bowl of soup!