

I love dill pickles and I especially love garlic dill pickles. I used to can pickles way back in the day haha. I’d say about 10-12 years ago I was canning them. I did it for several years but you know what? They were always soggy. If I’m eating a dill pickle, it has to have a lot of crunch. Do you know what I’m saying? That’s what I get when I bite into my Fermented Garlic Dill Pickles.
You are going to love these and they are so easy to make. They also have a lot of health benefits when you ferment them. There’s no canning involved and you can have homemade crunchy pickles ready to munch on in about a week.

What Are Fermented Foods
Fermenting vegetables starts with Lacto-fermentation. It basically converts the starches in the vegetables into lactic acid by the bacteria lactobacilli. This makes fermented foods rich in probiotics. They are excellent for your digestive system. You can actually ferment pretty much any vegetable. Start with about 1 tablespoon of the fermented vegetable until your body gets used to it. As much as you’re going to want to eat the entire jar, too much of it at first can cause bloating.


How To Make Fermented Garlic Dill Pickles
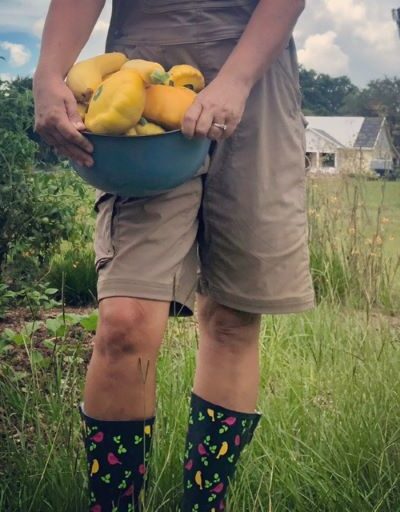
- Grow or buy Boston pickling cucumbers. I grew mine this year and what a difference it made just picking them from the vine and bringing them into my kitchen. Just make sure they are fresh picked.
- Grab a mason jar. You can make these pickles in small batches or in a big gallon jar. That really just depends on what best serves your family.
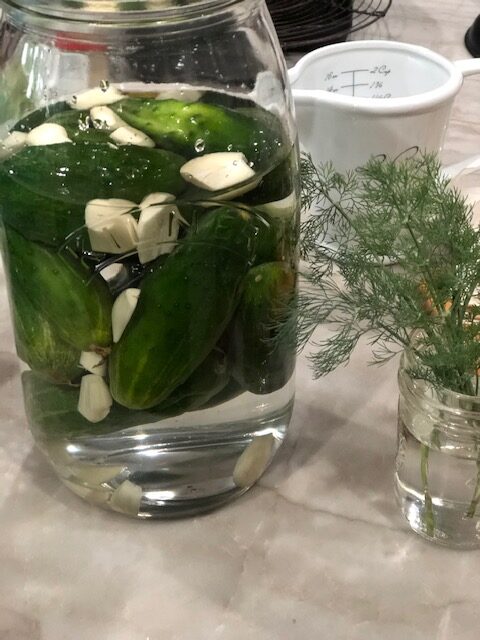
- Cut the blossom end of the cucumber off and wash thoroughly. You can then pack your jar with either whole, sliced, or spear cucumbers. Pack the jar tight.
- Next, add the water and salt brine mixture. Make sure it covers the cucumbers.
- You will need some kind of weight to put on top. This will make sure the pickles stay underneath the brine so that mold doesn’t develop. If you do see mold starting to develop on top, no worries, just scoop that part out. Add a little more water and just keep an eye and make sure the pickles stay below the brine.
- Now, you’ll need to cover the glass jar. I use these pickle pipes (see below) which allows the fermentation to develop nicely.
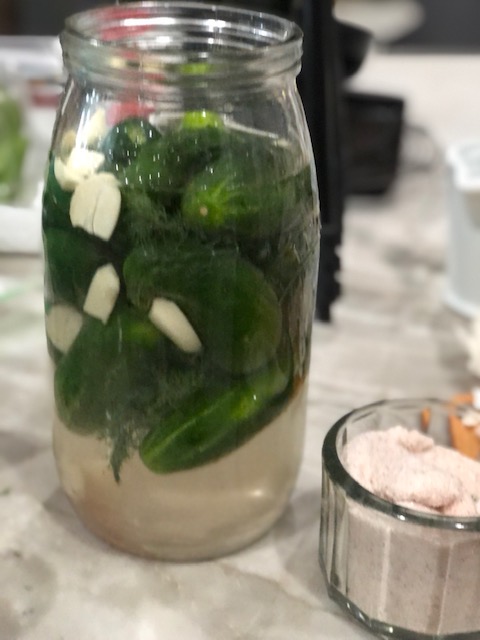
- Place the jar in a dark space or on the counter for 3-7 days. Just make sure the jar is out of direct sunlight. Check your jar each day. You’ll start to see bubbles. That is completely normal and means your pickles are fermenting. The pickles will also start turning from bright green to dark green. Again, completely normal. The brine may also become cloudy. That’s just part of the fermenting process.
Watch How To Make Fermented Garlic Dill Pickles

Fermented Garlic Dill Pickles
Ingredients
Method
- Grow or buy Boston pickling cucumbers. I grew mine this year and what a difference it made just picking them from the vine and bringing them into my kitchen. Make sure they are fresh-picked.
- Grab a clear jar. You can make these pickles in small batches or in a big gallon jar. That really just depends on what best serves your family.
- Cut the blossom end of the cucumber off and wash thoroughly. You can then pack your jar with either whole, sliced, or spear cucumbers. Pack the jar tight. Add the garlic and spices.
- Next, add the water and salt brine. Make sure it covers the cucumbers.
- You will need some kind of weight to put on top. This will make sure the pickles stay underneath the brine so that mold doesn't develop. If you do see mold starting to develop on top, no worries, just scoop that part out. Add a little more water and just keep an eye on it and make sure the pickles stay below the brine.
- Now, you'll need to cover the glass jar. I use these pickle tops which allows the fermentation to develop nicely.
- Place the jar in a dark space or on the counter for 3-7 days. Just make sure the jar is out of direct sunlight. Check your jar each day. You'll start to see bubbles. That is completely normal and means your pickles are fermenting. The pickles will also start turning from bright green to dark green. Again, completely normal. The brine may become cloudy. Completely normal.
- Store in the refrigerator for up to one year, if they last that long haha.
Notes
- Soak the cucumbers in an ice water bath for 4-6 hours. This will help the pickles retain their crispness.
- You can also add a grape or oak leaf into the brine mixture while they are fermenting. This will also help the pickles to stay crunchy.
- Mustard seeds are optional.
- If you like a lot of garlic, add more.
Pin For Later

Supplies You May Need
Real Pink Salt – Use code LHSIMPLELIVING for 15% off
Fermentation Kit – Here and Here


See my full disclosure here.
Tips On Fermenting
- Use a Mineral-Rich Unrefined Salt. See why I use it HERE. I use 2-3 tablespoons per quart jar.
- Make sure your water is filtered. Chlorine can ruin the entire ferment.
- The pickles have to be weighted down so either use the pickle pipes or find something that’s a little heavy to weigh down the pickles. You want the brine to be below 1 1/2 inches from the top of the jar.
- Start slow when eating the fermented pickles if you are new to fermented foods. I would suggest 1-2 tablespoons at first so you can avoid any bloating.
- Label your jar with the day you started the ferment. I use a post-it and stick it on top of the jar.


Leave a Reply