

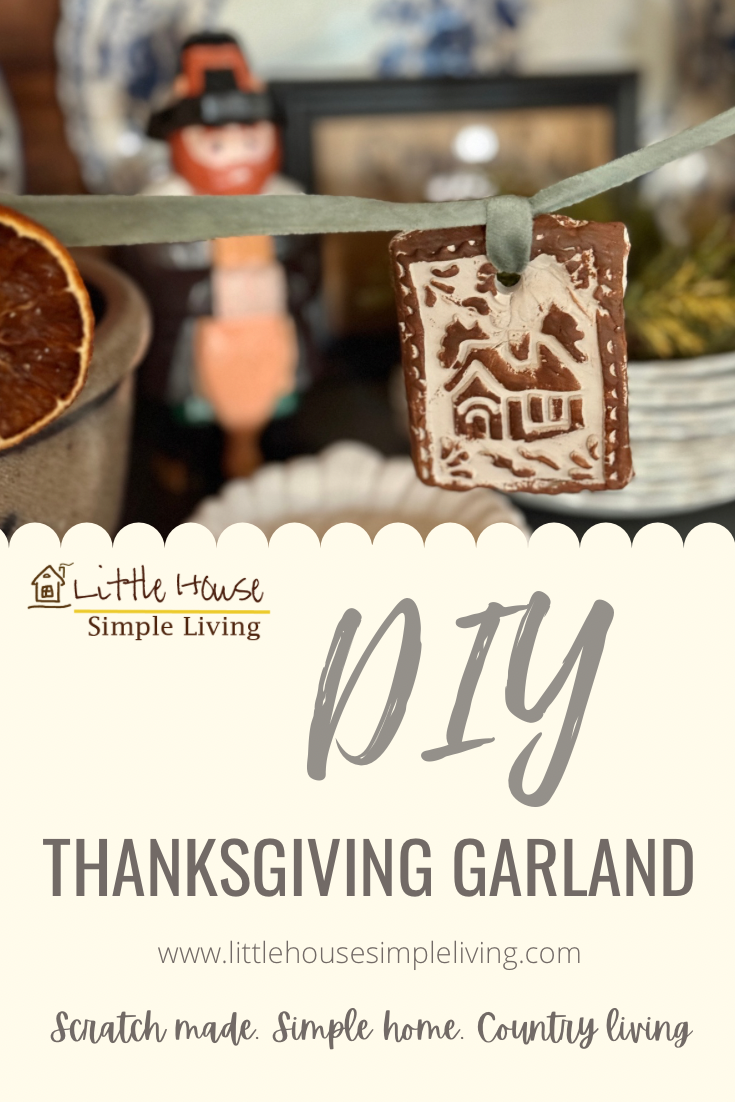
This DIY Thanksgiving Garland is the perfect thing for kids, grandkids or yourself to make. It’s quick and easy as well. Using air dried clay, paper napkins and a few other items. You might even have all the supplies already.
Materials
- Air-dry clay (any brand works)
- Rolling pin (or a straight glass)
- Cookie cutters (stars, hearts, circles, trees, etc.) or a knife
- Straw or skewer (to poke holes)
- Pretty paper napkins (the patterned kind – festive, floral, or solid colors)
- White school glue (like Elmer’s) or Mod Podge
- Paint
- Paintbrush or foam brush
- Twine, yarn, ribbon, or string for hanging
- Scissors


Join Our Simple Living Community


Instructions
Make the Cut-Outs
1. Prepare the clay
Knead the air-dry clay until soft. Roll it out on a smooth surface to about ¼ inch thick. Too thin will be fragile; too thick will be heavy and slow to dry.
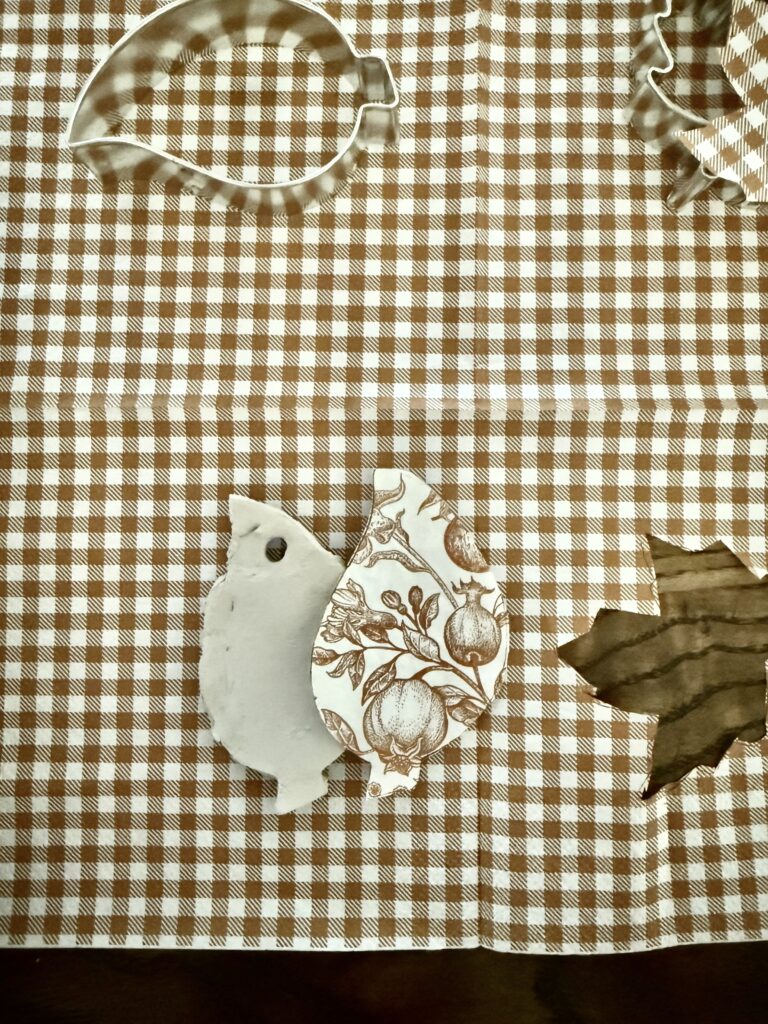
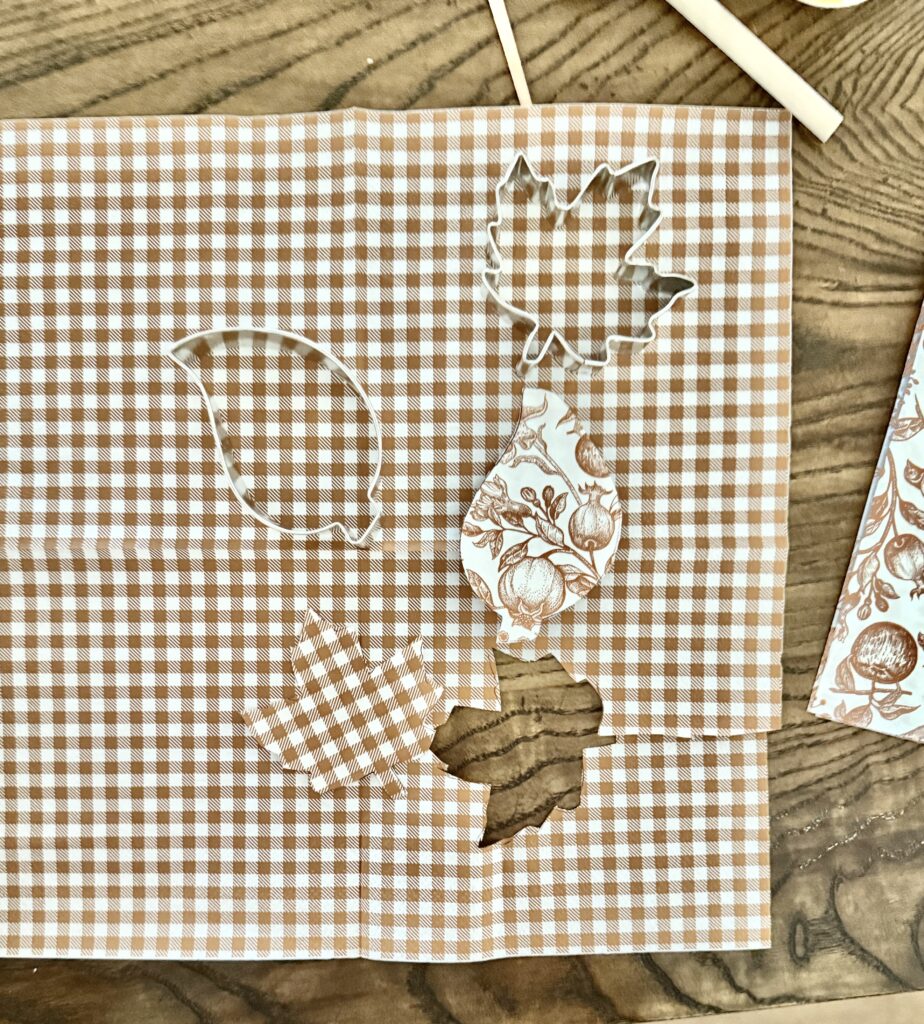
2. Cut shapes
Use cookie cutters to cut out shapes. Gently peel away excess clay and re-roll scraps.
3. Poke holes
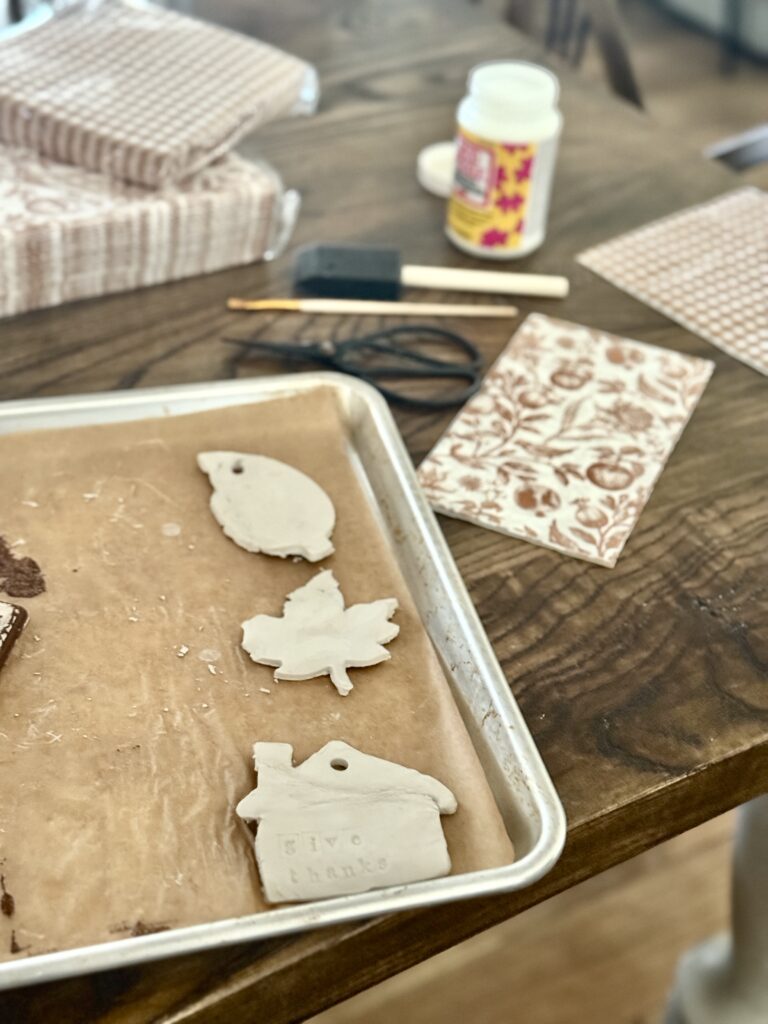
While the clay is still soft, use a straw to poke a hole near the top of each shape (for stringing later).
4. Dry the clay shapes
Place shapes on a flat surface (or baking sheet/cooling rack for airflow). Let dry 24–48 hours. Drying time depends on humidity and thickness. They’re ready when completely hard and lightweight.
Decorate the Cut-Outs (once dried)
5. Using napkins
Most printed paper napkins have 2–3 layers. Gently peel apart so you only have the thin top printed layer (the white backing layers get discarded).
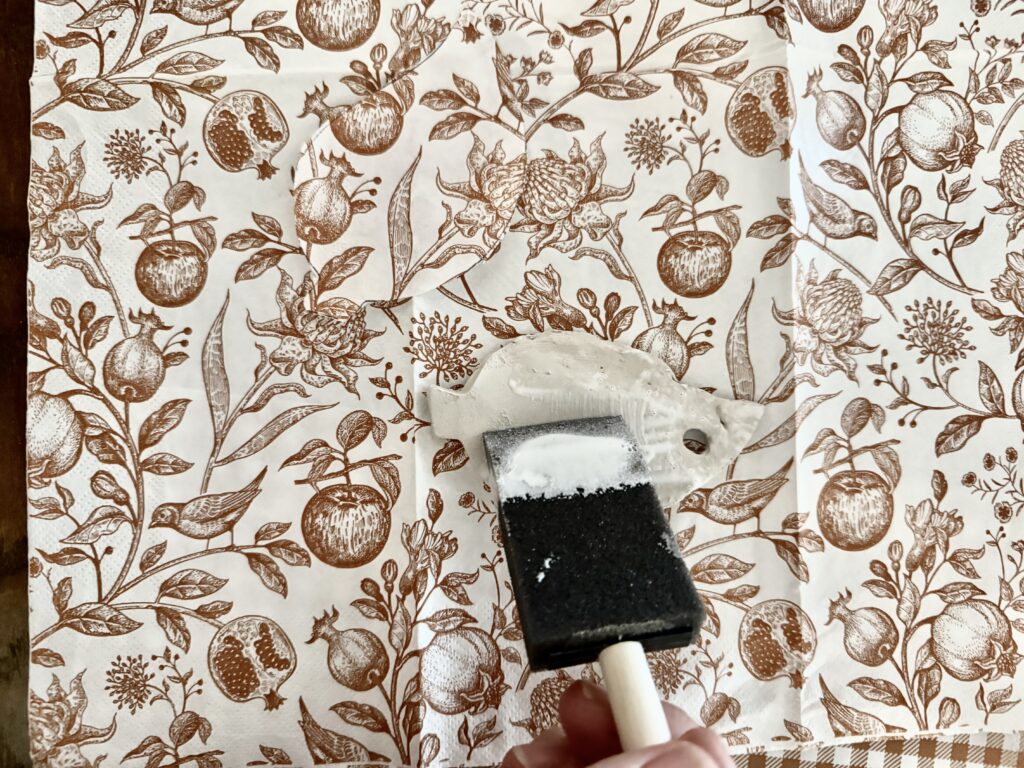
6. Découpage the napkins onto the clay
- Brush a thin layer of white glue or Mod Podge on the front of a dried clay cookie cut-out.
- Lay the printed napkin piece over it (cut slightly larger than the shape).
- Brush another layer of glue/Mod Podge on top of the napkin, smoothing gently with the brush (it will look milky but dries clear).
- Let dry 30-60 minutes, again trim excess napkin around the edges with scissors.
7. Paint your cut-outs
- If you want to paint any of the cut-outs, dab your foam brush with the paint. Paint the front part of the cut-out the way you want it to look. You can go light or do several coats. Get creative.
Pin For Later
See my full disclosure here.
8. Optional sealing
If you want them extra durable or slightly glossy, add one more coat of Mod Podge on top and allow to dry.
9. String the garland
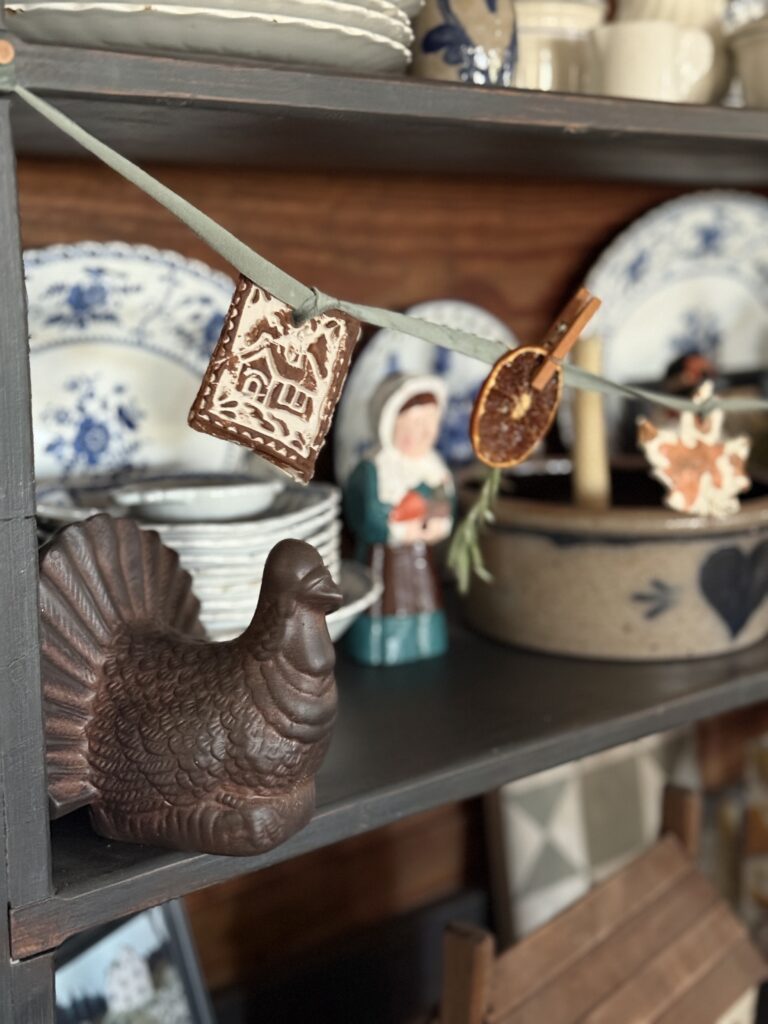
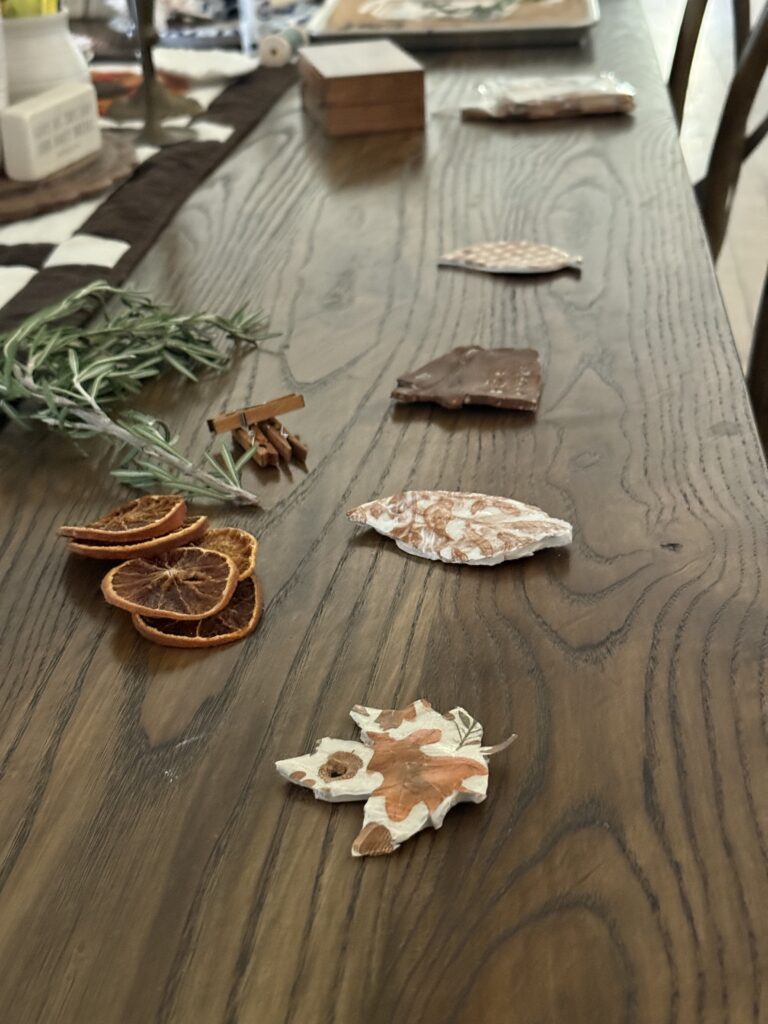
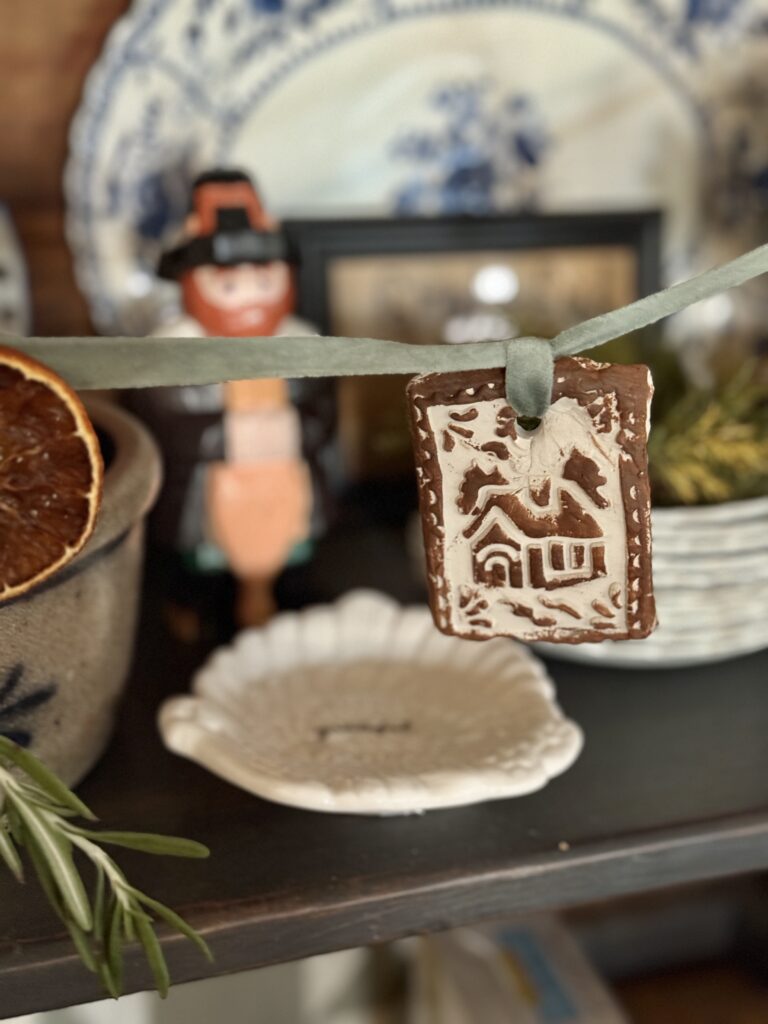
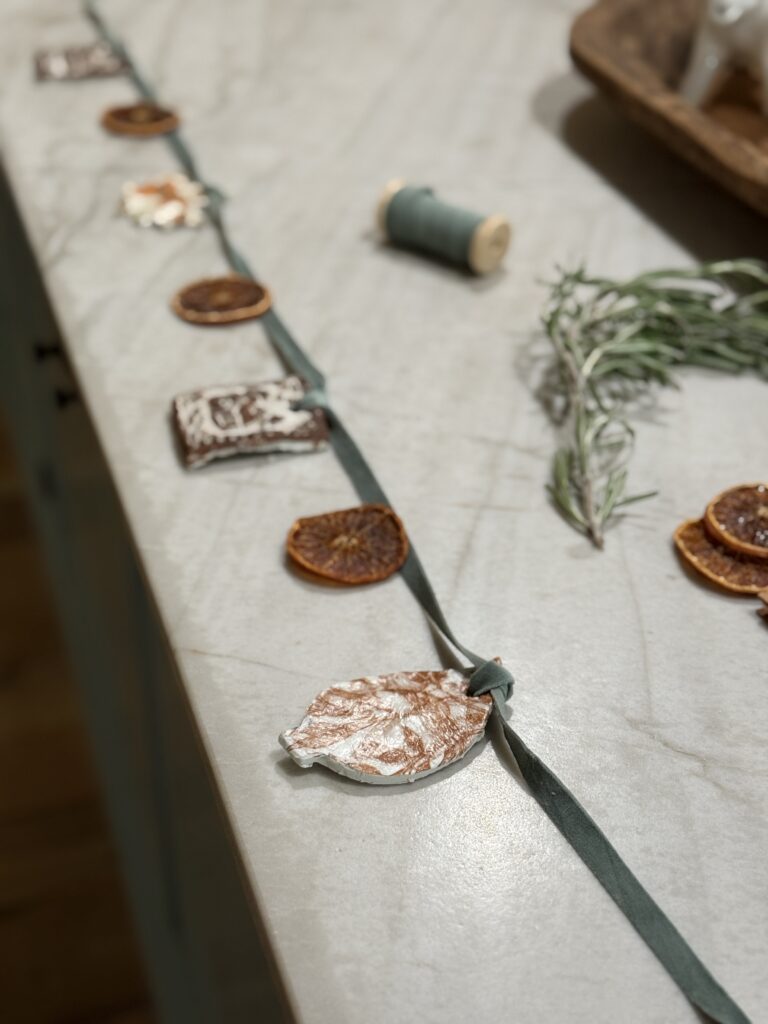
Cut a long piece of twine/yarn/ribbon. I go measure where I’m hanging my garland and add 5-7 inches for overhang. Thread it through the holes of the cut-outs, spacing the ornaments as desired. Add knots or dried oranges between each section, if you like. Add more ribbon if you will be making knots. This will allow you to have enough ribbon for tying onto the push pins/nails.
Tips
- For a softer look, tear the napkin edges instead of cutting straight.
- Use a fine sanding block to smooth out the edges.
- Use stamps to imprint words like “Give Thanks” or “Grateful”/“Thankful”. You’ll do this optional step after you cut the clay out of a cookie cutter.
What Age Group Can Make This Garland?
This is a great DIY craft for kids/grandkids, moms, and grandparents. Parents may want to supervise children ages 3-6 due to the rolling of the clay may be a little hard for them. The mod-podge is all sticky. I can’t wait to do crafts with my new granddaughter next year. She’ll be almost two years old so I know she will have fun helping me.
If you have loved ones in a nursing home, you could take all the supplies over and help them make one. Displaying their garland in their room would be a nice pretty decor for the month of November.
CRAFTER’S TIP
Get creative with your Thanksgiving Garland. Cut out a house or a turkey shaped cookie cutter. Stamp words like “Give Thanks” or “Thankful/Grateful” when the clay is still soft. You can paint over the cut-out and you’ll see the words in the color of the clay. I recommend using white or gray clay and a darker paint when doing this.
Supplies Used
Wood House Mold and Leaf Cookie Cutter
Dried Oranges & Fresh Rosemary
Check out my Bourbon Brined Smoked Turkey and don’t forget to make this Leftover Turkey Pot Pie!
Have a Stress Free Thanksgiving
Here are my simple tips so you can enjoy your Thanksgiving with your family and friends and not be frazzled. With this guide, you’ll be able to watch the Thanksgiving Day Parade too!

DIY Thanksgiving Garland
Materials
- Air-dry clay
- Rolling Pin
- Cookie Cutters (stars, house, heart, trees, etc.)
- Straw or skewer (to poke holes)
- Pretty paper napkins (Fall colors, pumpkins, turkey, etc.)
- White school glue or mod-podge (matte finish)
- Paint
- Paintbrush or Foam brush
- twine, yarn, ribbon (for hanging)
- Scissors
Instructions
Make the Cut-outs
- Knead the air-dry clay until soft. Roll it out on a smooth surface to about ¼ inch thick. Too thin will be fragile; too thick will be heavy and slow to dry.
- Use cookie cutters to cut out shapes. Gently peel away excess clay and re-roll scraps.
- While the clay is still soft, use a straw to poke a hole near the top of each shape (for stringing later).
- Place shapes on a flat surface (or baking sheet/cooling rack for airflow). Let dry 24 – 48 hours. Drying time depends on humidity and thickness. They’re ready when completely hard and lightweight.
Decorate the Cut-outs (once dried)
- Using Napkins (separate napkin layers):Most printed paper napkins have 2 – 3 layers. Gently peel apart so you only have the thin top printed layer (the white backing layers get discarded).
- Brush a thin layer of white glue or Mod Podge on the front of a dried clay shape.
- Lay the printed napkin piece over it (cut slightly larger than the shape).
- Brush another layer of glue/Mod Podge on top of the napkin, smoothing gently with the brush it will look milky but dries clear).
- Let dry 30-60 minutes, again trim excess napkin around the edges with scissors.
Paint Your Cut-Outs
- If you want to paint any of the cut-outs, dab your foam brush with the paint. Paint the front part of the cut-out the way you want it to look. You can go light or do several coats. Get creative.
Seal and Assemble
- If you want them extra durable or slightly glossy, add one more coat of Mod Podge on top and allow to dry.
- Cut a long piece of twine/yarn/ribbon. I go measure where I’m hanging my garland and add 5-7 inches for overhang. Thread it through the holes, spacing the ornaments as desired. Add knots or dried oranges/herbs between each section, if you like. Add more ribbon if you will be making knots.
Notes
- For a softer look, tear the napkin edges instead of cutting straight.
- Use a fine sanding block to smooth out the edges.
- Use stamps to imprint words like “Give Thanks” or “Grateful” / “Thankful”. You’ll do this optional step after you cut the clay out of a cookie cutter, while it’s still soft.
I hope you (and your kids/grandkids) had fun making this simple DIY Thanksgiving Garland. It will be a beautiful memory every year when you pull your decorations out. I like to add mine November 1st as I call it “Thankful” month. Tag me over on Instagram, I’d love to see how yours turns out.

Wendy Lea Walker, NTP
Nutritional Therapy Practitioner
I’m Wendy. A wife, empty-nester mama, homemaker, homebaker, gardener and small-time farmer. I love sharing wisdom and mistakes I’ve learned along the way. Anyone can garden or homestead, no matter where you live. It’s a mindset. You just have to start somewhere. I believe food is medicine. Feed the body real whole foods and healing will begin.

Leave a Reply