

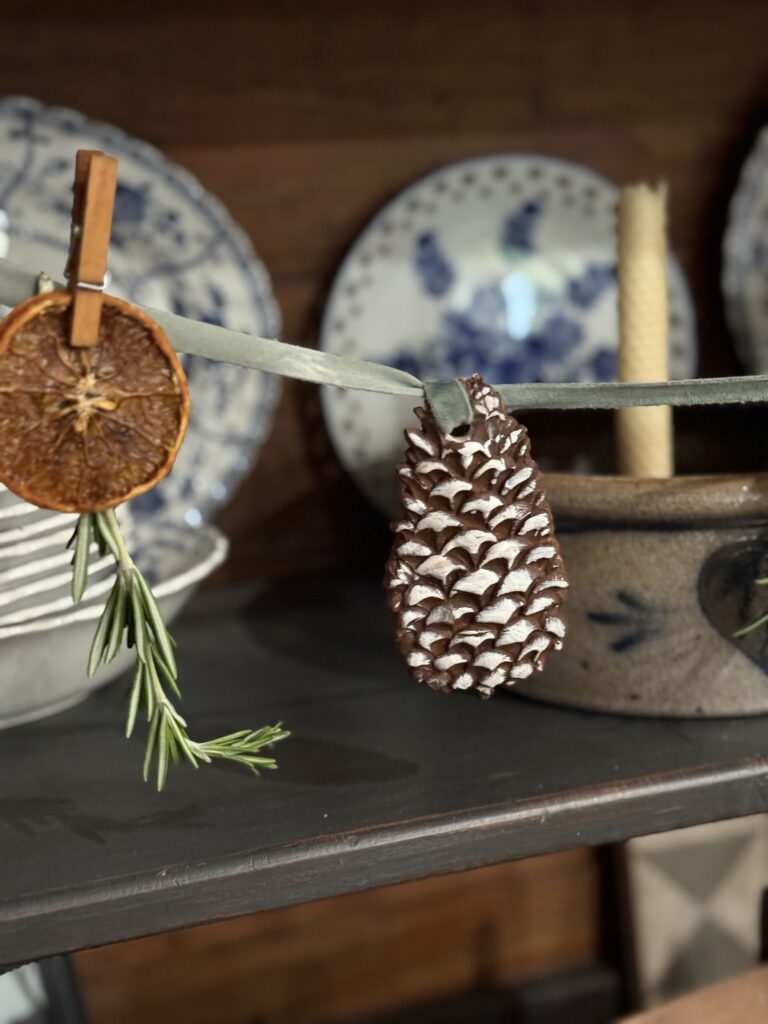
I love stringing homemade Christmas/Winter Garland around my home. They can be made from air dry clay, dried orange slices, berries and fresh herbs.

How to Display this Christmas/Winter Garland
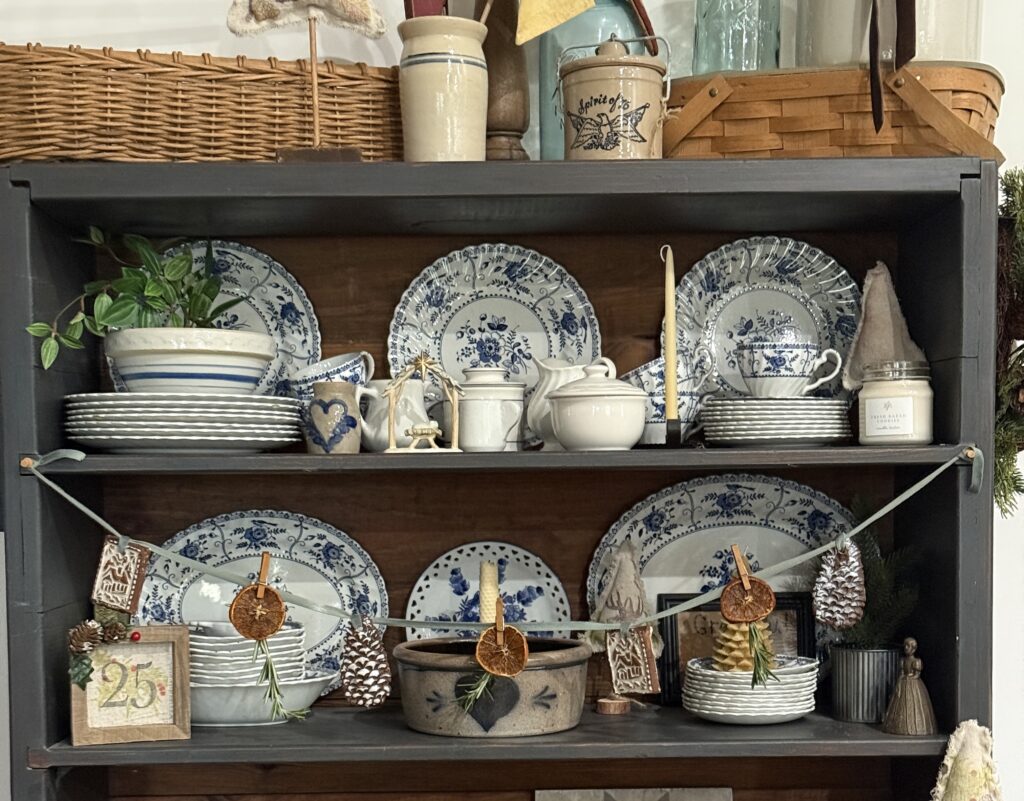
Look around your house to see where a garland would be pretty. I like to use cabinets, shelves, doorways, etc. Measure the space and make sure you allow for tying the ends. You can use small nails or push pins to attach the ends to space where it is going.
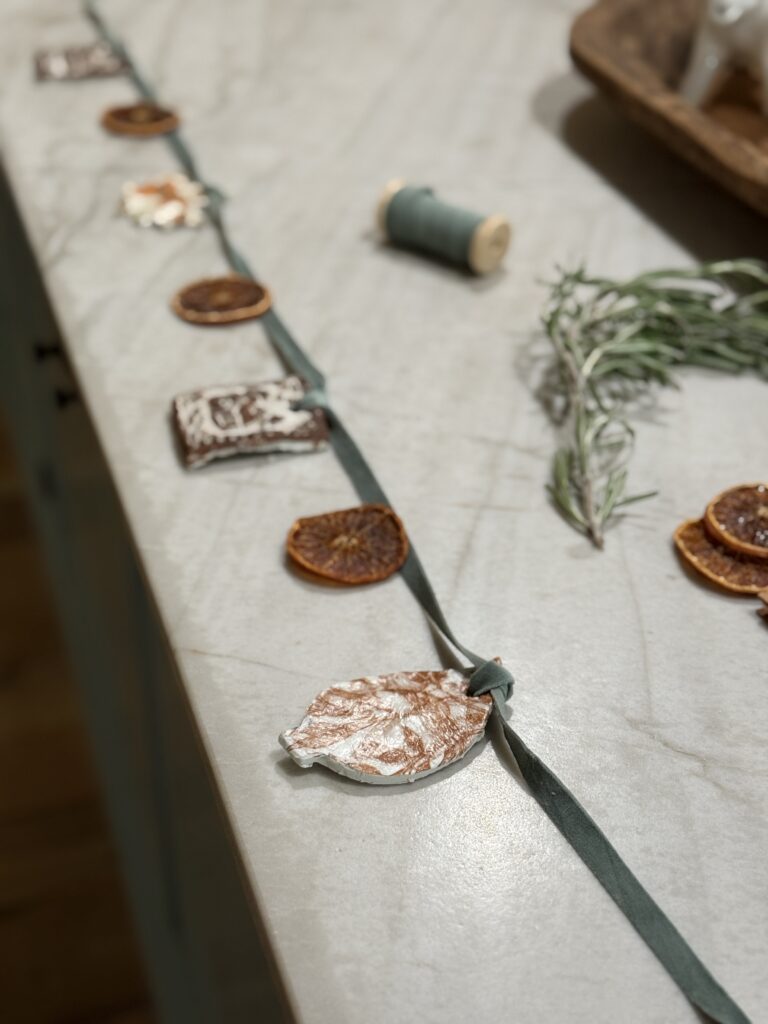
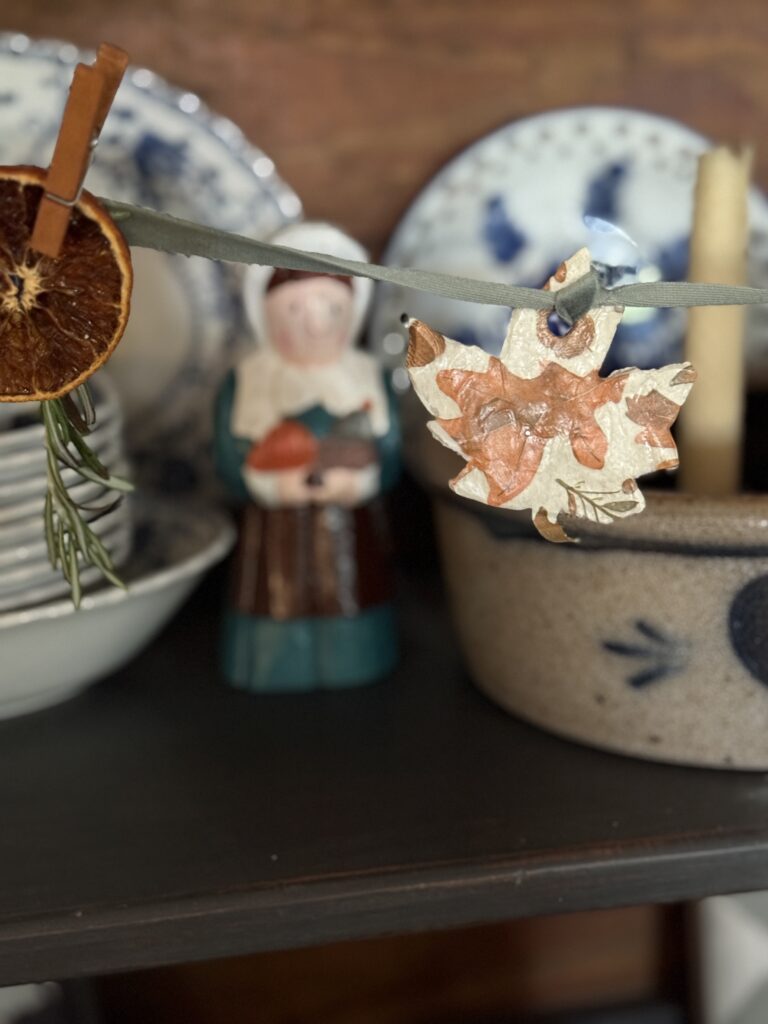
I like using neutral cutouts and then they will carry over to winter. The cutouts are stationary but the orange slices are attached with small clothespins. You can easily add different decorative elements for Christmas and then switch over to winter themed once the new year comes.
Supplies Needed
- Air-dry clay (any brand works)
- Rolling pin (or a straight glass)
- Cookie cutters (stars, hearts, circles, trees, etc.) or a knife
- Straw or skewer (to poke holes)
- Pretty paper napkins (the patterned kind – festive, floral, or solid colors)
- White school glue (like Elmer’s) or Mod Podge
- Paint
- Paintbrush or foam brush
- Twine, yarn, ribbon, or string for hanging
- Scissors
Join Our Simple Living Community


Instructions
Make the Cut-Outs
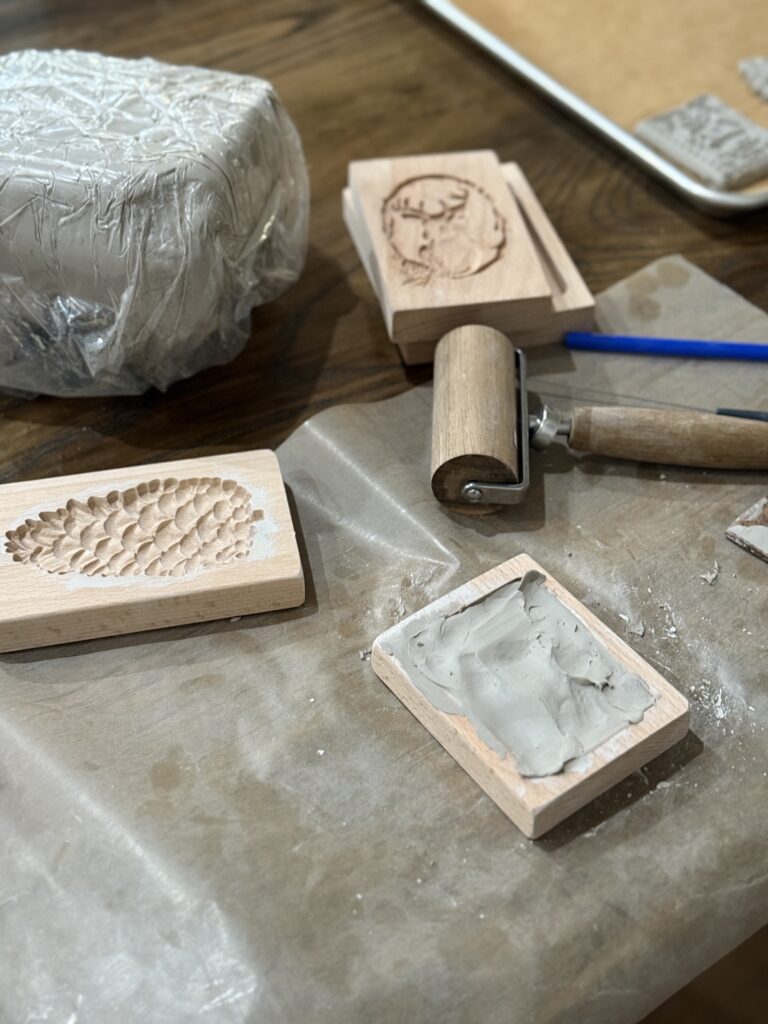
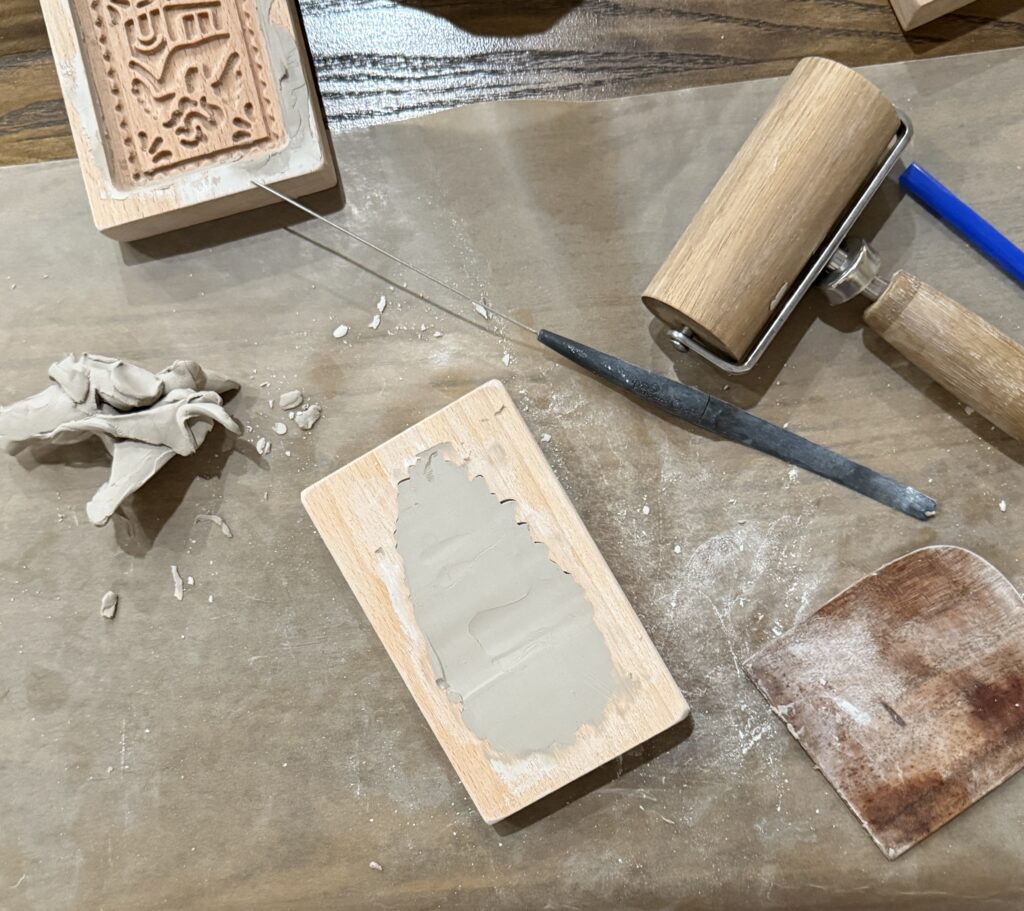
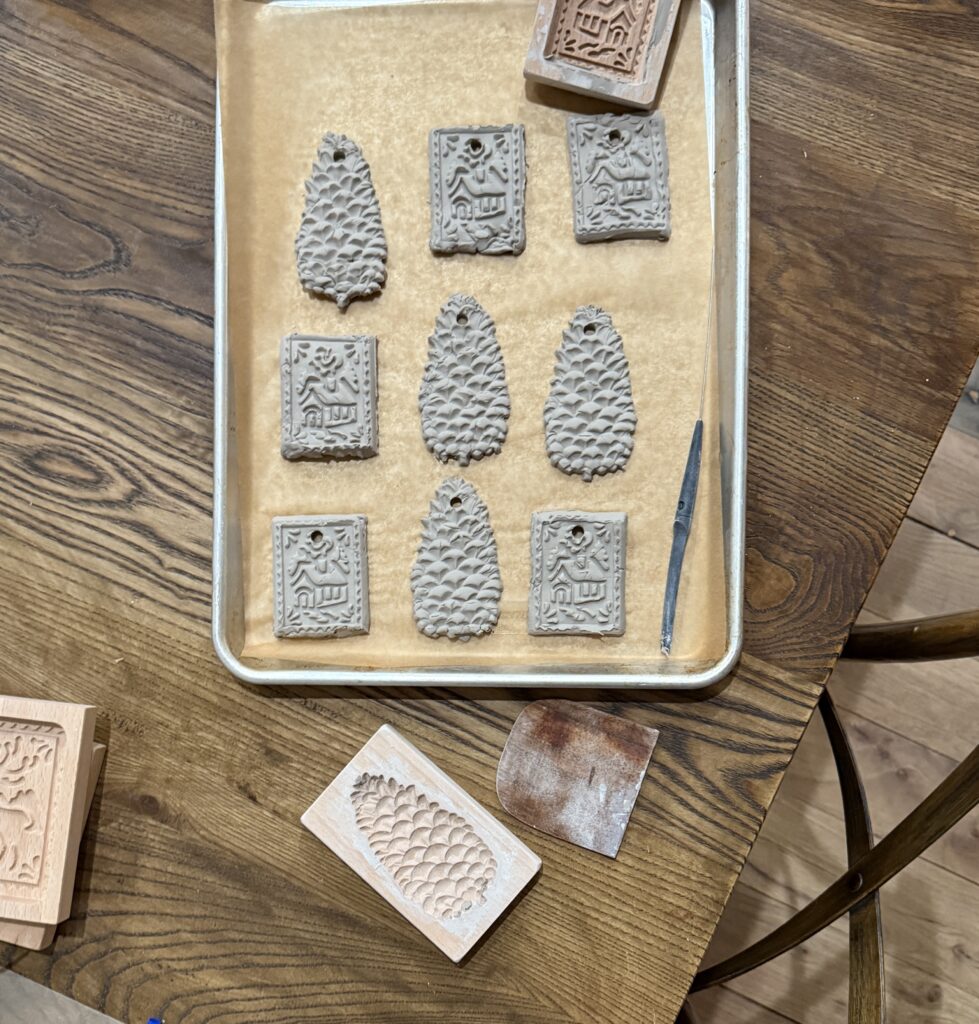
1. Prepare the clay
Knead the air-dry clay until soft. Roll it out on a smooth surface to about ¼ inch thick. Too thin will be fragile; too thick will be heavy and slow to dry.
2. Cut shapes
Use cookie cutters to cut out shapes. Gently peel away excess clay and re-roll scraps.
3. Poke holes
While the clay is still soft, use a straw to poke a hole near the top of each shape (for stringing later).
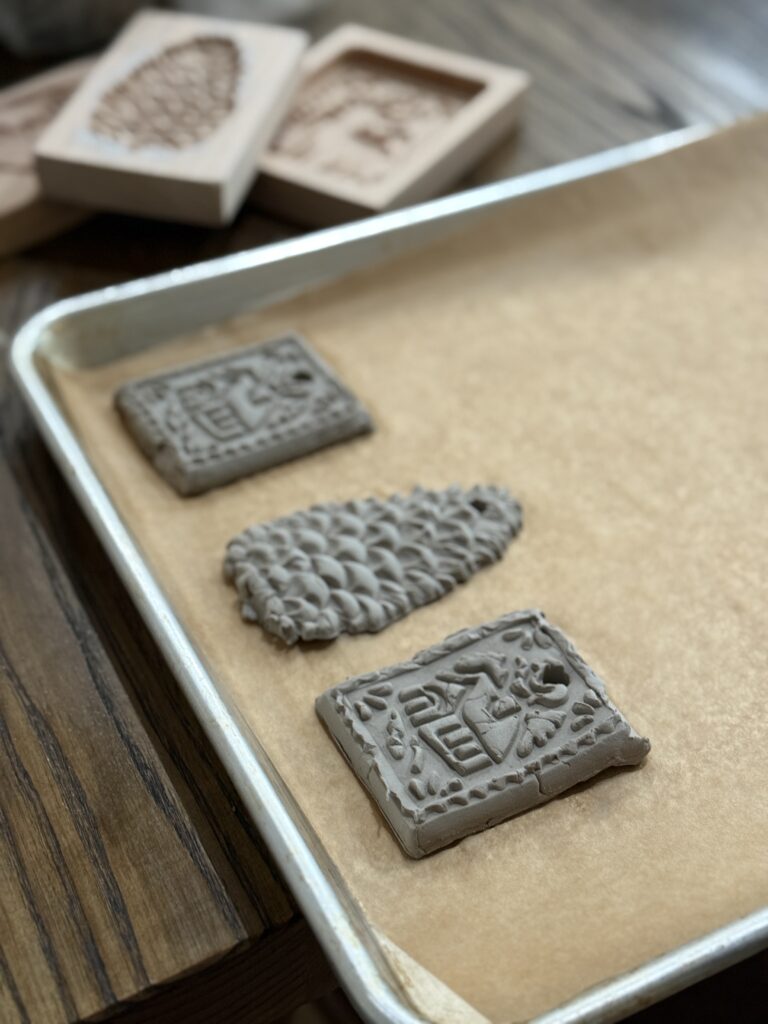
4. Dry the clay shapes
Place shapes on a flat surface (or baking sheet/cooling rack for airflow). Let dry 24–48 hours. Drying time depends on humidity and thickness. They’re ready when completely hard and lightweight.
Decorate the Cut-Outs (once dried)
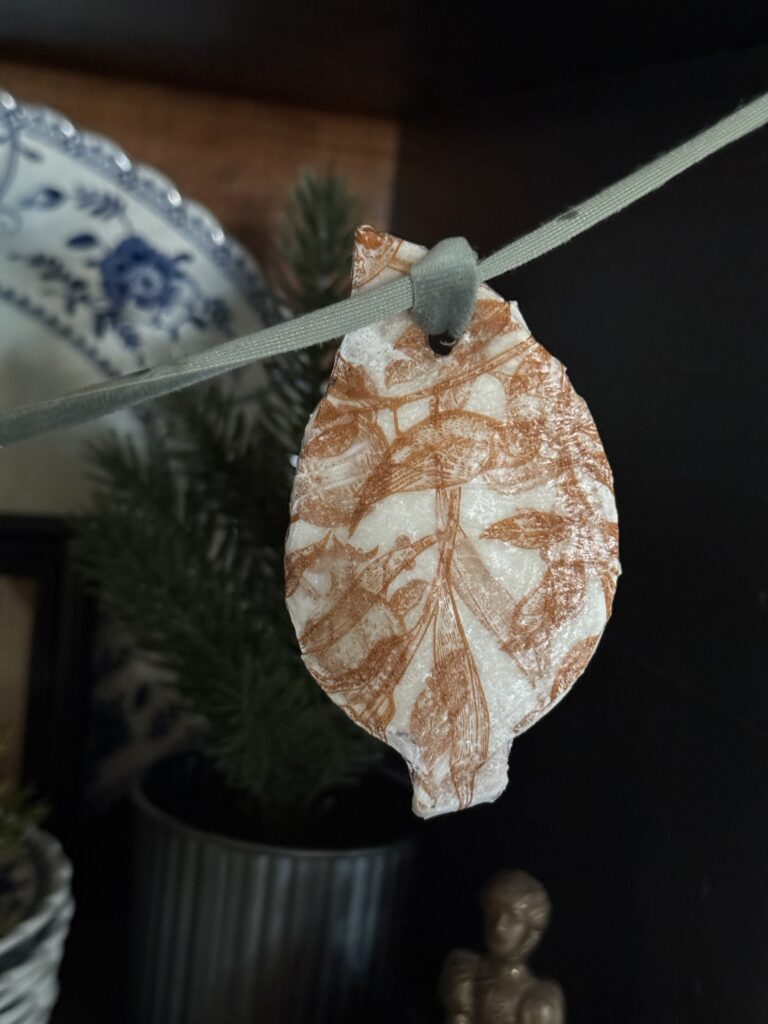
5. Using napkins (optional)
Most printed paper napkins have 2–3 layers. Gently peel apart so you only have the thin top printed layer (the white backing layers get discarded).
6. Découpage the napkins onto the clay
- Brush a thin layer of white glue or Mod Podge on the front of a dried clay cookie cut-out.
- Lay the printed napkin piece over it (cut slightly larger than the shape).
- Brush another layer of glue/Mod Podge on top of the napkin, smoothing gently with the brush (it will look milky but dries clear).
- Let dry 30-60 minutes, again trim excess napkin around the edges with scissors.
Here’s some ones I did at Thanksgiving. See more HERE.
Pin For Later
See my full disclosure here.
7. Paint your cut-outs
- If you want to paint any of the cut-outs, dab your foam brush with the paint. Paint the front part of the cut-out the way you want it to look. You can go light or do several coats. Get creative.
8. Optional sealing
If you want them extra durable or slightly glossy, add one more coat of Mod Podge on top and allow to dry.
9. String the garland
Cut a long piece of twine/yarn/ribbon. I go measure where I’m hanging my garland and add 5-7 inches for overhang. Thread it through the holes of the cut-outs, spacing the ornaments as desired. Add knots or dried oranges between each section, if you like. Add more ribbon if you will be making knots. This will allow you to have enough ribbon for tying onto the push pins/nails.
TIPS
- For a softer look, tear the napkin edges instead of cutting straight.
- Use a fine sanding block to smooth out the edges.
- Use stamps to imprint words like “Merry Christmas” or “Away in a Manger”. You’ll do this optional step after you cut the clay out of a cookie cutter.
How Long Does it Take to Make
Well, that depends how long your garland is and how intricate your designs are. My three foot garland I made here took about an hour to make all the shapes. That’s basically, day one. Then, it has to dry for a few days. The painting and decorating can take maybe an hour or two. Put on a good Christmas movie and enjoy the slow down.
Supplies Used
Wood House Mold and Wood Christmas Tree
Dried Oranges & Fresh Rosemary
Make a DIY Paper Chain Garland
This is the perfect craft for kids of all ages. Simple supplies needed and you might just have everything on hand already. Even adults love making these.

Other Christmas Activities to DO
Make and Decorate Christmas Cutout Cookies
One Last Thing
Make a batch of Sourdough Cinnamon Rolls and enjoy them while making this garland.
Grab any Last Minute Gifts with this Gift Giving Guide. A guide to practical, useful, functional gifts for everyone on your list.

DIY Christmas/Winter Garland
Materials
- Air Dry Clay
- Rolling Pin
- Cookie Cutters (stars, hearts, circles, trees, etc.)
- Straw or Skewer
- Pretty Paper Napkins (optional)
- White School Glue or Mod-Podge
- Paint
- Paintbrush or Foam Brush
- Twine, Yarn, Ribbon or String
- Scissors
Instructions
Make the Cutouts
- Prepare the clay: Knead the air-dry clay until soft. Roll it out on a smooth surface to about ¼ inch thick. Too thin will be fragile; too thick will be heavy and slow to dry.
- Cut shapes: Use cookie cutters to cut out shapes. Gently peel away excess clay and re-roll scraps.
- Poke holes: While the clay is still soft, use a straw/skewer to poke a hole near the top of each shape (for stringing later).
- Dry the clay shapes: Place shapes on a flat surface (or baking sheet/cooling rack for airflow). Let dry 24 – 48 hours. Drying time depends on humidity and thickness. They're ready when completely hard and lightweight.
Decorate the Cutouts
- Using napkins (optional): Most printed paper napkins have 2 – 3 layers. Gently peel apart so you only have the thin top printed layer (the white backing layers get discarded).
- Découpage the napkins onto the clay: Brush a thin layer of white glue or Mod Podge on the front of a dried clay cookie cut-out.Lay the printed napkin piece over it (cut slightly larger than the shape).Brush another layer of glue/Mod Podge on top of the napkin, smoothing gently with the brush (it will look milky but dries clear).Let dry 30-60 minutes, again trim excess napkin around the edges with scissors.
- Paint your cut-outs: If you want to paint any of the cut-outs, dab your foam brush with the paint. Paint the front part of the cut-out the way you want it to look. You can go light or do several coats. Get creative.
- Optional sealing: If you want them extra durable (to last for next year) or slightly glossy, add one more coat of Mod Podge on top and allow to dry.
- String the garland: Cut a long piece of twine/yarn/ribbon. I go measure where I'm hanging my garland and add 5-7 inches for overhang. Thread it through the holes of the cut-outs, spacing the ornaments as desired. Add knots or dried oranges between each section, if you like. Add more ribbon if you will be making knots. This will allow you to have enough ribbon for tying onto the push pins/nails.
Notes
- For a softer look, tear the napkin edges instead of cutting straight.
- Use a fine sanding block to smooth out the edges.
- Use stamps to imprint words like “Merry Christmas” or “Away in a Manger”. You’ll do this optional step after you cut the clay out of a cookie cutter.
I hope you had fun and slowed down this Christmas season with your kids or grandkids. I’d love to see how yours turns out. Share this post over on Pinterest and tag me on Instagram if you end up making your own garland.

Wendy Lea Walker, NTP
Nutritional Therapy Practitioner
I’m Wendy. A wife, empty-nester mama, homemaker, homebaker, gardener and small-time farmer. I love sharing wisdom and mistakes I’ve learned along the way. Anyone can garden or homestead, no matter where you live. It’s a mindset. You just have to start somewhere. I believe food is medicine. Feed the body real whole foods and healing will begin. I’ve learned to slow down over the years from all the noise that came with life and enjoy creating a simple home.

Leave a Reply